If you want to grow a serious crop of oyster mushrooms without a pressure cooker, a still-air box, or any lab equipment at all, bucket tek is where you start. It is the single most popular low-tech cultivation method in the hobby — and for good reason. A five-dollar bucket, a bale of straw, and a bag of grain spawn will produce flush after flush of fresh oyster mushrooms, often right on a patio or in a garage.
This guide walks through bucket tek from drilling the bucket to harvesting your mushrooms. It pairs well with our broader oyster mushroom growing guide, which compares bucket tek against kits, bags, and other methods.
What Is Bucket Tek?
Bucket tek is a method for growing oyster mushrooms in a five-gallon bucket using pasteurized straw as the substrate. You drill holes around the bucket, layer pasteurized straw with grain spawn inside it, let the mushroom mycelium colonize the straw, and then mushrooms fruit out of the drilled holes in dense clusters.
The reason bucket tek works without sterile technique comes down to one thing: oyster mushrooms are aggressive. Their mycelium colonizes straw so fast that it simply outraces the competing moulds and bacteria that pasteurization did not kill. You are not aiming for a perfectly sterile substrate — you are aiming for a head start, and oysters take it from there.
Why Bucket Tek Works So Well for Beginners
- No expensive equipment. No pressure canner, no flow hood. A drill and a big pot are the only "gear."
- Forgiving. Straw only needs pasteurization, not sterilization, and oyster mycelium tolerates imperfect technique.
- High yield. A full bucket holds a lot of substrate and fruits from dozens of holes, so a single bucket can produce several pounds of mushrooms across multiple flushes.
- Self-regulating temperature. The thermal mass of a packed bucket buffers temperature swings, which is genuinely helpful in a Canadian garage or basement.
What You Need
- A clean five-gallon food-safe bucket with a lid — a new bucket is best, or a well-scrubbed used one
- A drill with a 1.5–2 cm (about ⅝–¾ inch) bit
- Oyster mushroom grain spawn — Blue Oyster is the best choice for most Canadian conditions
- Wheat or oat straw — a single small bale is enough for several buckets
- A large pot, drum, or cooler for pasteurizing the straw
- A spray bottle for misting during fruiting
If you would rather skip straight to fruiting, a pre-colonized grow kit is the fastest route — but bucket tek is the better teacher, because you see the whole life cycle.
How to Grow Oyster Mushrooms in a Bucket
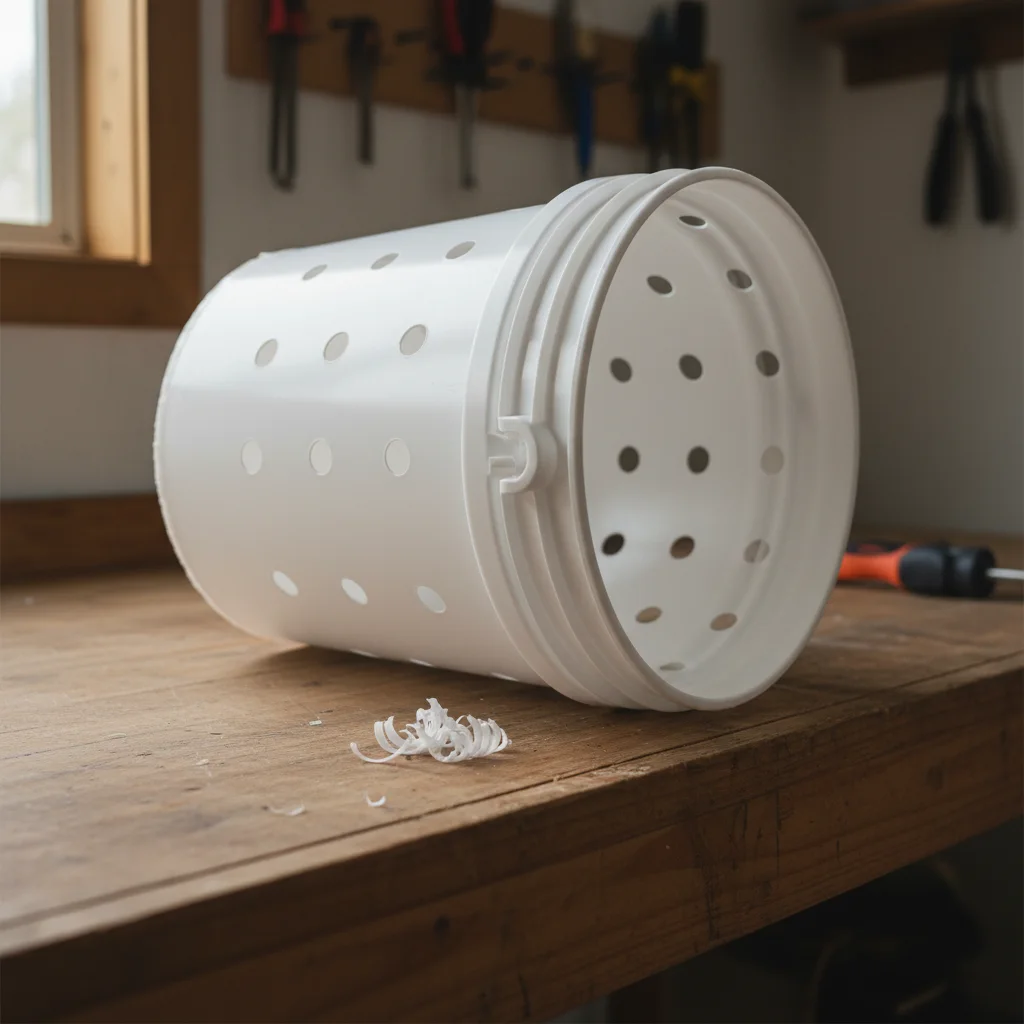
Drill the Bucket
Drill 1.5–2 cm holes all around the sides of the bucket in a staggered grid — roughly 10–15 cm apart in every direction, with each row offset from the one above it. Four or five rows of five or six holes is typical. These holes do two jobs: they let fresh air reach the mycelium, and they give the mushrooms an exit point to fruit from. Leave the bottom 8–10 cm of the bucket undrilled so the base holds a little moisture. Rinse the drilled bucket clean.
Pasteurize the Straw
Chop the straw into 5–10 cm lengths so it packs tightly, then pasteurize it. The quickest method is hot-water pasteurization: submerge the chopped straw in water held at 65–80°C for 60–90 minutes. Pasteurization kills the competing organisms while leaving the straw friendly to oyster mycelium. We cover hot-water and cold-water lime pasteurization in full in our dedicated guide on how to pasteurize straw — follow that process, then come back here.
Drain the pasteurized straw and let it cool to below 27°C. It should feel like a wrung-out sponge — damp, but not dripping when squeezed. Straw that is too wet invites bacterial souring; too dry and the mycelium stalls.
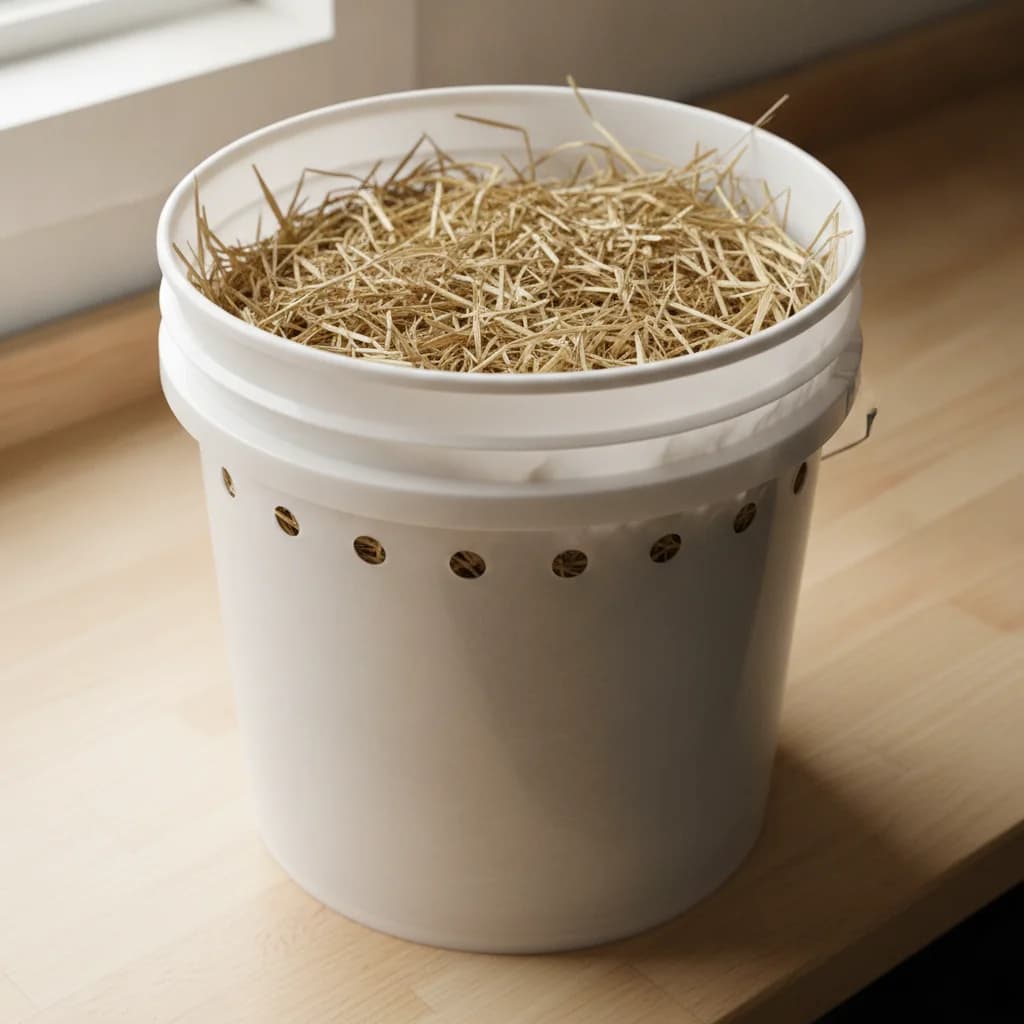
Layer Straw and Spawn
Work on a clean surface and wash your hands first. Add a 10 cm layer of pasteurized straw to the bottom of the bucket and press it down firmly. Sprinkle a handful of grain spawn across the surface, then add another packed layer of straw, then more spawn — repeat all the way up. Aim for a spawn rate of about 10% of the straw weight; a more generous rate colonizes faster and resists contamination better. Finish with a straw layer on top and press the whole column down firmly. Good contact between straw and spawn is what drives fast colonization.
Seal and Colonize the Bucket
Put the lid on the bucket and move it somewhere dark and room-temperature — 18–24°C is ideal. Colonization takes about two to three weeks. During this time the mycelium spreads as a web of white threads through the straw. You will start to see white mycelium peeking out of the drilled holes — that is your signal that the bucket is nearly fully colonized. White, faintly mushroom-smelling growth is healthy. Patches of green, black, or sooty grey, or a sour smell, mean contamination took hold.
Move to Fruiting Conditions
Once the straw is colonized and white mycelium shows at most of the holes, move the bucket to a fruiting spot: bright indirect light, fresh air, and humidity around 85–95%. Take the lid off, or leave it loosely resting on top. Mist the drilled holes two or three times a day with clean water — you want the surface moist, never soaked. Within a week, small pins will form at the holes and rapidly swell into recognizable oyster clusters.
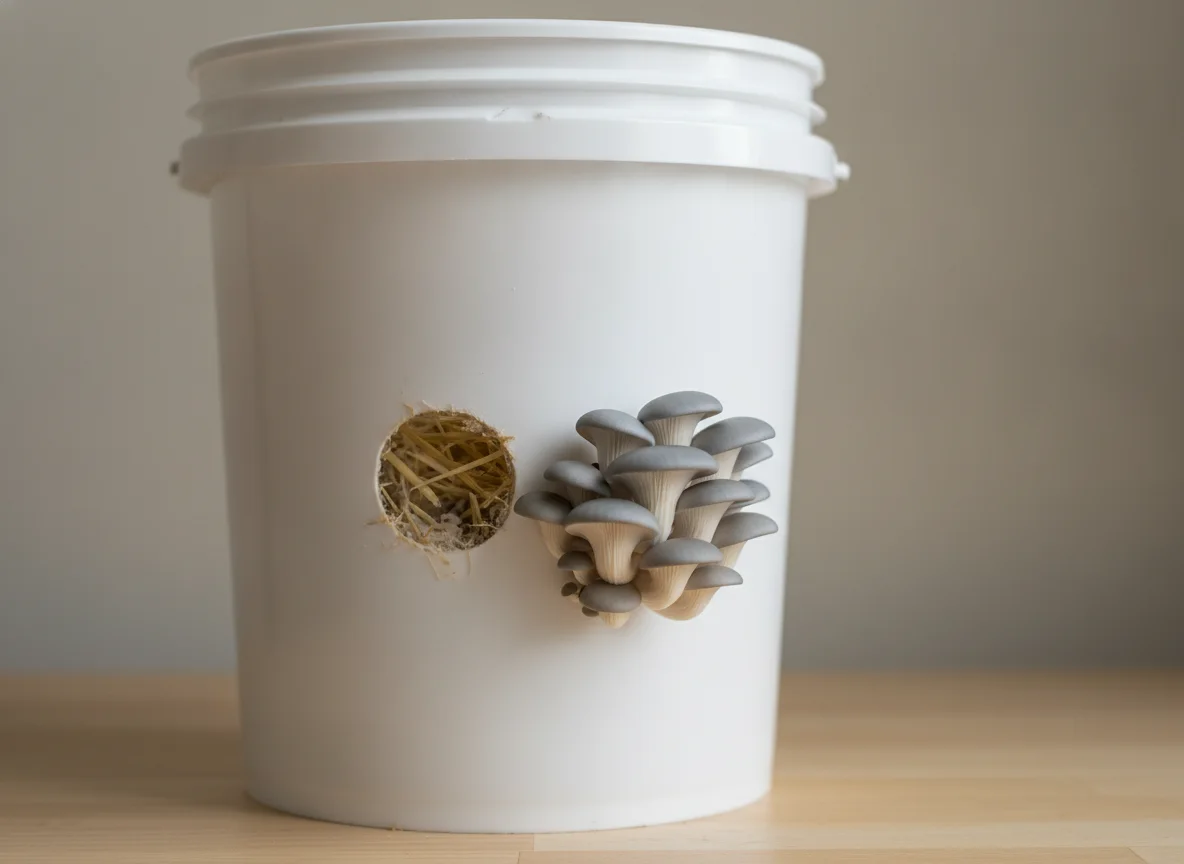
Harvest Your Mushrooms
Harvest each cluster when the cap edges are still curled slightly downward — before they flatten out and turn upward. Twist the whole cluster off at the base rather than cutting, so you do not leave a stub to rot. A well-run bucket fruits from many holes at once, so expect to harvest over a few days as different clusters mature.
Getting Multiple Flushes
A bucket is not done after one harvest. After the first flush, keep misting and give the bucket a few days of rest — a second flush usually appears within one to two weeks. If the straw feels light and dry, rehydrate the whole bucket: submerge it in cold water for a couple of hours, drain it fully, and return it to fruiting conditions. Most buckets give two or three solid flushes, and an attentive grower can sometimes coax a fourth before yields taper off. When flushes become small and sparse, retire the spent straw — it makes excellent garden compost.
Troubleshooting Bucket Tek
Green or black mould. This is Trichoderma or another competitor that beat the oysters. Common causes are under-pasteurized straw, straw that was too wet, or too little spawn. Discard a heavily contaminated bucket — do not try to fruit it — and increase your spawn rate next time.
Long, leggy stems with tiny caps. Not enough fresh air. High CO₂ makes oysters stretch toward oxygen. Move the bucket somewhere more open or improve ventilation in the room.
Pins forming but drying out and aborting. Humidity is too low. Mist more often, or set the bucket inside a loose humidity tent of clear plastic to hold moisture around the holes.
No pins after two weeks in fruiting conditions. The bucket may need more fresh air and light to trigger pinning, or the room may be outside the species' temperature range. Confirm you are using a cool-tolerant variety like Blue Oyster if your space sits in the 15–20°C range.
Frequently Asked Questions
How long does bucket tek take?
From start to first harvest, budget about four to five weeks: two to three weeks for the mycelium to colonize the straw, then roughly one to two weeks in fruiting conditions for pins to form and mature. After that, each additional flush comes every one to two weeks.
Can you do bucket tek without drilling holes?
Drilling is strongly recommended. The holes provide the fresh-air exchange the mycelium needs and give the mushrooms a defined place to fruit. Without holes, oysters will still try to fruit — but they will force their way out of the lid gap or any seam, producing fewer, more deformed clusters. A drill takes five minutes and dramatically improves your results.
What is the best spawn for bucket tek?
Oyster grain spawn is the standard choice because grain spawn colonizes straw quickly and evenly. For most Canadian growers, Blue Oyster is the best variety — it fruits well in the cool 10–21°C range typical of homes, basements, and garages. Pink Oyster is an excellent summer option if your space stays above 20°C.
Can I grow bucket tek outdoors in Canada?
Yes — bucket tek is well suited to Canadian summers. Set the colonized bucket in full shade on a porch or under a tree, where ambient humidity often does much of the misting for you. Avoid direct sun, which dries and overheats the bucket, and bring it in or insulate it once nights turn cold in the fall.
Start Your First Bucket
Bucket tek is the method that turns curious beginners into committed mushroom growers. It is cheap, it is hard to truly fail, and the payoff — a bucket bristling with fresh oyster clusters — is genuinely satisfying. Pick up some oyster grain spawn and growing supplies to get started, or read the complete guide to growing mushrooms in Canada for the full picture.
Stuck on a step? Dr. MycoThumb is our free AI growing assistant — ask about pasteurization, spawn rates, or fruiting conditions any time, in the chat bubble at the bottom-right of every page.