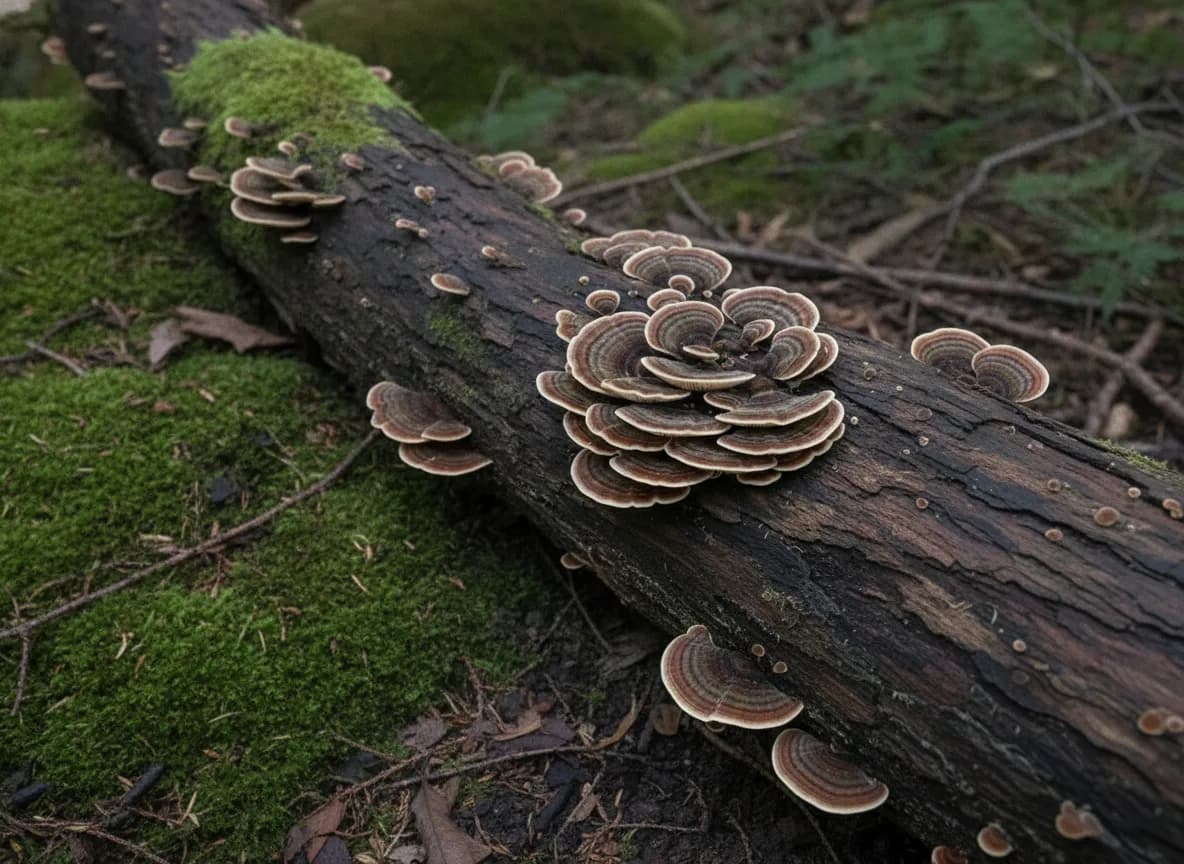
Turkey tail (Trametes versicolor) is one of the most common mushrooms in Canadian forests — and one of the most rewarding to cultivate deliberately. If you have ever walked a trail in Ontario or British Columbia and noticed rings of thin, banded brackets fanning out across a fallen log, you have already met it. Learning how to grow turkey tail mushrooms gives you a steady, renewable supply of one of the most studied medicinal fungi in the world, and it is far more forgiving than fussier species like shiitake.
This guide covers both ways to grow it: the slow, low-effort outdoor log method, and the faster indoor sawdust-block method. Turkey tail is a vigorous colonizer, so whichever route you choose, your odds of success are excellent.
Why Grow Turkey Tail?
Turkey tail is not a culinary mushroom — it is far too thin and leathery to eat like an oyster or a portobello. It is grown for the medicinal harvest. The brackets are dried and simmered into a long decoction (tea) or processed into a dual extract. Turkey tail has been used in traditional medicine for centuries and is studied today for its polysaccharides, particularly PSK and PSP, which are the subject of ongoing immune-support research. We grow it; we do not make health claims about it — that distinction matters.
For a home cultivator, turkey tail has three big advantages:
- It is nearly bulletproof. Turkey tail mycelium is one of the most aggressive colonizers you can work with. It shrugs off contamination that would ruin a shiitake or lion's mane grow.
- It is not picky about wood. Where shiitake demands oak, turkey tail happily takes oak, maple, birch, beech, alder, poplar, and aspen.
- A log keeps producing for years. An inoculated log will fruit every spring and fall for four to six years with no further work.
Turkey Tail at a Glance
| Factor | Detail |
|---|---|
| Species | Trametes versicolor |
| Difficulty | Easy — beginner-friendly |
| Best substrates | Hardwood logs; supplemented hardwood sawdust |
| Colonization | 6–12 months (logs); 2–4 weeks (blocks) |
| Fruiting temperature | 15–21°C |
| Use | Dried for tea and extracts (medicinal, not culinary) |
Two Ways to Grow Turkey Tail
You have two practical options. Outdoor logs take the least effort and the most patience — you inoculate once, then let nature run for a year before the first harvest. Indoor sawdust blocks are faster and give you a controlled harvest in about two months, but they require sterilization equipment. Beginners in Canada with a bit of yard space should start with logs. Growers who already pressure-cook substrate for other species can fold turkey tail straight into their existing routine.
Growing Turkey Tail on Hardwood Logs
This is the classic method, and it mirrors the process in our guide to growing mushrooms on logs.

Choose and Cut Your Logs
Cut fresh, healthy hardwood in late winter or early spring while the tree is still dormant and the bark is tight. Oak, sugar maple, birch, beech, alder, and poplar all work well. Aim for logs 8–15 cm in diameter and about 1 metre long. Let the cut logs rest for two to four weeks before inoculating — freshly felled wood carries natural anti-fungal compounds that fade over a couple of weeks. Do not let them dry out completely, though; turkey tail needs moist wood.
Inoculate the Logs
Drill 8 mm holes about 2.5 cm deep in a diamond pattern: rows spaced 10 cm apart along the log, with holes every 15 cm and each row offset from the last. Push plug spawn into each hole and tap it flush with a mallet, or use a palm inoculator to pack in sawdust spawn. A 1-metre log usually takes 30–40 plugs.
Seal and Stack the Logs
Melt food-grade cheese wax or beeswax and brush a dab over every inoculation hole. This locks moisture in and keeps competing fungi and insects out. Stack the sealed logs in a shaded, sheltered spot — the north side of a building, under conifers, or against a fence all work. The logs must never bake in direct Canadian summer sun.
Colonize and Wait
This is where patience comes in. Turkey tail mycelium spreads through the log over 6 to 12 months. During dry summer stretches, soak or hose the logs occasionally so they never fully dry out. You will know colonization is well underway when you see white mycelium at the cut ends.
Fruiting and Harvest on Logs
Turkey tail fruits on its own schedule — usually in autumn and again in spring, triggered by cool temperatures and rainfall. The thin, banded brackets emerge along the log in overlapping rosettes. A healthy log produces for four to six years. There is no precise "harvest window" the way there is with a culinary mushroom; pick the conks while they are still firm and vivid rather than waterlogged or bug-eaten.
Growing Turkey Tail on Sawdust Blocks Indoors
If you want a harvest in weeks instead of a year, grow turkey tail indoors on supplemented hardwood sawdust. This route needs a pressure canner or sterilizer, but it gives you a fast, predictable crop.
Prepare the Substrate
Hydrate hardwood fuel pellets with boiling water at roughly a 2.5:1 water-to-pellet ratio so they break down into sawdust. Mix in wheat bran at 15–20% of the dry weight — turkey tail responds well to that extra nutrition. The finished substrate should hold together when squeezed and release only a drop or two of water. Our bulk substrate guide walks through ratios in detail.
Sterilize the Blocks
Because supplemented sawdust is contamination-prone, you must sterilize it rather than pasteurize. Load the substrate into filter-patch grow bags and pressure cook at 15 PSI for 2.5 hours, then let the bags cool completely to room temperature. See our substrate sterilization guide for the full procedure.
Inoculate With Spawn
Working in front of a still-air box or flow hood, add turkey tail grain spawn at about 8–10% of the substrate weight. If you are propagating your own culture, start it on agar or liquid culture — our spawn-making guide covers the process. Seal the bag and mix the spawn through evenly.
Let the Blocks Colonize
Incubate the bags at 21–24°C in the dark. Turkey tail colonizes quickly for a medicinal species — expect full white coverage in two to four weeks. The surface often develops small dark "stress" zones; that is normal for this species.
Trigger Fruiting
Once fully colonized, cut a window in the bag or open the top, and move the block to fruiting conditions: 15–21°C, 85–95% humidity, bright indirect light, and plenty of fresh air. Turkey tail demands strong fresh-air exchange — starved of oxygen, it produces lumpy white antler shapes instead of proper fanned brackets. Within a couple of weeks you will see the characteristic concentric, multicoloured rosettes form.
Harvesting and Drying Turkey Tail
Harvest the brackets by cutting them cleanly from the substrate or log with a knife or scissors. They should be firm and flexible, not slimy or crumbling. Brush off any debris.
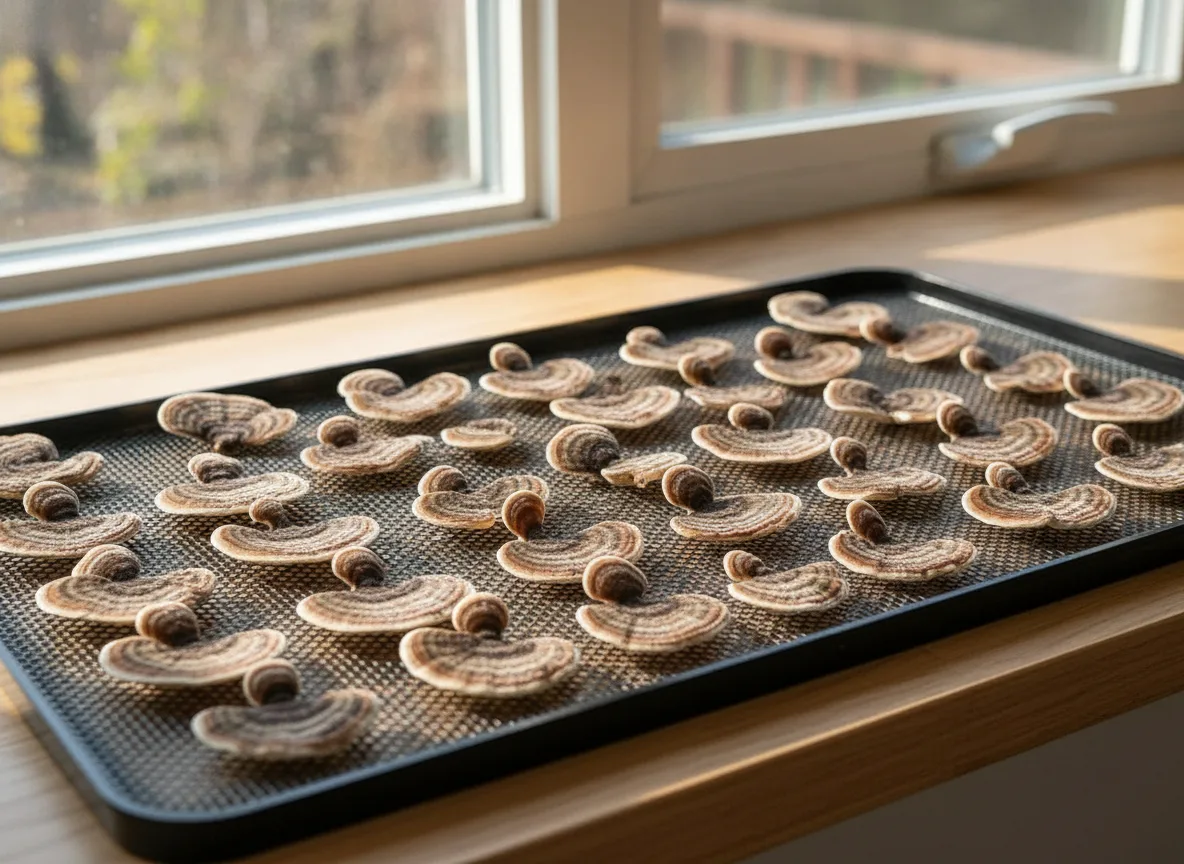
Drying is essential — turkey tail is always used dry. Spread the brackets in a single layer in a dehydrator at 45–50°C for 6–10 hours, or air-dry them in a warm, well-ventilated room until they snap cleanly. Store the dried conks in an airtight jar away from light. Properly dried, they keep for a year or more. To use them, simmer the dried brackets gently for at least an hour to draw out the water-soluble compounds.
Common Problems
Lumpy white growth instead of flat brackets. This is almost always too little fresh air (high CO₂). Increase ventilation in your fruiting space.
Logs not fruiting after a year. Either the logs dried out during a hot summer or they were inoculated too late in the season. Keep logs shaded and moist, and be patient through a second autumn.
A different fungus on your log. True turkey tail has a pored, pale underside. "False turkey tail" (Stereum species) has a smooth underside and will sometimes colonize wild wood. If the underside is smooth, that log was outcompeted — start fresh with well-sealed inoculation holes.
Frequently Asked Questions
How long does it take to grow turkey tail mushrooms?
It depends on the method. On hardwood logs, expect 6 to 12 months of colonization before the first flush, after which the log fruits every spring and fall for several years. On supplemented sawdust blocks indoors, colonization takes 2 to 4 weeks and fruiting follows within another 2 to 3 weeks — roughly two months from start to harvest.
Can you grow turkey tail indoors?
Yes. Indoor cultivation on sterilized, supplemented hardwood sawdust is faster and more predictable than the log method. The main requirements are a pressure cooker or sterilizer for the substrate and a fruiting space you can keep humid (85–95%) and well-ventilated at 15–21°C.
What is the best wood for growing turkey tail?
Turkey tail is unusually flexible. Oak, maple, birch, beech, alder, poplar, and aspen all produce good results, which makes it easier than shiitake for most Canadian growers. Use freshly cut, healthy hardwood and avoid softwoods like pine or cedar entirely.
Is homegrown turkey tail safe to use for tea?
If you grow it from a verified turkey tail culture on clean hardwood substrate, you know exactly what you have — which is safer than foraging, where look-alikes exist. Always dry the brackets fully and simmer them in a long decoction. As with any functional mushroom, treat it as a supplement and speak to a healthcare professional about your own situation.
Start Your Turkey Tail Grow
Turkey tail is the ideal first medicinal mushroom: tough, generous, and genuinely hard to fail with. Start a log this spring and you will be harvesting for years, or run a few sawdust blocks if you want a crop this season. Browse our grain and plug spawn, live cultures, and grow kits to get going, or read the complete guide to growing mushrooms in Canada for the bigger picture.
Have a growing question? Dr. MycoThumb is our free AI growing assistant — ask about substrate recipes, fruiting conditions, and troubleshooting any time, in the chat bubble at the bottom-right of every page.