Making your own mushroom spawn is the skill that changes everything. Instead of buying spawn for every grow, you produce it yourself from a single culture — and from that one culture, you can generate enough spawn to fill dozens of monotubs, hundreds of bags, or whatever scale you're working at.
It's also where most new growers feel intimidated. Grain prep, pressure cooking, sterile inoculation — it sounds like a chemistry lab. But the reality is straightforward once you understand each step. We make spawn every week, and the process is mechanical at this point. This guide walks you through every detail so yours can be too.
What Is Mushroom Spawn?
Spawn is any material that's been colonized by mushroom mycelium and is used to inoculate a larger substrate. Think of it as the mushroom equivalent of a seed — except instead of planting one seed at a time, you're distributing thousands of colonized inoculation points throughout your growing medium.
The most common spawn type is grain spawn — cereal grains that have been hydrated, sterilized, and inoculated with a mushroom culture. Each individual grain becomes a point of mycelial growth. When you mix grain spawn into bulk substrate, every grain starts colonizing the substrate around it.
For more on how grain spawn compares to liquid culture, check our detailed comparison.
Choosing Your Grain
Different grains work, and growers have strong opinions about which is "best." Here's the honest breakdown:
Rye Berries (Whole Rye)
The gold standard for grain spawn. Rye berries are the right size, hold moisture well, are nutritious enough for vigorous growth, and are available at most bulk food stores in Canada.
Pros: Excellent colonization speed, good grain size for even distribution, widely available Cons: Can be tricky to get the moisture right — overhydrated rye gets sticky and clumps together
Whole Oats
A popular budget alternative to rye. Whole oats (with hull intact, not rolled oats) are cheap and available at any feed store. Many commercial spawn producers use oats because the cost per bag is lower.
Pros: Cheap, widely available, slightly more forgiving on moisture than rye Cons: Larger grain means fewer inoculation points per jar, husk can trap bacteria if not prepped properly
Millet
Small, round grains that produce a very high number of inoculation points per jar. Millet is excellent for grain-to-grain transfers because the small grains distribute easily.
Pros: Highest inoculation point density, fast colonization, easy to shake and break up Cons: Can compact if overfilled, harder to judge moisture visually
Wheat Berries
Similar to rye in size and performance. A solid choice that's available at most bulk food stores and some feed stores.
Pros: Good all-rounder, consistent moisture absorption Cons: Not quite as nutritious as rye, slightly slower colonization in our experience
Popcorn Kernels
Used in the "Broke Boi Tek" budget method (covered below). Large kernels that are dead simple to prepare but produce fewer inoculation points per jar.
Pros: Extremely cheap, available everywhere, nearly foolproof to prep Cons: Large grain size means slower colonization and fewer inoculation points
Our Recommendation
If you're just starting: rye berries. They're the most reliable grain with the most community knowledge behind them. Once you're comfortable, experiment with whatever's cheapest and most available in your area. All of these grains produce good spawn.
Grain Preparation: Step by Step
Proper grain prep is the most important part of making spawn. Get this wrong and you'll get burst, sticky grains that clump together, or dry grains that don't support growth, or worst of all — bacterial contamination hiding inside improperly hydrated kernels.
Step 1: Rinse
Rinse your grain in a colander or strainer under cool water. Stir it around to wash off dust, chaff, and debris. This takes about 2 minutes.
Step 2: Soak (Optional but Recommended)
Soak the grain in clean water for 12-24 hours. This allows the grains to fully hydrate at their own pace, which produces more even moisture distribution than boiling alone. Some growers skip this and go straight to simmering — both work, but soaking is more forgiving.
For rye berries and wheat berries, a 12-18 hour soak is ideal. For oats, 12 hours maximum — they absorb water faster and can get soggy.
Step 3: Simmer (Do Not Boil)
After soaking, drain the grain, add fresh water, and bring to a simmer. You want a gentle simmer, not a rolling boil. Boiling bursts the grain, exposing the starchy interior and creating a breeding ground for bacteria.
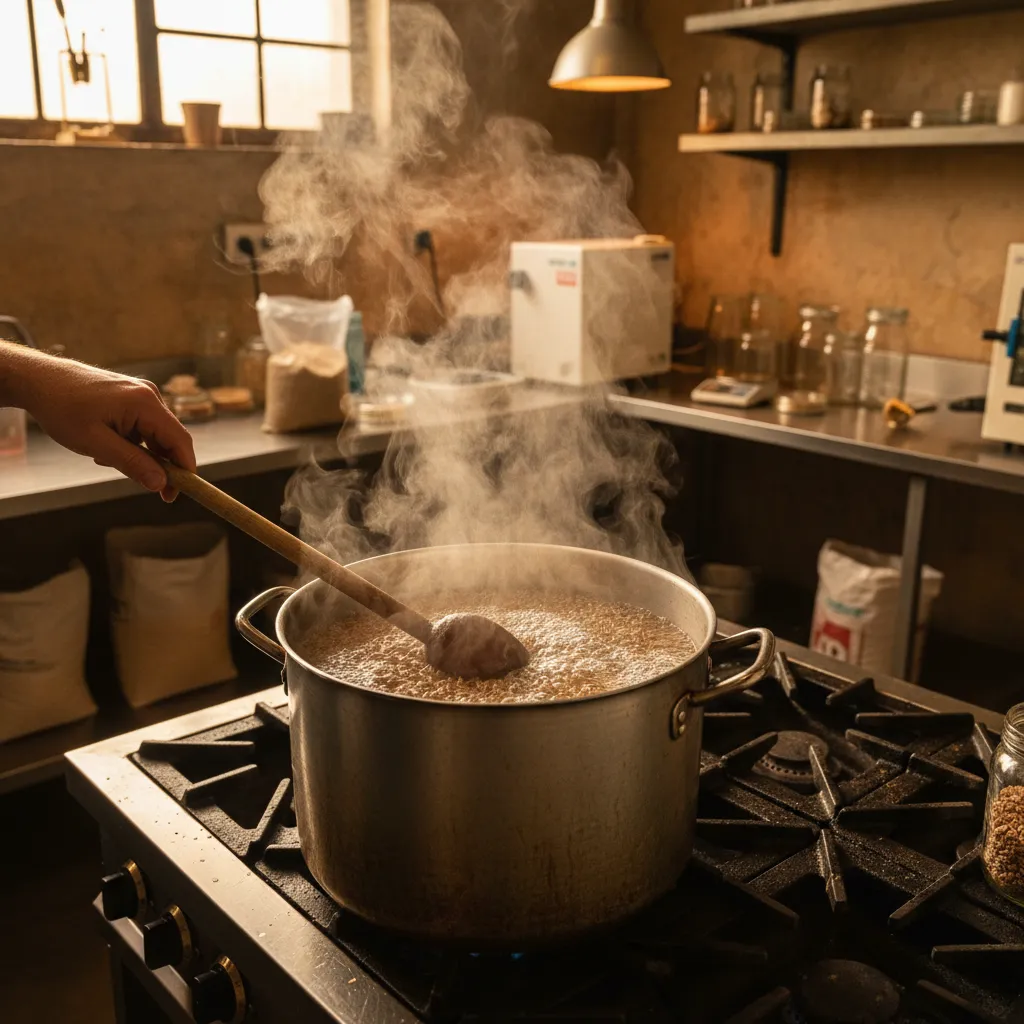
Simmer times:
- Rye berries (soaked): 10-15 minutes
- Rye berries (unsoaked): 20-30 minutes
- Whole oats: 10-15 minutes
- Millet: 8-10 minutes (watch carefully — millet overcooks quickly)
- Wheat berries: 15-20 minutes
The test: Take a grain and press it between your fingers. It should give slightly but not squish or burst. If you can see the inside splitting open, it's overcooked. Better to undercook slightly than overcook.
Step 4: Drain
Pour the grain into a colander or strainer and let it drain for 15-20 minutes. Shake it periodically to release trapped water.
Step 5: Dry
This step is critical and the one most beginners skip. Spread the drained grain in a thin layer on a clean surface — a baking sheet lined with parchment, a clean tarp, or even a clean countertop. Let it air dry for 30-60 minutes, stirring occasionally.
You're looking for grains that are dry on the outside but moist on the inside. Pick up a handful and let it fall — the grains should separate and fall individually, not clump together in a sticky mass. If they clump, keep drying.
The paper towel test: Place a handful of grains on a paper towel. Press another paper towel on top for 10 seconds. If the towel comes away with only a slight dampness, you're good. If it's wet, keep drying.
Step 6: Add Gypsum (Optional)
Some growers add 1-2 tablespoons of gypsum per quart jar of grain. Gypsum helps prevent grains from sticking together and provides calcium that supports mycelial growth. Mix it in while the grain is still slightly damp so it coats evenly.
Loading and Sterilizing
Jars
Wide-mouth quart mason jars (12-pack) are the standard for home spawn production. Fill each jar about 2/3 to 3/4 full — leave headspace so you can shake the jar during colonization.
Lid modification: Drill or punch a hole in each jar lid (6-8 mm diameter). Cover the hole with a piece of micropore tape or stuff it with a small piece of synthetic filter disc. This allows gas exchange during colonization while keeping contaminants out.
Cover each jar with aluminum foil to prevent water from entering the hole during sterilization.
Bags
If you're making larger batches, filter-patch mushroom grow bags work well. Fill each bag with 1-2.5 kg (2-5 lbs) of prepared grain, fold the top over, and seal with an impulse sealer or fold and secure with a clip.
Sterilization
Load your jars or bags into the pressure cooker — we use the Presto 23-Quart Pressure Canner, which fits 7 quart jars per run. For jars, place them on a rack — not directly on the bottom.
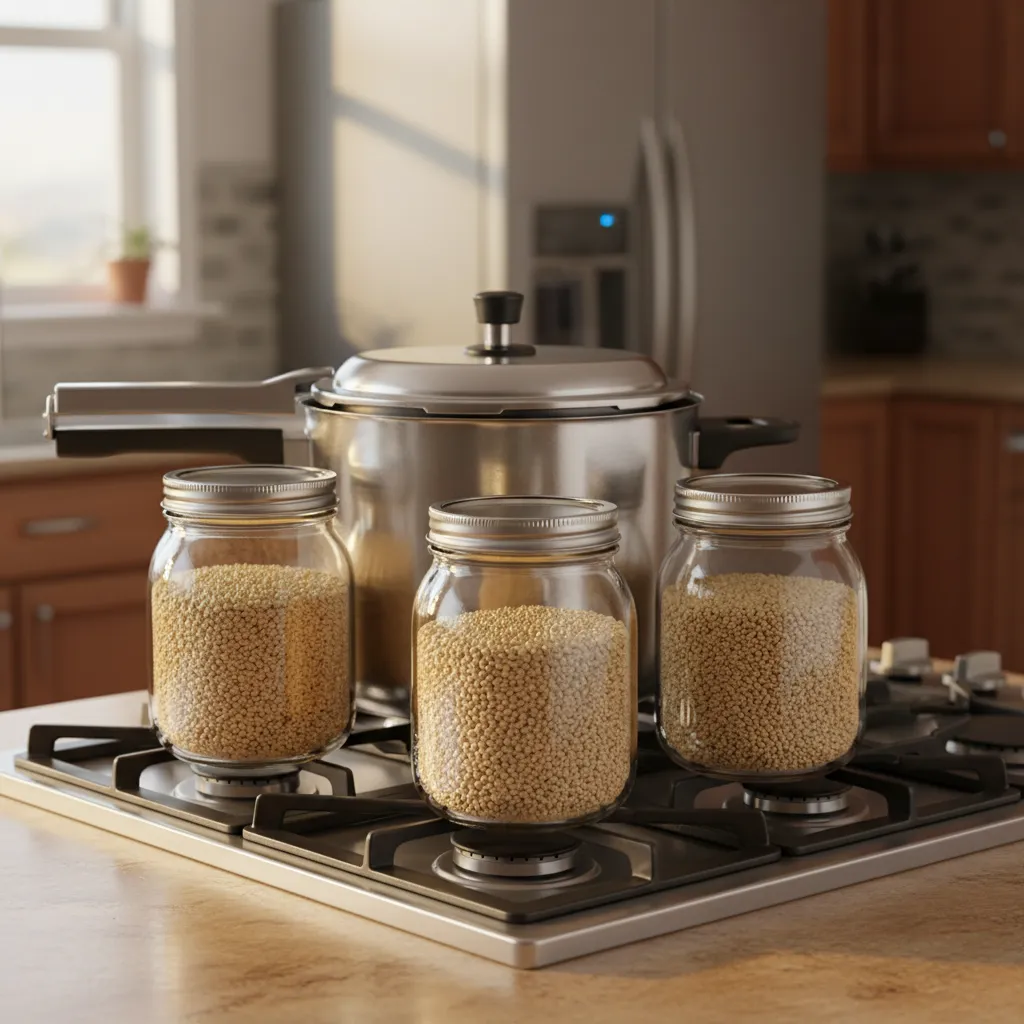
Sterilize at 15 PSI for 90 minutes.
Why 90 minutes? Grain is nutritious — far more than BRF cakes or coir substrate. That nutrition makes it a paradise for contaminants. You need a full 90 minutes at 15 PSI to reliably sterilize all the way to the centre of each jar.
After the pressure drops to zero naturally (never quick-release), leave the jars inside with the lid cracked overnight to cool. The jars need to reach room temperature before you inoculate — injecting into warm grain creates condensation that breeds bacteria.
Presto 23-Quart Pressure Canner
The standard pressure cooker for mushroom cultivation. Fits 7 quart jars at once — enough to sterilize a full batch of grain spawn in one run. Works on gas, electric, and smooth-top stoves.
View on Amazon.ca →When you buy through our links, it supports our mycology research at no extra cost to you.
Inoculation
Methods
There are three main ways to inoculate your sterilized grain:
1. Liquid Culture Syringe
The most common method for beginners. Draw liquid culture into a sterile syringe and inject 2-3 cc through the jar lid's injection port or micropore tape.
Work inside your still air box. Flame sterilize the needle between every 2-3 jars. Push the needle in far enough that the liquid drops onto the grain, not onto the glass wall.
2. Agar Wedge
If you're doing agar work, you can cut a small wedge of colonized agar and drop it into the grain jar. Inside your SAB, open the jar lid, use a flame-sterilized scalpel to cut a 1-2 cm piece of colonized agar, drop it onto the grain, close the lid. Fast and effective.
Agar inoculation is preferred by experienced growers because it's easier to verify the culture is clean before committing it to grain. If there's contamination on the agar plate, you can see it. In a syringe, you can't.
3. Grain-to-Grain (G2G) Transfer
The fastest method for scaling up. Take a fully colonized jar of grain spawn and pour a portion of it into uncolonized jars. See our full G2G transfer guide for the technique.
After Inoculation
- Label your jars. Species, date, culture source. A piece of masking tape and a marker is all you need.
- Store at 21-27°C (70-80°F) in a clean, dark area.
- Don't touch them for 3-5 days. Let the mycelium establish at the inoculation points before disturbing the jars.
Colonization
Monitoring Progress
Check your jars daily by looking through the glass — but don't shake or move them.
- Day 3-7: White growth appears at the inoculation points.
- Day 7-14: Growth spreads outward. You'll see white mycelium threading between grains.
- Day 14-21: Approximately 30-50% colonized. This is when you shake.
Shaking (The Break and Shake)
When your jars are about 30% colonized, shake them vigorously to break up the colonized grain and redistribute it throughout the jar. This dramatically speeds up colonization by creating dozens of new inoculation points from one.
How to shake: Hold the jar firmly and shake it hard — you want to break up the clumps of colonized grain and mix everything together. It will look like you destroyed all progress. Within 2-3 days, you'll see white growth reappearing throughout the entire jar, and full colonization will come much faster than waiting for the original inoculation points to spread.
Some growers shake twice — once at 30% and again at 60-70%. We usually do one shake at 30% and find that's sufficient.
Troubleshooting During Colonization
No growth after 10 days: Temperature too low, or the culture was inactive. Try moving to a warmer spot (24-27°C / 75-80°F). If nothing after 3 weeks, the inoculant may have been dead.
Wet, slimy grain: Bacterial contamination from overhydrated grain or improper sterilization. This is the "wet spot" problem. The grain will smell sour. Discard the jar.
Green patches: Trichoderma contamination. Remove the jar immediately — Trich spores will contaminate your growing area if you open it. Common causes: insufficient sterilization, break in sterile technique, or contaminated inoculant.
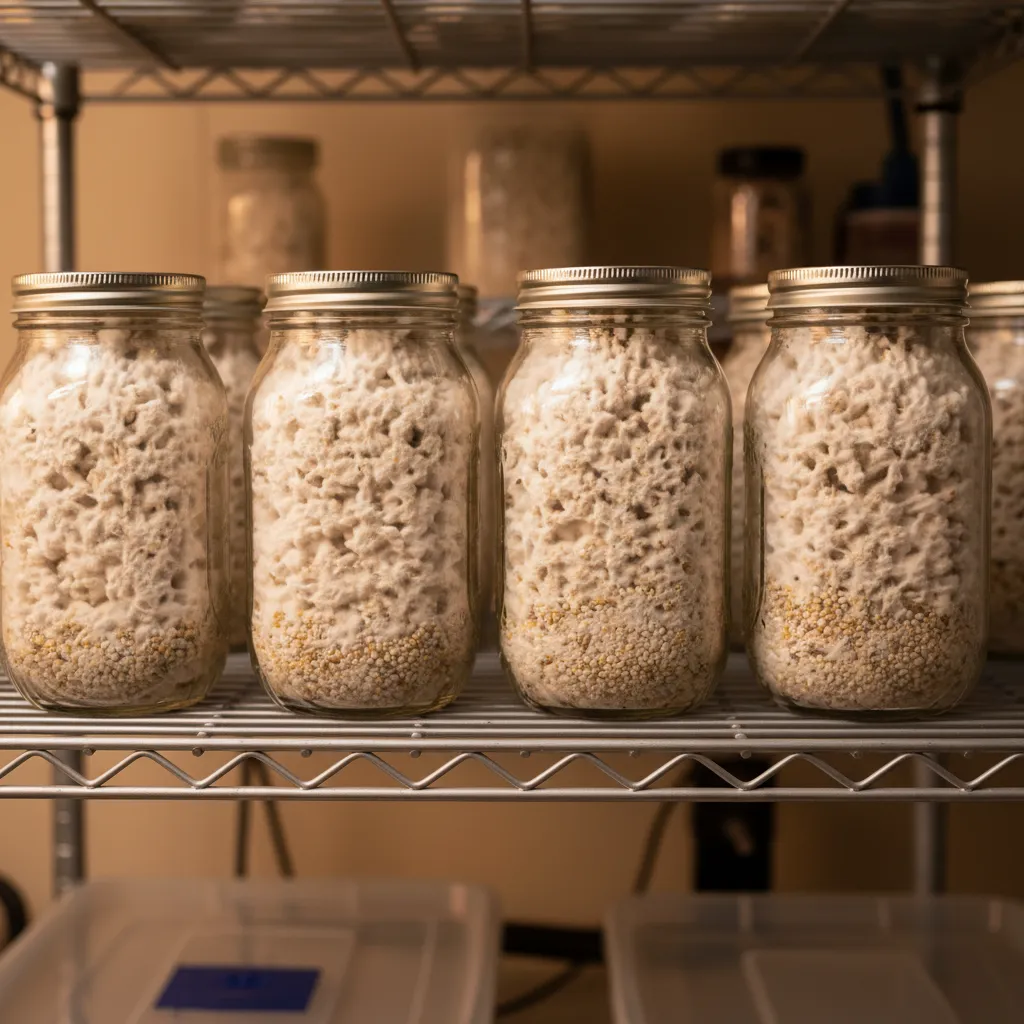
When Is Spawn Ready?
Your spawn is ready to use when:
- Every grain is covered in white mycelium — no bare or brown grains visible.
- The jar smells clean — fresh, mushroomy scent when you crack the lid.
- The grain breaks apart easily when you shake it — fully colonized grains separate readily. Grains that stick together in a solid mass that won't break up may indicate bacterial contamination holding them together.
Use your spawn within 1-2 weeks of full colonization for best results. For storage options if you need to wait, check our spawn storage guide.
The Broke Boi Method: Spawn Without a Pressure Cooker
The "Broke Boi" method is a popular budget approach that uses popcorn kernels and steam sterilization instead of a pressure cooker. It's not as reliable as pressure sterilization, but it works well enough for many growers and costs almost nothing.
Broke Boi Grain Prep
- Measure popcorn kernels. Fill quart jars 2/3 full with dry popcorn kernels (yellow or white, plain — not microwave popcorn).
- Add water. Add water to each jar until it covers the kernels by about 2 cm. Add 1/2 teaspoon of gypsum per jar.
- Do not soak. This is the key difference — the no-soak approach means the kernels don't absorb excess water and are less prone to bursting.
- Simmer. Pour jars into a pot (carefully — they're full of water and grain). Simmer for about 15-20 minutes until kernels are soft but not splitting. Some growers skip simmering entirely with popcorn and go straight to sterilizing.
- Drain and dry. Same process as above. The popcorn should be dry on the outside, plump but firm.
- Load and sterilize. Fill jars 2/3 full, cover with foil, and steam sterilize for 90-120 minutes. Without a pressure cooker, you need to extend the time. Some Broke Boi growers steam for 2 hours to compensate for the lower temperature.
The trade-off: you'll see slightly higher contamination rates than with a proper pressure cooker. But if you're doing 12 jars and losing 1-2 to contam, you're still getting 10 jars of good spawn for almost no cost.
Scaling Up: From Jars to Bags
Once you're comfortable making spawn in jars, bags let you scale up significantly. A single 2 kg bag of grain spawn can inoculate a much larger substrate batch than a quart jar.
The process is identical — prep grain, load bags, sterilize, inoculate — but bags require an impulse sealer and slightly longer sterilization times (2-2.5 hours at 15 PSI for larger bags due to the thermal mass).
If you're making spawn regularly, consider investing in a proper setup:
- A 23-quart (or larger) All American pressure cooker ($300-400 CAD)
- Filter-patch grow bags ($1-2 each)
- An impulse sealer ($80-150 CAD)
- A flow hood for high-volume inoculation
This setup pays for itself within a few batches if you're buying spawn regularly. Especially in Canada, where shipping adds cost to every order.
Your First Spawn Run: Recommended Approach
If you've never made spawn before, here's what we suggest:
- Start with rye berries in quart jars — the most documentation and community support is behind this combo.
- Inoculate with a liquid culture syringe inside a still air box.
- Do 6 jars for your first batch. Small enough to manage, large enough to learn from variation between jars.
- Use the spawn to start a monotub or fruiting bags.
Once that first batch works, you'll have the confidence — and the technique — to scale as far as you want to go.
Need help with your grow? Dr. MycoThumb is our free AI growing assistant — ask about substrates, contamination, fruiting conditions, or any cultivation question. Available 24/7 in the chat bubble at the bottom-right of every page.