Once you have colonized grain spawn, the next step is mixing it into bulk substrate. This is where your mushroom grow really scales up. Instead of fruiting from a small jar or cake, you're spreading that mycelium across litres of nutritious substrate that will produce significantly larger harvests.
If you've read our mushroom substrate guide, you know the different materials available. This guide is the hands-on companion — the actual process of preparing, pasteurizing, and spawning to bulk substrate. We'll cover the most popular recipes and methods used by home growers across Canada.
What Is Bulk Substrate?
Bulk substrate is the nutrient-rich material you mix your colonized grain spawn into for the final growing phase. Think of grain spawn as the starter and bulk substrate as the main course. The spawn colonizes the grain first (a small, controlled environment), and then you introduce that colonized grain to a much larger volume of substrate.
The substrate provides the food source and moisture that the mycelium needs to produce mushrooms. Different substrates work for different species, but the preparation principles are the same: get the moisture right, eliminate competing organisms, and give your mycelium a head start.
Common bulk substrates include:
- CVG (coir, vermiculite, gypsum) — the most popular all-purpose recipe
- Hardwood fuel pellets — excellent for wood-loving species
- Straw — classic choice for oyster mushrooms
- Masters mix (hardwood sawdust + soy hull pellets) — high-yield supplemented substrate
The CVG Recipe: The Most Versatile Bulk Substrate
CVG stands for coir, vermiculite, and gypsum. It's the default substrate for home growers because it's cheap, easy to prepare, forgiving on moisture levels, and works with a wide range of gourmet species.
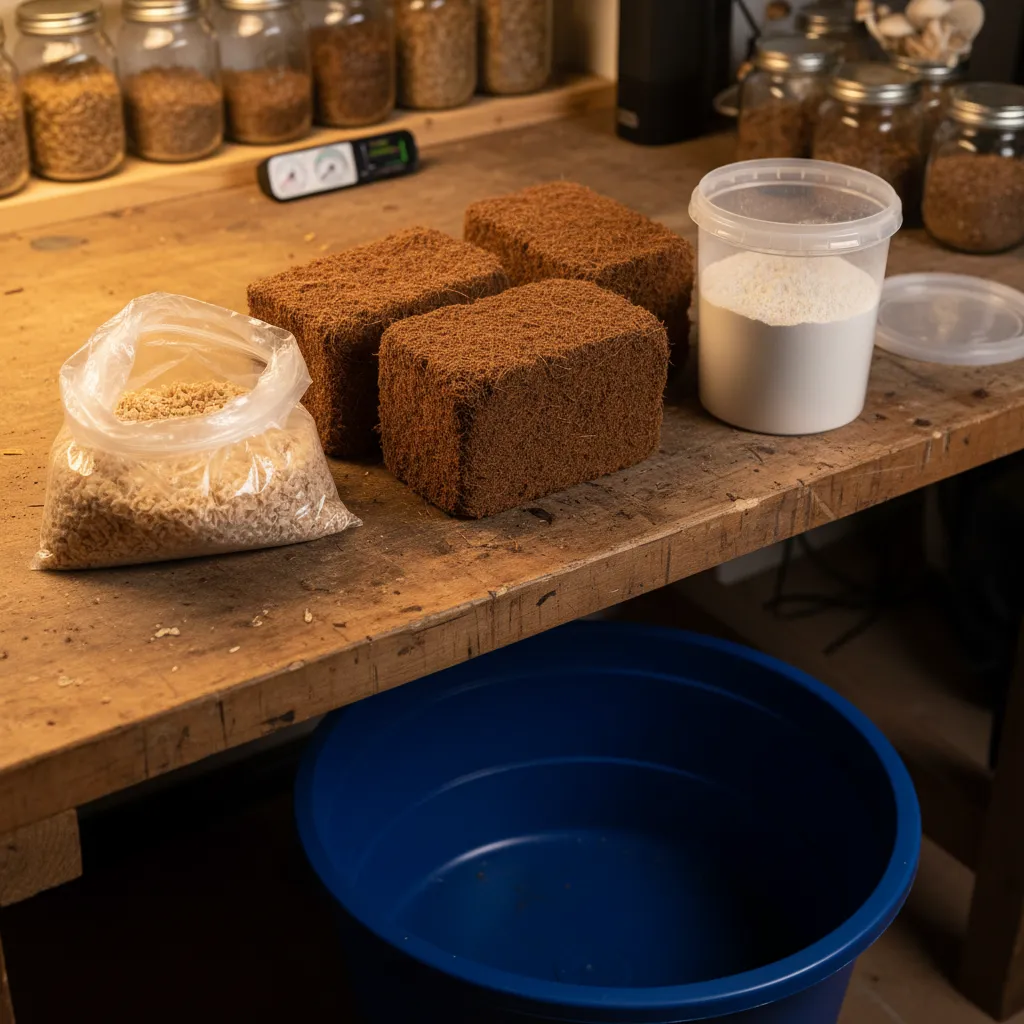
Ingredients
For one standard monotub (64 qt / 60 L tub):
| Ingredient | Amount | Purpose |
|---|---|---|
| Coco coir | 650 g (1 brick) | Base material, holds moisture, provides structure |
| Vermiculite (coarse) | 2 quarts / 2 litres | Holds moisture, creates air pockets |
| Gypsum (calcium sulfate) | 1 cup / 240 mL | Provides calcium, prevents substrate from clumping, buffers pH |
Where to find these in Canada:
- Coco coir: Pet stores (sold as reptile bedding), garden centres, or online. Make sure it's pure coir with no added fertilizers or trichoderma (some garden coir is pre-inoculated with Trich for plant use — avoid those).
- Vermiculite: Any garden centre or hardware store. Get coarse grade, not fine.
- Gypsum: Garden centres (sold as a soil amendment), or buy food-grade calcium sulfate online. Garden-grade works fine.
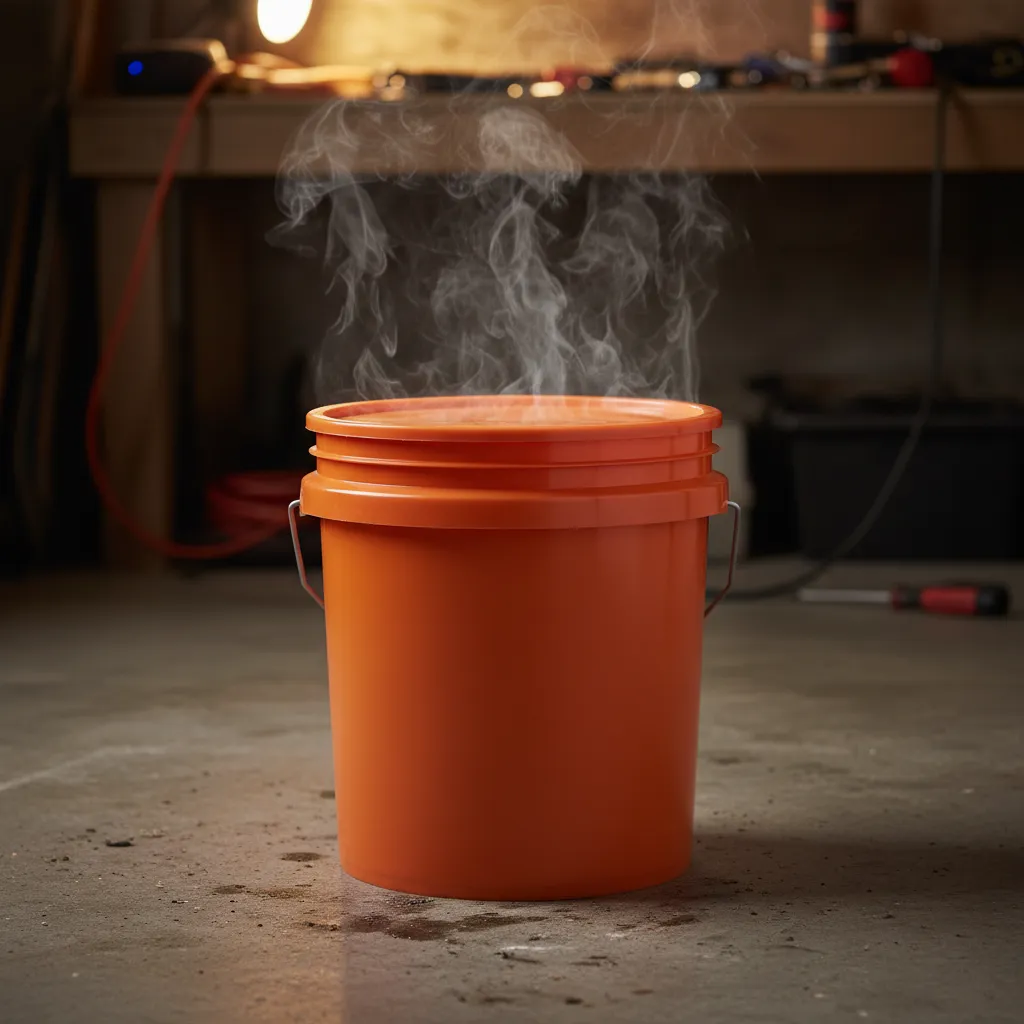
Preparation: The Bucket Method
This is the simplest pasteurization method and the one we recommend for beginners. No thermometer required, no stovetop boiling.
Step 1: Break up the coir brick. Place the coir brick in a clean 5-gallon (19 L) bucket. If it's a compressed brick, break it into a few chunks so water can penetrate evenly.
Step 2: Add vermiculite and gypsum. Pour the vermiculite and gypsum on top of the coir.
Step 3: Pour boiling water. Boil about 3.5-4 litres of water and pour it over the dry ingredients. The exact amount depends on your coir brick — some are denser than others. Start with 3.5 litres and add more if needed.
Step 4: Close the lid and wait. Snap the bucket lid on tight and let it sit for at least 2-4 hours. Many growers prepare it the night before and let it sit overnight. The boiling water pasteurizes the substrate while the bucket acts as an insulator, keeping the temperature high long enough to kill most competing organisms.
Step 5: Mix and check moisture. After it's cooled enough to handle (below 27°C / 80°F), open the lid and mix everything thoroughly with clean hands or a clean spoon. Break up any remaining clumps of coir.
The Field Capacity Test
This is the single most important test in substrate preparation. If your moisture is wrong, nothing else matters. A digital kitchen scale makes it easy to weigh your ingredients for consistent results every time.
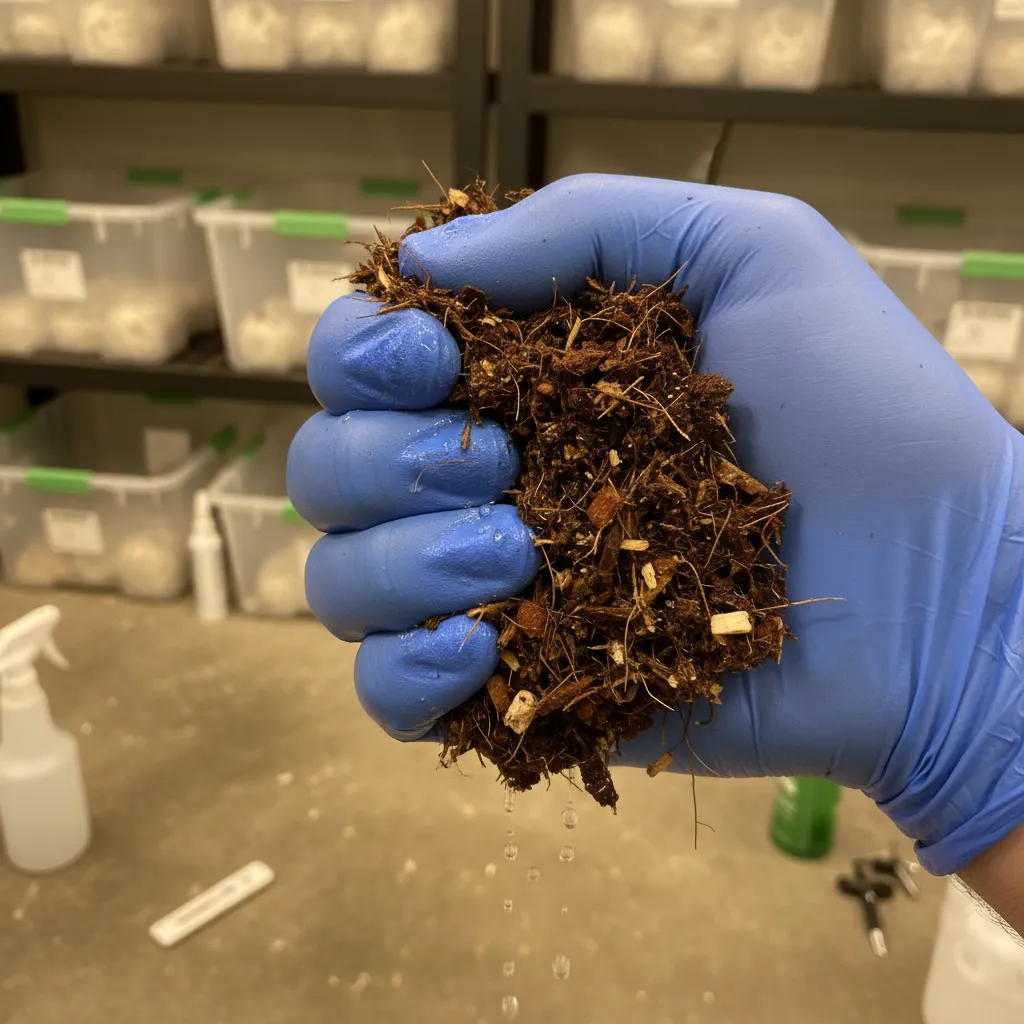
Grab a handful of substrate and squeeze it firmly in your fist:
- Perfect field capacity: A few drops of water drip out. Maybe 2-3 drops. The substrate holds together in a clump when you open your hand.
- Too wet: Water streams or pours out when you squeeze. Solution: spread the substrate out and let it dry, or add more dry coir/vermiculite.
- Too dry: Nothing drips out at all, and the substrate doesn't hold together. Solution: add small amounts of water, mix, and test again.
Field capacity is the sweet spot where the substrate holds as much water as it can without being waterlogged. Too wet creates anaerobic conditions that breed bacteria. Too dry starves the mycelium and prevents proper colonization.
If you're consistently struggling with moisture levels, it helps to weigh your ingredients and water with a kitchen scale. A reliable starting ratio is roughly 1:1.1 coir to water by weight for a standard brick.
Vivlly Compressed Coco Coir Bricks — 5 Pack
Each 650g brick expands to about 9 litres of substrate. The 5-pack gives you enough coir for multiple monotub batches at a much better per-brick price than buying singles.
View on Amazon.ca →When you buy through our links, it supports our mycology research at no extra cost to you.
Hardwood Fuel Pellet Substrate
Hardwood fuel pellets are compressed sawdust, available at any Canadian hardware store or feed store for about $7-10 per 40 lb bag. They're an outstanding substrate for wood-loving species like shiitake, lion's mane, and oyster mushrooms.
Basic Hardwood Pellet Recipe
| Ingredient | Amount | Notes |
|---|---|---|
| Hardwood fuel pellets | 2.3 kg (5 lbs) | Must be 100% hardwood, no softwood or binding agents |
| Water | 2.8 L (3 quarts) | Adjust slightly based on pellet brand |
Step 1: Measure pellets into a container. A clean bucket or large mixing tub works well.
Step 2: Add boiling water. Pour the boiling water over the pellets and mix. The pellets will absorb the water and break apart into sawdust within 15-20 minutes.
Step 3: Break up and mix. Use a clean spoon or gloved hands to break up any remaining pellet chunks. You want a uniform, fluffy sawdust texture.
Step 4: Check field capacity. Same squeeze test as CVG. Adjust with more water or dry pellets as needed.
Supplementing Hardwood Substrate
For higher yields, you can add a nitrogen source:
- Wheat bran: 10-15% by dry weight. Increases yield significantly but also increases contamination risk. This supplemented substrate must be sterilized (pressure cooked), not just pasteurized.
- Soy hull pellets: Mix 50/50 with hardwood pellets by weight for "Masters Mix." Again, requires sterilization.
If you're not using a pressure cooker, stick with unsupplemented hardwood. Pasteurization alone won't reliably eliminate contaminants in supplemented substrates. For more on substrate options, check our full mushroom substrate guide.
Straw Substrate Preparation
Straw is the traditional substrate for oyster mushrooms and remains one of the most cost-effective options. Our full straw pasteurization guide covers this in detail, but here's the overview.
Hot Water Pasteurization
Chop the straw into 5-10 cm (2-4 inch) lengths using a string trimmer in a garbage can, a garden shredder, or by hand with shears.
Submerge in hot water at 65-82°C (150-180°F) for 60-90 minutes. A large stock pot, turkey fryer, or a metal drum with a propane burner works well.
Drain thoroughly. Let the straw drain in a clean colander, mesh bag, or on a clean surface until it stops dripping. It should feel like a wrung-out sponge.
Cool to below 27°C (80°F) before mixing with spawn. Spreading it out on a clean tarp speeds this up considerably.
Cold Water Lime Bath (Budget Alternative)
Soak chopped straw in cold water with hydrated lime (calcium hydroxide) at roughly 150 g per 75 litres of water (1 cup per 20 gallons). The high pH kills competing organisms. Soak for 12-18 hours, drain, and use. This method costs almost nothing and requires no heat source.
Spawning to Bulk: Mixing Spawn with Substrate
This is the moment everything comes together. Your grain spawn is fully colonized, your substrate is prepared and at field capacity, and you're ready to combine them.
Spawn Rate
The ideal spawn-to-substrate ratio is 10-20% spawn by weight (or roughly by volume). A higher spawn rate means:
- Faster colonization
- Lower contamination risk (the mycelium establishes dominance faster)
- Higher cost (you're using more spawn)
A lower spawn rate means:
- Slower colonization
- Higher contamination risk
- More substrate per jar of spawn
For beginners, we recommend erring on the higher side — 15-20%. The faster colonization is worth the extra spawn. As you gain experience and your sterile technique improves, you can drop to 10%.
How to Mix
Step 1: Prepare your container. For a monotub, line the tub with a black garbage bag (optional but makes cleanup easier). For grow bags, have your bags ready.
Step 2: Break up the spawn. Shake or break up the colonized grain so individual grains are separated. This distributes the spawn points evenly throughout the substrate.
Step 3: Mix thoroughly. Combine the broken-up grain spawn with your prepared substrate in a clean container. Mix with clean, gloved hands until the grain is evenly distributed throughout. You should see individual grains scattered uniformly — no clumps of spawn in one area and bare substrate in another.
Step 4: Pack into your container. Transfer the mix into your monotub, grow bag, or fruiting container. Pack it firmly but not tightly — you want good contact between substrate particles without squeezing out moisture. Aim for a substrate depth of 7-13 cm (3-5 inches) in a monotub.
Step 5: Add a casing layer (optional). Some growers top the spawned substrate with a thin layer (1-2 cm) of plain, pasteurized coir. This helps maintain surface humidity and can improve pinning. It's optional for oyster mushrooms but beneficial for other species.
Step 6: Seal and incubate. Close the lid (with gas exchange — don't make it airtight) and place in a clean area at 21-24°C (70-75°F). Don't open it. Resist the urge. Let the mycelium colonize undisturbed.
How to Inoculate Your Substrate
With your substrate prepared and at field capacity, it's time to introduce your colonized grain spawn. This step — called "spawning to bulk" or inoculation — is where the mycelium from your grain transfers into the much larger volume of substrate. Getting this right sets the foundation for a healthy, fast-colonizing grow with minimal contamination risk.
Choosing Your Spawn Rate
The spawn rate is the ratio of grain spawn to bulk substrate, expressed as a percentage by weight. The standard range is 10-20%, and your choice within that range affects both speed and cost:
- 20% spawn rate: Maximum colonization speed. The substrate will be fully colonized in 7-10 days for aggressive species like oyster mushrooms. Contamination risk is minimal because the mycelium dominates the substrate before competitors can establish. This is ideal for beginners and any time you're working in less-than-perfect conditions.
- 15% spawn rate: The sweet spot for most growers. Balances speed, cost, and reliability. Full colonization in 10-14 days for most gourmet species.
- 10% spawn rate: Economical for experienced growers with clean technique and a proven process. Colonization takes 14-21 days, and any lapses in cleanliness during that extended window increase contamination risk.
For your first few batches, use 20%. The extra spawn cost is insignificant compared to the cost of losing an entire batch to contamination because colonization took too long.
Mixing Technique: Even Distribution Is Everything
The goal of mixing is to distribute grain spawn uniformly throughout the substrate so that every cubic centimetre of material has colonization points nearby. Poor mixing — clumps of spawn in one area and bare substrate in another — creates uncolonized pockets where contaminants can establish before the mycelium arrives.
Break up the spawn first. Before adding it to substrate, break your grain spawn into individual kernels. For bags, knead and shake the bag until the grains separate. For jars, shake firmly or use a clean utensil to break up any clumps. Fully separated grains distribute far more evenly than chunks of stuck-together spawn.
Mix in a clean container. Combine substrate and spawn in a sanitized tub, bucket, or directly in your monotub. Use clean, gloved hands to fold and turn the mixture repeatedly — like folding bread dough. Continue until you can look at any handful and see grain kernels distributed evenly throughout. This usually takes 2-3 minutes of thorough mixing.
Avoid over-compacting. When you transfer the mixture into its final container (monotub, grow bag, or bucket), pack it firmly enough to eliminate air gaps but not so tightly that you squeeze moisture out. Moderate, even pressure is the target. For monotubs, aim for a substrate depth of 7-13 cm (3-5 inches). For grow bags, fill to the recommended level and fold or seal the top.
Loading Into Containers
Monotubs: Spread the spawned substrate evenly across the bottom of the tub. Level the surface with clean hands — an even surface promotes uniform pinning later. Optionally apply a 1-2 cm casing layer of plain pasteurized coir on top.
Grow bags: Fill to roughly 75% capacity, leaving room for gas exchange at the top. Fold the top over or seal with an impulse sealer if using filter-patch bags. The filter patch provides gas exchange during colonization.
Buckets: Layer the spawned substrate into the bucket, packing each layer moderately. Fill to within 5 cm of the rim. Replace the lid loosely for incubation.
Incubation Conditions
Once loaded, place containers in a clean, dark area at 21-24°C (70-75°F). This temperature range promotes fast mycelial growth for most gourmet species. Avoid temperatures above 27°C, which stress the mycelium and favour bacterial contaminants. Don't open, peek, or disturb the containers during incubation — every time you open a lid, you introduce fresh air (and potentially contaminants) to an uncolonized substrate.
For beginners wondering about spawn options, browse our grain spawn collection for species ranging from oyster mushrooms to lion's mane and shiitake. Each 5 lb bag inoculates 25-50 lbs of prepared substrate at the recommended 10-20% spawn rate.
Colonization: What to Expect
After spawning to bulk, you'll see white mycelium spreading from each grain point into the surrounding substrate. Here's a rough timeline:
- Days 1-3: Not much visible. The mycelium is establishing itself around each grain.
- Days 3-7: White spots become visible, spreading outward from each grain. This is healthy — the more uniformly distributed these spots are, the better your mixing was.
- Days 7-14: The white patches merge and cover the surface. Full colonization means the entire surface is covered in white mycelium.
A fully colonized substrate should be completely white on the surface. Some small areas of exposed substrate are normal, but large uncolonized patches after 14+ days might indicate issues — low spawn rate, incorrect moisture, or low temperatures.
For more on what to expect during this phase, see our mushroom growing timeline.
Troubleshooting Substrate Preparation
"My substrate smells sour"
This usually means it's too wet, creating anaerobic conditions where bacteria thrive. The substrate should smell earthy and clean — like garden soil or wet wood. Sour, rotten, or sweet smells mean bacterial contamination. Start over with drier substrate.
"There's green mold on my substrate"
Green mold (Trichoderma) is the most common contaminant. If you see it before full colonization, the batch is lost — Trichoderma grows faster than mushroom mycelium in an uncolonized substrate. Common causes: substrate wasn't properly pasteurized, spawn was contaminated, or non-sterile conditions during mixing.
"My substrate won't hold together"
The coir probably didn't get enough water, or you're using fine vermiculite instead of coarse. Add water gradually and re-test field capacity. Coarse vermiculite creates better structure than fine.
"Colonization is extremely slow"
Check your temperature. Below 18°C (64°F), mycelial growth slows dramatically. Make sure you're in the 21-24°C (70-75°F) range. Also check your spawn — if it wasn't fully colonized when you mixed it, colonization of the bulk will be slower and contamination risk higher.
Which Substrate for Which Species?
| Species | Best Substrate | Notes |
|---|---|---|
| Oyster mushrooms | Straw, hardwood pellets, CVG | Oysters grow on almost anything |
| Shiitake | Hardwood pellets + bran (sterilized) | Need hardwood, supplemented |
| Lion's Mane | Hardwood pellets + bran (sterilized) | Prefer supplemented hardwood |
| Chestnut | Hardwood pellets, Masters mix | Versatile, moderate supplement |
| Reishi | Hardwood pellets | Low supplement needed |
| Turkey Tail | Hardwood pellets, logs | Very adaptable |
The beauty of learning proper substrate preparation is that the technique transfers across species. Once you can consistently prepare CVG at perfect field capacity, switching to hardwood or supplemented substrates is just a recipe change — the process is the same.
Pick up some grain spawn and growing supplies, prepare your substrate this weekend, and you'll be harvesting fresh mushrooms within the month.
Need help with your grow? Dr. MycoThumb is our free AI growing assistant — ask about substrates, contamination, fruiting conditions, or any cultivation question. Available 24/7 in the chat bubble at the bottom-right of every page.