Mushroom grow bags are the unsung heroes of home and commercial mushroom cultivation. They're what make it possible to prepare sterile grain spawn and fruiting blocks without expensive laboratory equipment. If you've ever wondered how cultivators produce clean, contamination-free mushroom blocks, the answer usually involves a good grow bag, a pressure cooker, and a bit of technique.
In this guide, we'll cover everything you need to know about mushroom grow bags — from understanding filter patches to choosing the right size, sterilizing, inoculating, and fruiting directly from the bag.
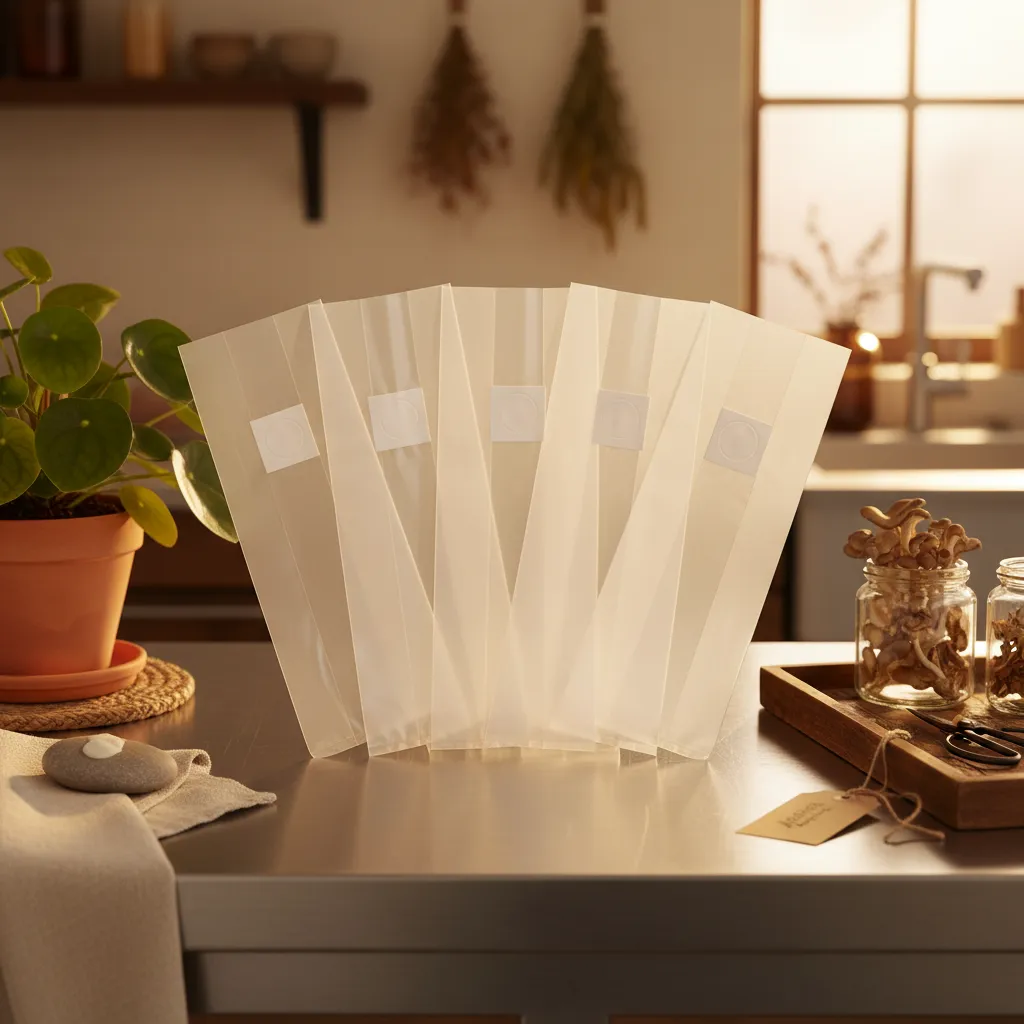
What Are Mushroom Grow Bags?
Mushroom grow bags are specially designed, heat-resistant polypropylene bags that can withstand the temperatures and pressures of autoclave sterilization (typically 121°C / 250°F at 15 PSI). Unlike regular plastic bags, which would melt or off-gas toxic fumes under these conditions, autoclavable grow bags maintain their structural integrity through repeated sterilization cycles.
The bags are made from thick, puncture-resistant polypropylene — typically 2.5 to 3.5 mil thick. This durability is important because you'll be handling them when they're full of heavy, wet substrate, and any small tear or puncture is an open invitation for contamination.
The Filter Patch Explained
The defining feature of a mushroom grow bag is the filter patch — a small square of microporous material heat-sealed into one side of the bag. This patch serves two critical functions:
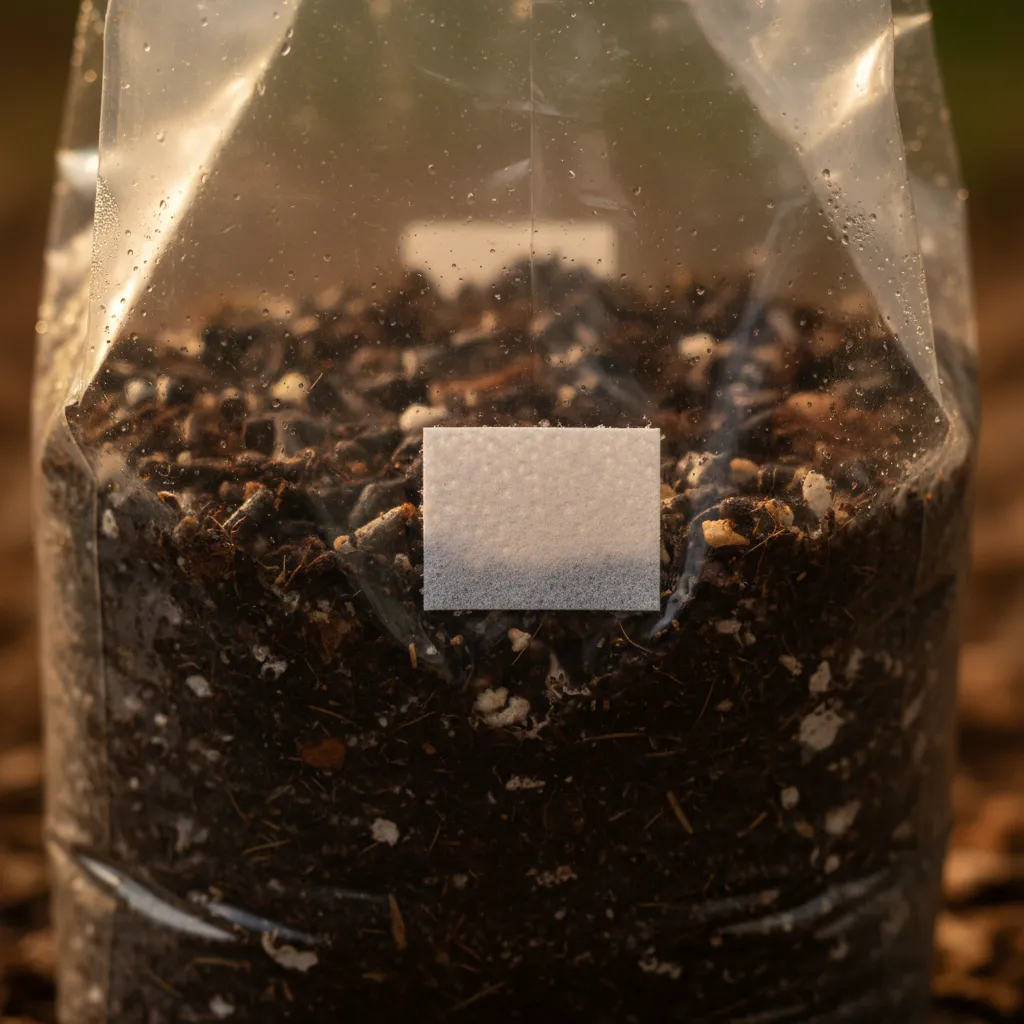
Gas Exchange: Mycelium needs oxygen to grow and produces carbon dioxide as it colonizes substrate. The filter patch allows this gas exchange to happen continuously without opening the bag.
Contamination Barrier: The filter patch (typically 0.5 micron pore size in our bags) blocks bacteria, mould spores, and other contaminants from entering. To put that in perspective, most airborne contaminant spores are 1–20 microns in size, so a 0.5-micron filter provides an effective barrier against the vast majority of threats.
This combination — gas exchange plus contamination protection — is what allows a sealed grow bag to function as a miniature clean room. Once your substrate is sterilized and the bag is sealed, the contents remain protected from environmental contaminants as long as the bag's integrity is maintained.
Our Three Sizes: Which Bag for Which Job?
We carry three sizes of Satrise grow bags, each designed for different applications.
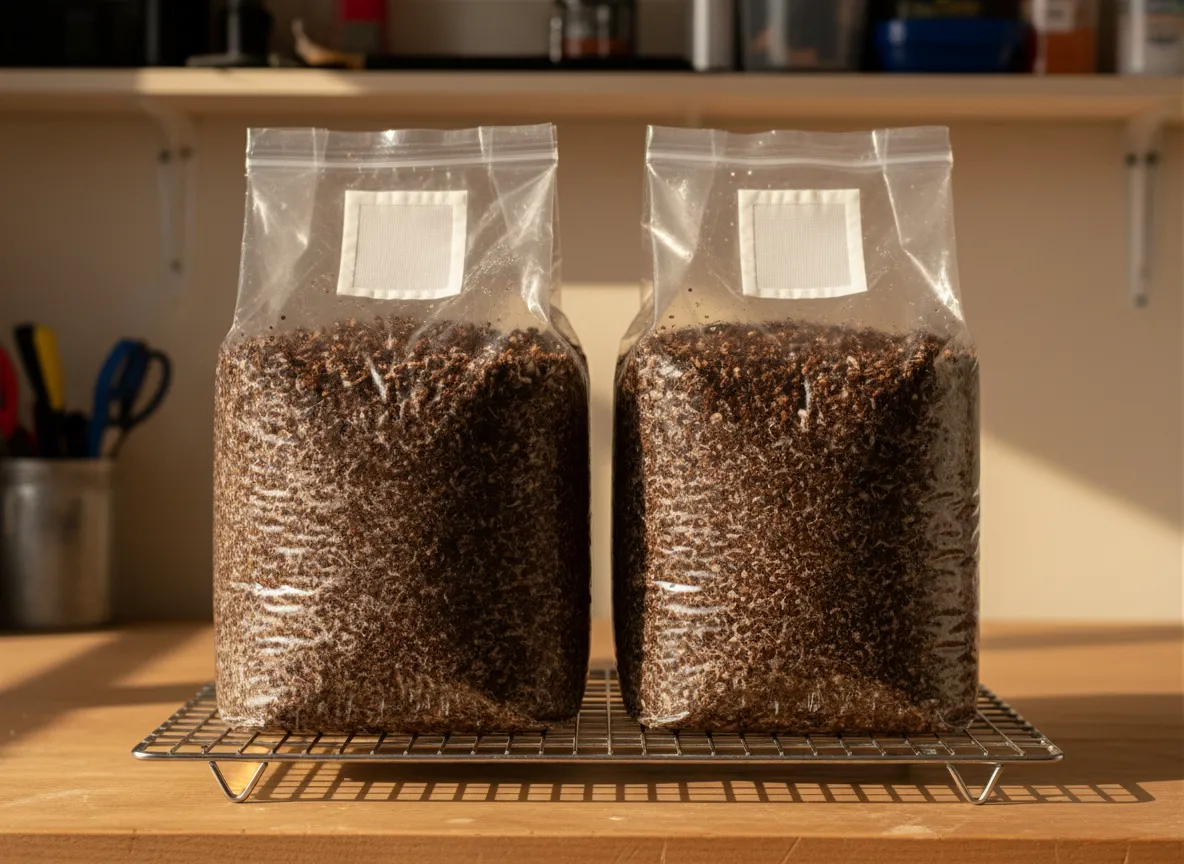
Medium (5" x 5" x 20")
The Medium Grow Bag is our most popular size for grain spawn production. Its narrow profile is ideal for:
- Grain spawn jars alternative: Fill with 2–4 lbs of hydrated grain (rye, wheat, millet, or oats), sterilize, and inoculate with liquid culture or agar. The bag format is easier to shake for break-and-shake than jars, and the flat shape means faster, more even colonization.
- Small fruiting blocks: Great for personal-use fruiting blocks using supplemented sawdust. A single medium bag produces enough for a small but satisfying harvest.
- Experimental batches: When you're testing new substrate recipes or species, the smaller size means less wasted material if something doesn't work out.
Large (8" x 5" x 18")
The Large Grow Bag is the workhorse size for home cultivators making fruiting blocks — and our most popular bag overall. Its wider footprint accommodates:
- Standard fruiting blocks: Fill with 5–7 lbs of supplemented hardwood sawdust (typically mixed with wheat bran at a 10–20% ratio). This is the standard size used by most home growers for species like oysters, shiitake, and lion's mane.
- Larger grain spawn batches: When you need more spawn for a bigger project, the large bag holds 5–8 lbs of grain comfortably.
- Straw-based substrates: The wider opening makes it easier to stuff in bulkier materials like chopped straw for oyster mushroom cultivation.
XL (8" x 5.5" x 25")
The XL Grow Bag is designed for commercial-scale production and ambitious home growers:
- Commercial fruiting blocks: Holds 8–12 lbs of supplemented sawdust, producing larger blocks that yield more mushrooms per unit.
- Bulk substrate preparation: Ideal for preparing large quantities of pasteurized or sterilized substrate for species that benefit from bigger blocks.
- Masters mix blocks: The extra volume is perfect for the popular 50/50 soy hull and hardwood pellet recipe that many commercial growers use for king oyster, lion's mane, and other high-value species.
How to Fill and Seal Your Grow Bags
Proper filling and sealing technique is essential for preventing contamination during sterilization.
Step 1: Prepare Your Substrate
Your substrate should be properly hydrated before bagging. For grain spawn, soak and simmer grain until fully hydrated but not waterlogged. For sawdust fruiting blocks, mix hardwood pellets with water and supplements to 60–65% moisture content. Our Bulk Substrate Calculator gives you exact weights for any number of bags so every batch comes out right.
Step 2: Fill the Bag
Fill to approximately 60–70% capacity — you need room at the top for folding, sealing, and expansion during sterilization. Pack gently to eliminate air pockets without over-compressing.
Step 3: Fold and Seal
Impulse sealer (recommended): Fold the top flat, press out excess air, and run through an impulse sealer. Make two parallel seals for security.
Fold and clip method: Fold the top accordion-style and secure with a binder clip or zip tie. Less reliable but workable without a sealer.
Important: Ensure the filter patch has clear airspace above the substrate — it must not be buried.
Metronic 8-Inch Impulse Bag Sealer
A reliable impulse sealer is essential for getting clean, airtight seals on your grow bags. The 8-inch width handles standard mushroom grow bags with ease.
View on Amazon.ca →When you buy through our links, it supports our mycology research at no extra cost to you.
Sterilization: Autoclave or Pressure Cooker
This is the most critical step. Inadequate sterilization is the number one cause of contamination in mushroom cultivation.
Pressure Cooker Method (Home Growers)
Load your filled, sealed bags into your pressure cooker. Place them on a trivet or rack so they're not sitting directly on the bottom. You can stack multiple bags, but make sure steam can circulate freely.
Bring to 15 PSI and maintain for:
- Grain spawn: 90 minutes minimum (some growers prefer 120 minutes for extra safety)
- Supplemented sawdust: 150–180 minutes (2.5–3 hours)
Allow the pressure cooker to cool naturally. Do not rapid-release the pressure — sudden pressure changes can cause bags to burst or the filter patch to blow out.
Autoclave Method (Commercial Scale)
Commercial autoclaves provide more consistent temperature and pressure control. Cycle times are similar: 90 minutes for grain, 150+ minutes for supplemented substrates, at 121°C / 15 PSI.
After sterilization, allow bags to cool completely to room temperature (8–12 hours) before inoculation. Inoculating warm substrate can kill your inoculant and favour heat-loving contaminants.
Inoculation
Once your bags are cool, it's time to introduce your mushroom culture. Work in the cleanest environment possible — ideally in front of a laminar flow hood, or at minimum in a still-air box.
From liquid culture: Wipe the injection area with isopropyl alcohol and inject 3–5 cc of liquid culture using a sterile syringe. If no injection port, cut a small corner, inject, and reseal.
From grain spawn: Open the bag in your clean workspace, add colonized grain spawn, and reseal. Faster colonization due to more inoculation points.
From agar: Transfer a wedge of colonized agar using sterile technique. Slowest method, but ideal when working from freshly isolated cultures.
Fruiting From the Bag
Many species can be fruited directly from the grow bag, eliminating the need to remove the block and exposing it to contamination risks.
Method 1: Cut and Fruit
Once the block is fully colonized (completely white with mycelium), cut an X or a 3–4 inch slit in the side of the bag. Mist the exposed area 2–3 times daily and maintain humidity above 80%. Mushroom pins will form at the cut site within 5–14 days depending on the species.
Method 2: Top Fruiting
Fold down the top of the bag to expose the top surface of the block. This works well for species like lion's mane that prefer to fruit from a single point, and for oyster mushrooms in humid environments.
Method 3: Remove From Bag
For some species — particularly shiitake — you may get better results removing the block from the bag entirely and fruiting it on a wire rack or shelf in a fruiting chamber. Shiitake blocks benefit from a "cold shock" (12–24 hours in a refrigerator) before fruiting.
Choosing the Right Grow Bag Size
Selecting the correct mushroom grow bag size is more than a matter of convenience — it directly affects colonization speed, contamination risk, and yield. Here's a deeper look at when to reach for each size.
Small bags (under 5" width) are primarily used for grain spawn production. Smaller volumes colonize faster, which means less time for contaminants to establish. If you're producing spawn to transfer into larger fruiting blocks, small bags keep your turnaround tight. They're also ideal for testing new liquid cultures or isolates before committing to a full production run.
Medium bags (5" x 5" x 20") strike a balance between grain spawn and small fruiting blocks. Home growers who produce 2–5 blocks per week often standardize on this size because it fits comfortably in most home pressure cookers. A single medium bag of supplemented sawdust yields roughly 200–400 grams of fresh oyster mushrooms per flush.
Large bags (8" x 5" x 18") are the standard for fruiting blocks in both home and small commercial operations. The wider footprint means better surface area for even colonization, and the volume (5–7 lbs of substrate) produces commercially viable yields. If you're only going to stock one size, large grow bags are the most versatile choice.
XL bags (8" x 5.5" x 25") shine in commercial settings where labour efficiency matters. Filling fewer, larger bags reduces your total handling time per kilogram of substrate. They're also the preferred choice for species like king oyster and lion's mane that benefit from larger block mass for thermal stability during colonization.
Pro tip: Match your bag size to your pressure cooker capacity. There's no point buying XL bags if your pressure cooker only fits two at a time — you'll spend more time on sterilization cycles than you save on filling.
Filter Patch Types: 0.2 Micron vs 0.5 Micron
Not all filter patches are created equal. The two most common pore sizes in mushroom cultivation are 0.2 micron and 0.5 micron, and each has its place.
0.5 micron filter patches are the standard for most mushroom grow bags, including our Satrise grow bags. They block the vast majority of airborne contaminants (mould spores typically range from 2–20 microns, bacteria from 0.5–5 microns) while allowing excellent gas exchange. For grain spawn, supplemented sawdust, and straw substrates, 0.5 micron is the right choice. The slightly larger pore size means better airflow, which is important during the high-metabolic colonization phase when mycelium is producing significant CO2.
0.2 micron filter patches provide near-HEPA-level filtration and are used in situations demanding the highest sterility:
- Liquid culture bags — where any bacterial contamination ruins the batch
- Long-term storage — bags that will sit colonized for weeks before use
- Extremely humid environments — where bacterial load in the air is higher
- Agar-based work in bags — where nutrient-rich media attracts more contaminants
The trade-off with 0.2 micron patches is reduced gas exchange. Mycelium in these bags may colonize slightly slower due to limited oxygen availability. For standard fruiting block production, 0.5 micron is faster and more than adequate.
When in doubt: Use 0.5 micron for anything going into a pressure cooker for sterilization and immediate inoculation. Reserve 0.2 micron for liquid culture work or situations where bags will remain sealed for extended periods.
How to Seal Grow Bags Properly
A poor seal is one of the most common contamination sources in mushroom cultivation. Whether you use an impulse sealer or the fold-and-clip method, technique matters.
Impulse Sealer Technique
An impulse sealer is the gold standard for closing mushroom grow bags. Unlike constant-heat sealers, impulse sealers deliver a brief burst of heat only when activated, giving you a clean, consistent weld without burning through the polypropylene. For a detailed breakdown of which sealer to buy and how to maintain it, see our impulse sealer guide.
Step-by-step sealing process:
Flatten the bag opening — Push air out gently from the bottom upward. You want minimal air inside, but don't compress the substrate. A small amount of air is fine and actually helps during sterilization (the air expands and helps steam penetrate).
Create a clean fold — Fold the bag material flat, ensuring no wrinkles or creases cross the seal line. Wrinkles create channels that compromise the seal's integrity.
Position above the filter patch — Your seal should be 2–5 cm above the filter patch. The patch needs clear airspace to function. If substrate or the seal itself covers the patch, gas exchange stops and your mycelium suffocates.
First seal — Run the bag through your impulse sealer with firm, even pressure. Hold for the full heating cycle (typically 2–3 seconds for standard polypropylene bags).
Second seal (recommended) — Make a parallel seal approximately 1 cm above the first. This redundancy ensures that even if one seal has a weak point, the bag remains closed. Commercial operations always double-seal.
Inspect — Pull gently on either side of the seal. It should hold firm with no separation. If you see any gaps or the seal peels apart, reseal.
Common sealing mistakes:
- Setting temperature too high (melts through the bag instead of welding)
- Setting temperature too low (seal looks closed but separates under pressure during sterilization)
- Sealing over wet or dirty material (moisture prevents a proper weld)
- Sealing with folds or creases in the bag material
Fold-and-Clip Alternative
If you don't yet own an impulse sealer, you can fold the bag top accordion-style (3–4 pleats) and secure with a large binder clip or zip tie. This method works but has higher failure rates — clips can slip off during sterilization, and the folds may not maintain a tight enough closure. If you're producing more than a few bags per month, investing in an impulse sealer pays for itself quickly in reduced contamination losses.
Common Mistakes with Mushroom Grow Bags
Beyond the basics, here are the mistakes we see most often from growers at all levels:
- Overfilling bags — Leave at least 30% of the bag empty for folding, sealing, and expansion during sterilization. An overfilled bag is nearly impossible to seal properly.
- Covering the filter patch with substrate or liquid — The patch must have clear airspace on both sides to function. When filling, keep substrate well below the patch level.
- Insufficient sterilization time — Err on the side of longer. Supplemented substrates (anything with bran, soy, or other nitrogen sources) require 2.5–3 hours at 15 PSI. Grain needs a minimum of 90 minutes. See our sterilization guide for species-specific times.
- Inoculating while warm — Always wait until bags reach room temperature (below 25°C). Warm substrate kills inoculant and creates conditions favouring heat-tolerant moulds like Bacillus species.
- Rough handling post-sterilization — Sharp impacts can create micro-tears invisible to the naked eye. Handle sterilized bags gently, and store them on smooth, clean surfaces away from sharp edges.
- Stacking too many bags in the pressure cooker — If steam can't circulate between bags, the centre bags won't reach sterilization temperature. Leave gaps, and consider standing bags upright rather than laying them flat.
- Using bags past their prime — Polypropylene degrades with UV exposure and repeated heat cycles. If a bag feels brittle, has visible discolouration, or the filter patch appears damaged, discard it.
- Opening bags to "check progress" — Every time you open a bag, you introduce contaminants. Judge colonization visually through the bag. If you can't see clearly, hold the bag up to a light source.
Can You Reuse Mushroom Grow Bags?
This is one of the most common questions we receive, and the honest answer is: you can, but you probably shouldn't.
The case for reusing:
- Reduces plastic waste
- Saves money on bag costs
- Polypropylene can technically withstand multiple autoclave cycles
The case against reusing:
- Micro-tears accumulate — Every handling, every sterilization cycle, every time you cut or fold the bag creates potential weak points. These micro-tears are invisible but provide entry points for contaminants.
- Filter patches degrade — The microporous filter material loses its structural integrity after repeated exposure to high heat and pressure. A degraded patch may allow contaminants through while appearing intact.
- Residual contamination — Even thorough washing may not remove all spores from the bag's interior surface. Bacterial biofilms can form in creases and folds.
- False economy — A single contaminated batch wastes far more in substrate, spawn, time, and lost production than the cost of a new bag. At roughly $0.50–$1.00 per bag, fresh grow bags are cheap insurance.
If you do reuse bags:
- Only reuse bags that had successful, contamination-free runs
- Wash immediately after emptying with hot soapy water
- Inspect thoroughly for tears, thin spots, or patch damage
- Limit reuse to 2–3 cycles maximum
- Never reuse a bag that held a contaminated batch — discard immediately
For most growers, the small cost of fresh bags is worth the peace of mind. Save your reuse efforts for other areas of your operation where the contamination risk is lower.
Frequently Asked Questions
How many times can you autoclave a mushroom grow bag?
Quality polypropylene grow bags (2.5+ mil thickness) can typically withstand 2–3 autoclave cycles before the material begins to degrade noticeably. However, each cycle weakens the bag incrementally — both the polypropylene body and the filter patch. For production runs, we recommend using fresh bags every time. For experimental or low-stakes batches, a twice-used bag in good condition is generally acceptable.
Do mushroom grow bags need air holes?
No — and you should never punch holes in a sealed grow bag during colonization. The filter patch provides all necessary gas exchange. Adding holes bypasses the contamination barrier and exposes your substrate to airborne moulds and bacteria. The only time you cut the bag is when you're ready to fruit (after full colonization), and even then you're making deliberate, controlled openings.
What size grow bag do I need for 5 lbs of substrate?
A large bag (8" x 5" x 18") comfortably holds 5–7 lbs of hydrated substrate with room for proper sealing. This is the most popular size for standard fruiting blocks. If you're making grain spawn at 5 lbs, the large bag also works, though you could get away with a medium bag if you pack efficiently. Always leave at least 30% empty space at the top.
Can I use regular plastic bags instead of grow bags?
Absolutely not. Regular plastic bags — including food-grade polyethylene — will melt, warp, or release toxic fumes at autoclave temperatures (121°C). Mushroom grow bags are made from autoclavable polypropylene specifically rated for repeated high-temperature, high-pressure exposure. They also have the critical filter patch for gas exchange. Using substitute materials risks contamination, toxic exposure, and wasted substrate. The cost difference is minimal compared to the risk.
How long does it take for mycelium to colonize a grow bag?
Colonization time depends on the species, substrate type, inoculation rate, and temperature. As a general guide:
- Grain spawn (medium bag): 10–21 days at 21–24°C
- Supplemented sawdust fruiting block (large bag): 14–30 days at 21–24°C
- Straw-based substrate: 10–18 days at 21–27°C
Higher spawn ratios (10–20% spawn to substrate by weight) colonize faster. Warmer temperatures speed colonization but increase contamination risk. Aim for the species' optimal range rather than maximizing speed.
Explore More
Ready to dive deeper into mushroom cultivation? Check out our complete substrate guide for detailed recipes, our beginner's complete guide for a start-to-finish overview, or our shiitake growing guide for species-specific tips.
All Nature Lion grow bags, spawn, and substrates are available from our CFIA-licensed facility in Brantford, Ontario. We're growers ourselves, and every product we sell is one we use in our own cultivation.
Need help with your grow? Dr. MycoThumb is our free AI growing assistant — ask about substrates, contamination, fruiting conditions, or any cultivation question. Available 24/7 in the chat bubble at the bottom-right of every page.