If someone asks us what mushroom they should grow first, the answer is always oyster mushrooms. Every time. They're fast, they're forgiving, they're prolific, and they taste fantastic. An oyster mushroom grow kit can go from box to plate in under two weeks, and even homemade fruiting blocks from grain spawn are straightforward enough for a first-timer.
But oyster mushrooms aren't just a beginner species. Plenty of commercial farms across Canada grow nothing but oysters because they're reliably productive and always in demand. This guide covers every method from your first kit through bucket tek and hardwood pellet blocks — everything you need whether you're growing for your kitchen or your farmers' market booth.
The Oyster Mushroom Family
"Oyster mushroom" actually refers to several distinct species, each with its own personality. Here's what you need to know about the varieties we carry, with honest notes on how each performs in Canadian conditions.
Blue Oyster (Pleurotus ostreatus var. columbinus)
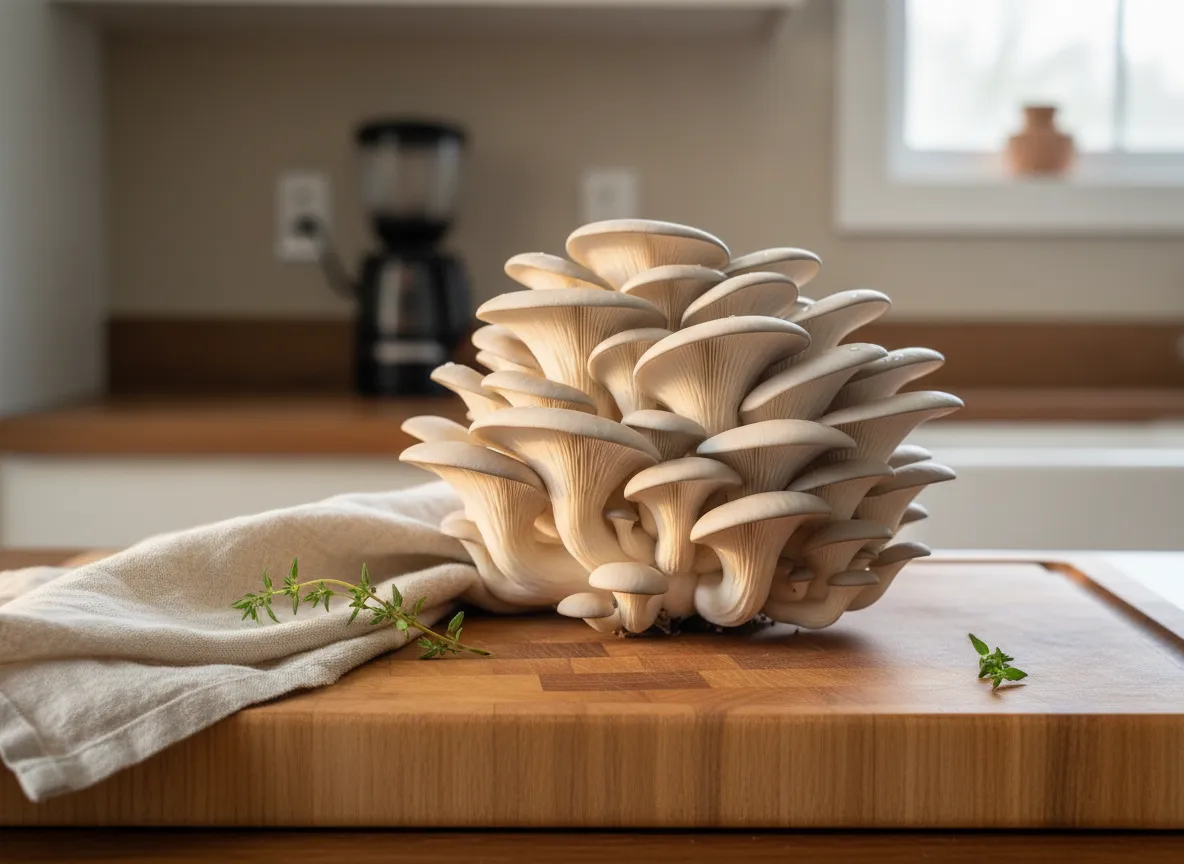
The workhorse. Blue Oyster thrives in cool temperatures — 10-21°C (50-70°F) — which makes it the ideal species for Canadian growers. It fruits happily in basements, garages, and unheated rooms through fall, winter, and spring. The caps are steel blue when young, fading to grey as they mature. Flavour is mild, with a velvety texture that works in virtually any dish.
If you can only grow one oyster, make it this one. Blue Oyster grow kit | Blue Oyster spawn
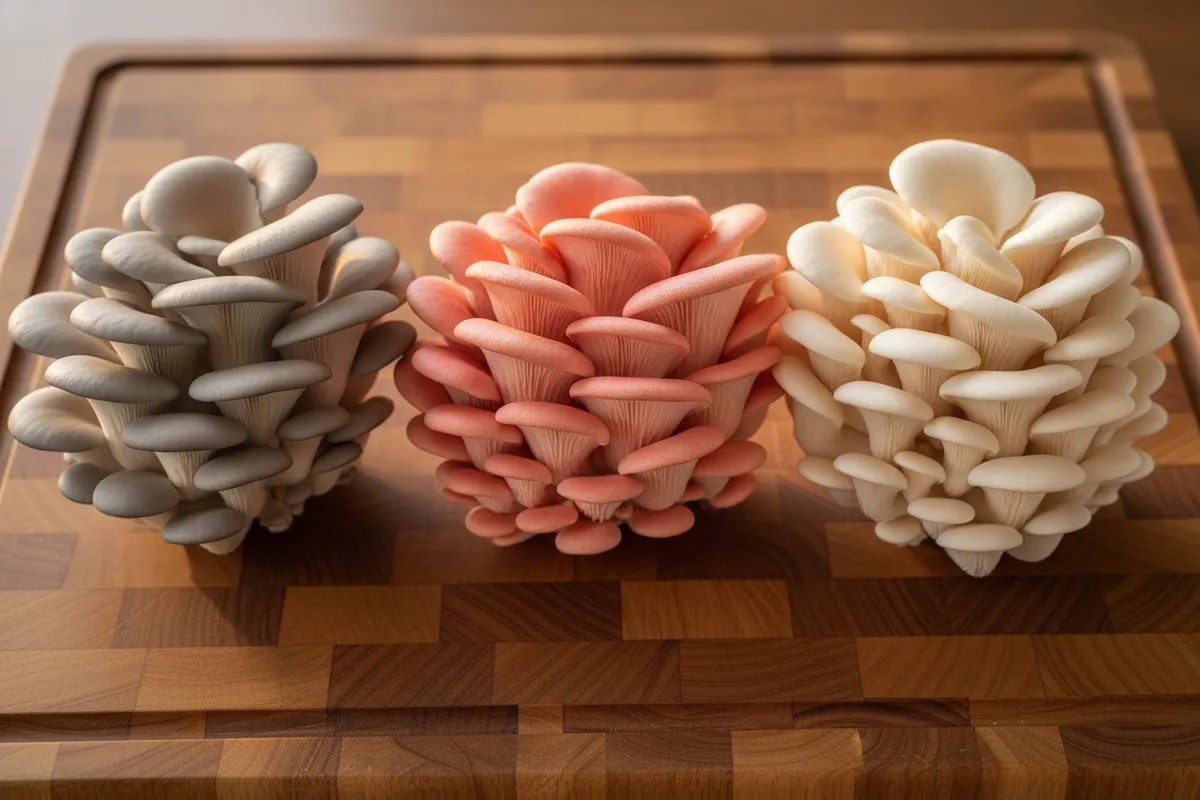
Pink Oyster (Pleurotus djamor)
The showstopper. Bright flamingo-pink caps that grow in dramatic ruffled clusters. Pink Oyster is a tropical species that needs warmth — 18-30°C (64-86°F). In Canada, that means it's a summer grower, or you need a heated space. It grows astonishingly fast in the right conditions — we've seen kits go from pins to harvest in four days.
The flavour is meatier than other oysters, sometimes described as bacon-like when seared. One important note: Pink Oyster does not store well. Cook it the day you harvest it. Read our complete Pink Oyster growing guide for temperature tips, troubleshooting, and recipes. Pink Oyster grow kit | Pink Oyster spawn
Black Oyster (Pleurotus ostreatus)
Very similar to Blue Oyster in growth characteristics and temperature range (10-21°C / 50-70°F), but with darker caps that range from deep grey to nearly black. Slightly firmer texture than Blue Oyster. Performs beautifully in Canadian conditions — essentially interchangeable with Blue Oyster in terms of growing requirements.
Black Oyster grow kit | Black Oyster spawn
White Oyster (Pleurotus ostreatus)
The mildest-flavoured oyster with clean white caps. Same temperature range as Blue and Black — cool-tolerant and well-suited to Canadian growing. Popular with restaurants for its clean presentation and delicate flavour. Grows slightly slower than Blue Oyster but produces dense, meaty clusters.
White Oyster grow kit | White Oyster spawn
King Blue Oyster (Pleurotus ostreatus x eryngii hybrid)
A hybrid that combines the easy-growing nature of Blue Oyster with the thick, meaty stem of King Oyster. Fruiting temperature is 10-18°C (50-64°F) — it actually prefers it cold, making it excellent for Canadian basements and garages in winter. The thick stems are the star here; they have a firm, almost scallop-like texture when sliced and seared.
Why Oysters Are Perfect for Beginners
We're not being diplomatic when we recommend oysters first. There are specific biological reasons they're easier than other species:
They're aggressive colonizers. Oyster mycelium grows fast and strong, which means it outcompetes contamination more effectively than slower species like Lion's Mane or Shiitake. If your sterile technique isn't perfect (and whose is, starting out?), oysters are the most likely to succeed anyway.
They're substrate-flexible. Oysters will grow on straw, sawdust, cardboard, coffee grounds, paper, cotton, corn cobs — almost any cellulose-based material. This means you can experiment with different substrates without worrying about species compatibility.
They're temperature-flexible. Between the different oyster species, you can cover the entire range from 10°C to 30°C (50°F to 86°F). There's an oyster for every season in Canada.
They fruit prolifically. Oyster mushrooms produce multiple flushes, and the total biological efficiency (mushroom weight as a percentage of dry substrate weight) can exceed 100%. You can literally get more mushroom than you started with in substrate.
They pin easily. Some species need a complex set of environmental triggers to initiate fruiting. Oysters basically just need fresh air and a bit of light. Open the bag, and they'll start.
Method 1: Grow Kit
The fastest path to fresh oysters. A grow kit is a fully colonized block, ready to fruit.
Step-by-step:
Choose your species. For your first kit, we strongly recommend Blue Oyster (year-round in most Canadian homes) or Pink Oyster (if your home is above 20°C / 68°F).
Cut the bag. Make an X-shaped slit about 7-10 cm across. Some growers prefer cutting a rectangular flap. Place the kit where it'll get indirect light — a kitchen counter is classic.
Mist 2-3 times daily. Spray the opening with clean water from a fine mist spray bottle. You want the surface moist, not dripping. If you're away during the day, loosely tent a plastic bag over the opening to hold humidity — but don't seal it shut. Oysters need fresh air.
Watch for pins (3-7 days). Small bumps will form at the opening, then rapidly develop into recognizable mushroom shapes. Oyster mushrooms grow fast — daily photo comparisons are fun at this stage.
Harvest (days 7-14 from cutting). Pick the entire cluster when the cap edges are still slightly curled downward. Don't wait for the caps to flatten out completely — once they do, the mushroom is past its prime, the texture gets tougher, and spore release begins in earnest. (Oyster mushroom spore loads can be heavy — people with respiratory sensitivity should harvest promptly.)
Second and third flush. Soak the block in cold water for 2-4 hours, drain, return to its spot, and resume misting. Expect 2-3 flushes from a kit, sometimes four.
Method 2: Straw Substrate + Grain Spawn
This is the classic oyster mushroom method, used by hobbyists and commercial growers alike. Straw is cheap, available at any farm supply store in Canada, and oysters absolutely love it.
What you need:
- Grain spawn — oyster variety of your choice
- Wheat or oat straw — one small bale is enough for several grows
- A large pot or drum for pasteurization
- Grow bags or 5-gallon buckets
- A thermometer
Pasteurization:
Unlike hardwood sawdust blocks, straw only needs pasteurization (not sterilization). This kills most competing organisms while leaving some beneficial bacteria that actually help the oyster mycelium.
Chop the straw into 5-10 cm lengths. A garden shredder works, or stuff it in a garbage can and go at it with a string trimmer. Shorter pieces pack better and colonize faster.
Submerge in hot water. Heat water to 70-80°C (160-175°F) and hold the chopped straw submerged for 60-90 minutes. You don't need a full rolling boil — sustained heat in this range is what matters. A large stock pot, a turkey fryer, or a barrel with a propane burner all work.
Drain and cool. Pull the straw out and let it drain and cool to below 27°C (80°F). Spread it on a clean surface for faster cooling if needed. It should feel damp but not dripping — roughly the moisture of a wrung-out sponge.
For more detail on this process, see our guide on how to pasteurize straw.
Mixing and bagging:
Layer or mix. In a clean container, combine the cooled straw with grain spawn at roughly a 10% spawn rate by weight. You can layer (straw-spawn-straw-spawn) or mix thoroughly — both work.
Pack into bags or buckets. For bags, use filter-patch grow bags and pack the straw-spawn mix tightly, squeezing out air pockets. For buckets, use a clean 5-gallon bucket with 1 cm holes drilled in a grid pattern every 10-15 cm.
Incubate. Store at 20-24°C (68-75°F) in a dark, clean area. The straw will colonize in 10-21 days. You'll see white mycelium spreading through the straw — this is good. Green or black patches mean contamination — remove the affected bag/bucket and check your pasteurization process.
Fruit. Once colonized, move to your fruiting area. For bags, cut slits where you want mushrooms to emerge. For buckets, mushrooms will fruit from the holes. Provide humidity, light, and fresh air.
Method 3: Hardwood Pellet Blocks
Hardwood fuel pellets give you a cleaner, more consistent substrate than straw, and they're available year-round at any Canadian hardware store. This method works for all oyster species and produces dense, high-quality mushrooms.
Hydrate pellets. Add boiling water to hardwood pellets at roughly a 2.5:1 ratio (pellets to water by weight). Stir as the pellets absorb water and break apart into sawdust.
Supplement (optional). Add wheat bran or soy hull pellets at 10-15% by dry weight. Supplementation increases yield but also increases contamination risk — skip it for your first few blocks.
Bag and sterilize. Load into filter-patch grow bags and pressure cook at 15 PSI for 2-2.5 hours. Let cool completely.
Inoculate. In front of a still air box, add grain spawn at 5-10% by weight. Seal and mix thoroughly.
Colonize. 2-3 weeks at 21-24°C (70-75°F). Oysters colonize pellet blocks faster than most species.
Fruit. Cut slits, provide conditions, harvest.
For more on using pellets, see growing mushrooms on hardwood pellets. For substrate recipes and ratios, check the mushroom substrate guide, or plug your batch size into our Bulk Substrate Calculator for exact measurements.
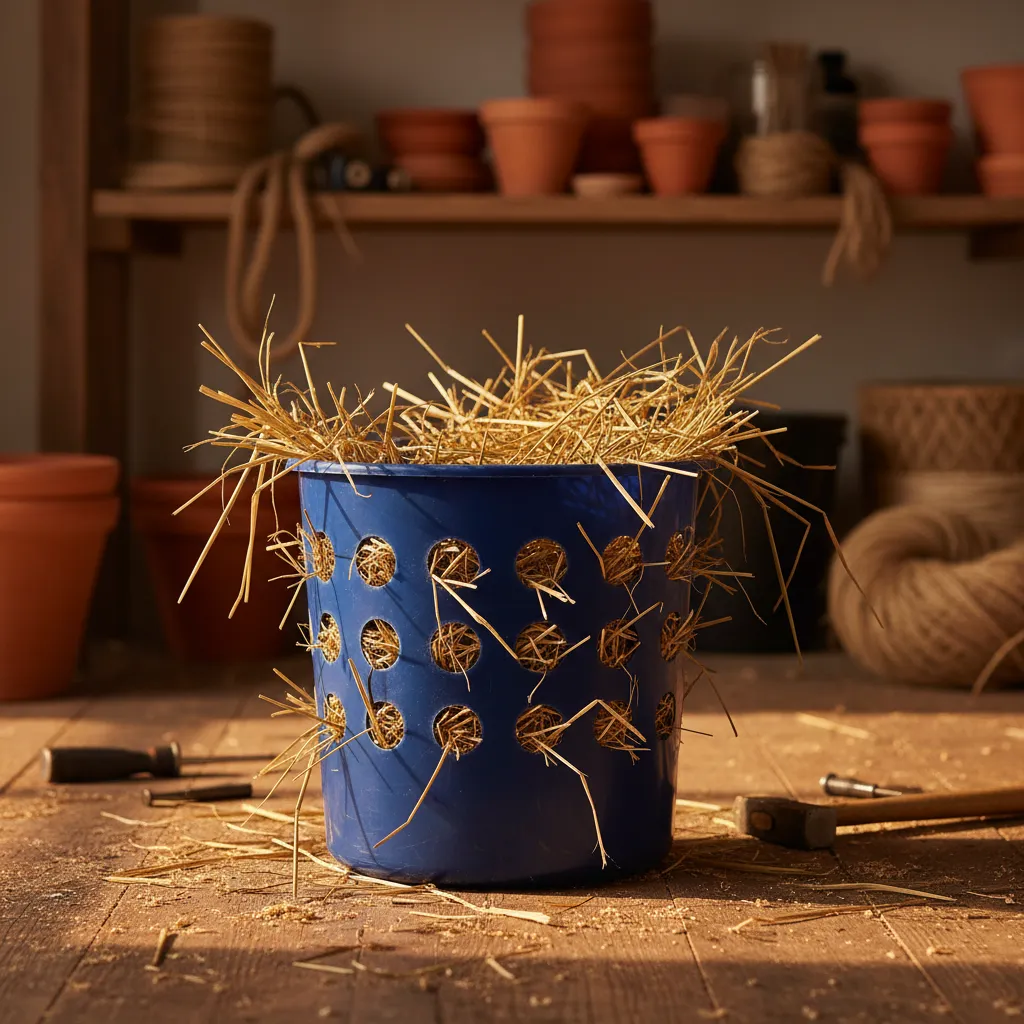
Method 4: Bucket Tek
The 5-gallon bucket method is beloved by hobbyist growers because it's simple, produces a lot of mushrooms, and looks impressive sitting on a patio or in a garage.
What you need:
- A clean 5-gallon bucket with lid
- A drill with a 1 cm bit
- Chopped, pasteurized straw
- Oyster mushroom grain spawn
Steps:
Drill holes. Make rows of 1 cm holes around the bucket, spaced about 10-15 cm apart in all directions. Four or five rows of 4-5 holes usually works well.
Pasteurize straw as described in Method 2.
Layer it up. Alternate layers of pasteurized straw (about 5-8 cm thick) with handfuls of grain spawn. Pack each layer firmly. End with a straw layer on top.
Put the lid on and store at room temperature. Colonization takes 2-3 weeks.
Fruit. Once you see mycelium poking out of the holes, move the bucket to a spot with indirect light and mist the holes 2-3 times daily. Mushrooms will emerge from the holes in beautiful clusters.
Bucket tek is also a great option if you're growing outdoors in Canadian summer. Set the bucket on a shaded porch or under a tree, and the ambient humidity is often sufficient for Blue Oyster without any misting.
TempPro TP50 Digital Hygrometer & Thermometer
Different oyster species need different temperatures. A hygrometer takes the guesswork out of matching your growing space to the right species for the season.
View on Amazon.ca →When you buy through our links, it supports our mycology research at no extra cost to you.
Environmental Requirements by Species
This is important — different oyster species need different conditions. Using the wrong temperature for your species is the most common reason for poor yields.
| Species | Fruiting Temp | Humidity | Speed | Canadian Season |
|---|---|---|---|---|
| Blue Oyster | 10-21°C (50-70°F) | 80-95% | Fast | Fall, winter, spring |
| Pink Oyster | 18-30°C (64-86°F) | 80-95% | Very fast | Summer only (or heated space) |
| Black Oyster | 10-21°C (50-70°F) | 80-95% | Fast | Fall, winter, spring |
| White Oyster | 10-21°C (50-70°F) | 80-95% | Moderate | Fall, winter, spring |
| King Blue | 10-18°C (50-64°F) | 85-95% | Moderate | Fall, winter |
For Canadian growers: The takeaway is straightforward. Blue, Black, and White Oyster are your three-season workhorses — they perform best when Canadian homes are naturally in the 15-20°C range. Pink Oyster is a summer project, perfect for July and August when your basement or kitchen is warm. King Blue actually likes it the coldest, so if you have an unheated garage or cold basement, it's your pick for deep winter growing.
How to Grow King Oyster Mushrooms
King Oyster (Pleurotus eryngii), also called King Trumpet, is the outlier in the oyster family. Unlike its shelf-fruiting relatives that grow in cascading clusters from the side of a bag, King Oyster produces thick, meaty individual stems with small caps — and those stems are the prize. Sliced into medallions and seared, they have a texture remarkably close to scallops. They're the most commercially valuable oyster species by weight, and they grow beautifully in Canadian conditions.
Substrate Requirements
King Oyster demands supplemented hardwood sawdust. Plain straw or unsupplemented pellets won't produce worthwhile results — this species needs the extra nutrition. The standard recipe is hardwood fuel pellets supplemented with 15-20% wheat bran or soy hull pellets by dry weight. Because supplemented substrates are contamination-prone, you must sterilize (pressure cook at 15 PSI for 2.5 hours), not merely pasteurize. If you're unfamiliar with supplemented substrates, review our mushroom substrate guide for ratios and sterilization protocols.
Temperature and Fruiting
King Oyster prefers cooler fruiting temperatures than most gourmet species — 12-18°C (54-64°F) is the sweet spot. This makes Canadian basements and garages ideal fruiting environments from October through April. Higher temperatures produce thinner stems and larger caps, which defeats the purpose of growing this species. If your space is warmer than 18°C, wait for cooler weather or use an unheated room.
Top-Fruiting Technique
Unlike other oysters that fruit from side slits, King Oyster performs best when fruited from the top of the bag. Once colonization is complete (which takes longer than other oysters — expect 3-4 weeks), roll down or cut away the top of the bag to expose the surface. The mushrooms will emerge upward, developing those characteristic thick stems when given adequate fresh air exchange. Poor air exchange produces spindly, elongated stems without the desired girth.
Colonization and Patience
King Oyster colonizes more slowly than Blue or Pink Oyster — plan for 21-28 days of incubation at 21-24°C before initiating fruiting. The mycelium appears wispy and less aggressive than other oyster species during colonization. This is normal. Don't mistake slower growth for a problem. Once fruiting begins, mushrooms develop over 7-10 days, considerably slower than the rapid 4-5 day flushes you see with Blue Oyster.
If you're ready to try this premium species, pick up some King Trumpet grain spawn and a bag of supplemented hardwood substrate. The patience pays off — King Oyster commands premium prices at farmers' markets, often $18-25 per pound.
Growing Blue Oyster Mushrooms in Cold Climates
Blue Oyster is already the go-to species for Canadian growers, but its cold tolerance is genuinely remarkable — and most guides understate just how well it performs in conditions that would stall other species entirely. If you've been limiting your growing to heated spaces, you're missing out on Blue Oyster's greatest strength.
Cold Tolerance: How Low Can You Go?
Blue Oyster will initiate pinning at temperatures as low as 10°C (50°F). Growth slows below 12°C, but it doesn't stop. We've seen healthy flushes develop over 10-14 days at 10-12°C where they'd normally take 5-7 days at 18°C. The mushrooms grown in cold conditions are actually denser and meatier than warm-grown ones — the slow development produces a firmer texture with deeper colour.
This cold tolerance opens up growing spaces that most Canadians write off during winter: unheated garages, garden sheds, enclosed porches, and even unfinished basements. Any space that stays above freezing (0°C) but below 21°C is Blue Oyster territory for at least eight months of the year in most of Canada.
Winter Growing in Garages and Sheds
The key challenge with unheated spaces isn't temperature — it's humidity. Cold air holds less moisture, and Canadian winters are notoriously dry. Here's how to maintain fruiting conditions in an unheated space:
Humidity management: A simple humidity tent works wonders. Drape clear plastic sheeting over a wire shelf rack to create a small enclosure, then mist inside the tent 3-4 times daily. The enclosed space holds humidity far better than the open garage. A small ultrasonic humidifier on a timer inside the tent automates this entirely.
Temperature monitoring: Install a min/max thermometer in your growing space. Blue Oyster tolerates cold, but a hard freeze will damage exposed pins. If your garage dips below -2°C during extreme cold snaps, bring fruiting blocks inside temporarily or add a small space heater set to 5°C as a frost guard.
Fresh air exchange: Cold-weather growing actually simplifies air exchange. The temperature differential between your humidity tent and the surrounding space creates natural convection. Open the tent flaps for 10-15 minutes twice daily to flush CO2 — that's usually sufficient.
Seasonal Strategy for Canadian Growers
The smartest approach is to match your species to the season. Grow Blue Oyster from September through May when ambient temperatures naturally sit in the 10-20°C range. Switch to Pink Oyster for June through August when heat makes Blue Oyster sluggish. This year-round rotation means you're always harvesting fresh mushrooms without fighting your environment.
For winter growing, start with Blue Oyster grain spawn and either straw (pasteurized) or hardwood pellet blocks. Bucket tek in a cold garage is particularly effective — the thermal mass of the bucket moderates temperature swings, and the holes provide natural air exchange. By January, while most gardens are dormant, you'll be harvesting fresh oyster mushrooms weekly.
Troubleshooting
Long, leggy stems with tiny caps
Cause: Not enough fresh air. The mushrooms are stretching toward oxygen. This is the most common oyster mushroom issue.
Fix: Increase ventilation immediately. Open up your tent, fan more aggressively, move the block to a less enclosed area. Leggy oysters are still edible — they just don't look or taste as good as properly grown ones with wide, substantial caps.
Small mushrooms or low yield
Cause: Usually one of three things: substrate too dry, not enough spawn (low inoculation rate), or temperatures outside the species' preferred range.
Fix: Check substrate moisture (should feel like a wrung-out sponge). Use at least a 10% spawn rate. Verify your temperature is in range for the species you're growing. Also make sure you're harvesting at the right time — picking too early obviously reduces yield.
Contamination (green mould)
Cause: Trichoderma, the arch-nemesis of mushroom growers. It thrives on the same substrates mushrooms do, and it's everywhere in the environment.
Fix: Prevention is the only reliable answer. Ensure thorough pasteurization (straw) or sterilization (hardwood). Use a clean workspace. Use a healthy spawn rate — more spawn means faster colonization, which means less opportunity for contaminants. If a bag is contaminated before it's colonized, discard it. If a kit develops a small green patch after fruiting has started, you can sometimes cut it away and continue — the mature mycelium may hold the contamination at bay for a flush or two.
Mushrooms growing from unexpected places
Cause: This isn't really a problem — oyster mycelium is opportunistic and will fruit from any gap, seam, or pinhole in the bag. But it can be inconvenient if mushrooms are growing from the bottom or back of the bag.
Fix: When you cut your fruiting slit, make it generous. The mushrooms will preferentially fruit from the largest opening where they sense the most fresh air and light. Tape over any accidental holes in the bag.
Harvesting and Storage
When to harvest: The perfect moment is when the cap edges are still curled slightly downward. Once they flatten out, and especially once they turn upward, the mushroom is over-mature. It's still edible, but the texture is tougher, the flavour is milder, and spore release becomes heavy. Harvest the entire cluster at once by twisting it off at the base.
Storage: Store fresh oyster mushrooms in a paper bag in the refrigerator. Never use plastic bags — they trap moisture and accelerate spoilage. Properly stored, home-grown oysters last 7-10 days in the fridge. Pink Oyster is the exception — it deteriorates within 1-2 days regardless of storage method. Cook it immediately.
Preserving: Oyster mushrooms dehydrate well (a basic food dehydrator at 55°C / 130°F for 4-6 hours works fine). They also freeze well if cooked first — saute them in butter or oil, cool, and freeze in portions.
Cooking Oyster Mushrooms
You grew these yourself, so let's not waste them on a mediocre preparation. Here are three methods that make oyster mushrooms genuinely shine:
1. The Dry Sear
Heat a pan over medium-high until very hot. Add torn oyster mushroom pieces in a single layer — no oil yet. Let them cook undisturbed for 2-3 minutes until the bottom is golden and the moisture has cooked out. Flip, add butter and salt, cook another 2 minutes. The edges should be crispy, the center tender. This is the method that makes converts.
2. Crispy Fried Oysters
Dredge torn oyster clusters in seasoned flour (or a mixture of cornstarch and flour), dip in buttermilk, dredge again. Deep fry or pan fry at 180°C (350°F) until golden. These are absurdly good — crispy on the outside, tender and almost juicy inside. The texture genuinely rivals fried chicken.
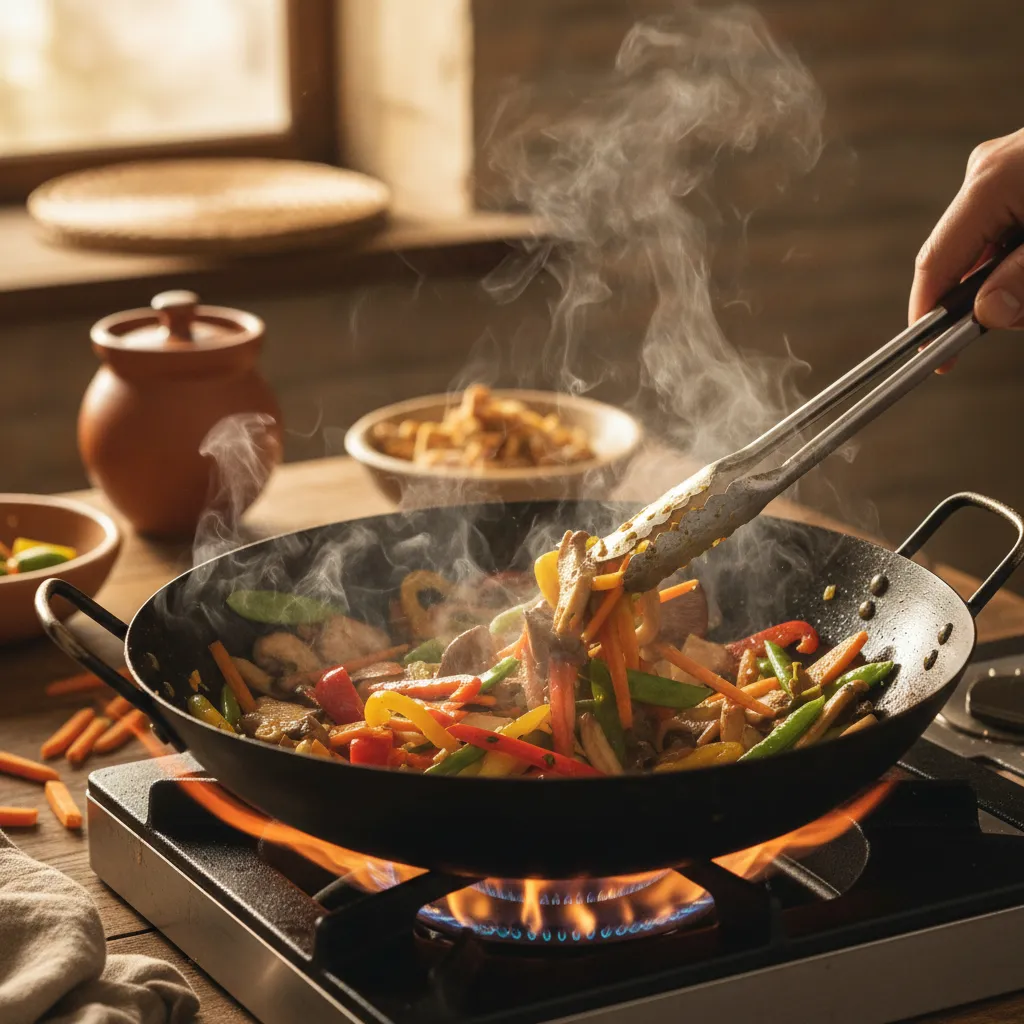
3. Quick Stir-Fry
Tear into bite-sized pieces. Stir-fry in a very hot wok with oil, garlic, ginger, and soy sauce. Cook just until they wilt and take on colour — 2-3 minutes max. Oyster mushrooms overcook easily in a stir-fry, turning slimy if left too long. Keep the heat high and the time short.
Oyster mushrooms are the gateway species that has launched thousands of mushroom growing obsessions, and for good reason. They're quick, dependable, delicious, and endlessly versatile in both how you grow them and how you cook them. Start with a kit, work your way up to spawn and substrate, and before long you'll be eyeing that spare room and doing the math on a farmers' market table.
Browse our full range of oyster mushroom grow kits, grain spawn, and growing supplies, or read the complete guide to growing mushrooms in Canada for the big picture.
Want to grow this species? Dr. MycoThumb is our free AI growing assistant — ask about growing conditions, substrate recipes, troubleshooting, and more. Available 24/7 in the chat bubble at the bottom-right of every page.
Looking for more advanced techniques? Mushroom Growing Tips has 14 detailed oyster mushroom tips covering every variety, substrate option, and fruiting parameter.