Once you have a single jar of healthy, colonized grain spawn, you can turn it into four, six, or even ten jars without buying another syringe, making another agar plate, or waiting for anything to grow from scratch. That's the power of grain-to-grain transfer, universally known as G2G.
G2G is the fastest way to scale up your spawn production. A single quart jar of colonized grain can inoculate multiple jars of fresh, sterilized grain in minutes. Those new jars colonize faster than syringe-inoculated jars because you're starting with thousands of active inoculation points instead of a few drops of liquid. Most G2G jars reach full colonization in 7-14 days — roughly half the time of a fresh inoculation.
If you're making your own mushroom spawn, G2G is the technique that makes it economically practical.
What Is Grain-to-Grain Transfer?
G2G is exactly what it sounds like: taking colonized grain from one jar and adding it to jars of fresh, sterilized grain. The colonized grains act as thousands of individual inoculation points, each one a starting node for mycelial growth into the surrounding fresh grain.
Think of it this way: when you inoculate a jar with a liquid culture syringe, you're creating maybe 2-4 inoculation points where the liquid contacts grain. When you G2G, you're dumping hundreds of individually colonized grains into fresh grain — each one starts growing immediately. That's why G2G colonization is so much faster.
Why G2G Instead of Other Methods?
Speed. G2G jars colonize in roughly half the time of syringe-inoculated jars. Aggressive species like oyster mushrooms can fully colonize a G2G jar in under a week at warm temperatures.
Cost. One liquid culture syringe or agar plate can produce one jar of spawn. That one jar can then be G2G'd into 4-10 more jars. Those jars can each be G2G'd again. The multiplication factor is enormous.
Consistency. Every jar receives the same genetics — the same strain, the same vigor. This is especially valuable if you've isolated a strong strain through agar work and want to scale it up without variation.
Simplicity. No syringes, no needles, no liquid. Just two jars and gravity. The technique is less fiddly than syringe inoculation once you've done it a couple of times.
Equipment Needed
- Colonized grain jar — your "mother" or "donor" jar, fully colonized and confirmed clean
- Fresh sterilized grain jars — prepared and sterilized as described in our spawn making guide
- Still air box or laminar flow hood
- 70% isopropyl alcohol in a spray bottle
- Nitrile gloves
- Lighter or alcohol lamp (for flame sterilizing jar rims if desired)
That's it. No special tools.
The G2G Process: Step by Step
Step 1: Prepare Your Workspace
Set up your SAB or flow hood. Wipe down the interior with 70% iso. Place your colonized donor jar, your fresh sterilized jars, iso spray bottle, and lighter inside. Wipe down the exterior of every jar.
Let the air settle for 30-60 seconds after inserting your arms.
Step 2: Break Up the Donor Jar
Before opening anything, shake the colonized donor jar vigorously against the palm of your hand. You want to break the colonized grain into individual kernels or small clumps. The better you break it up, the more evenly it distributes into the recipient jars.
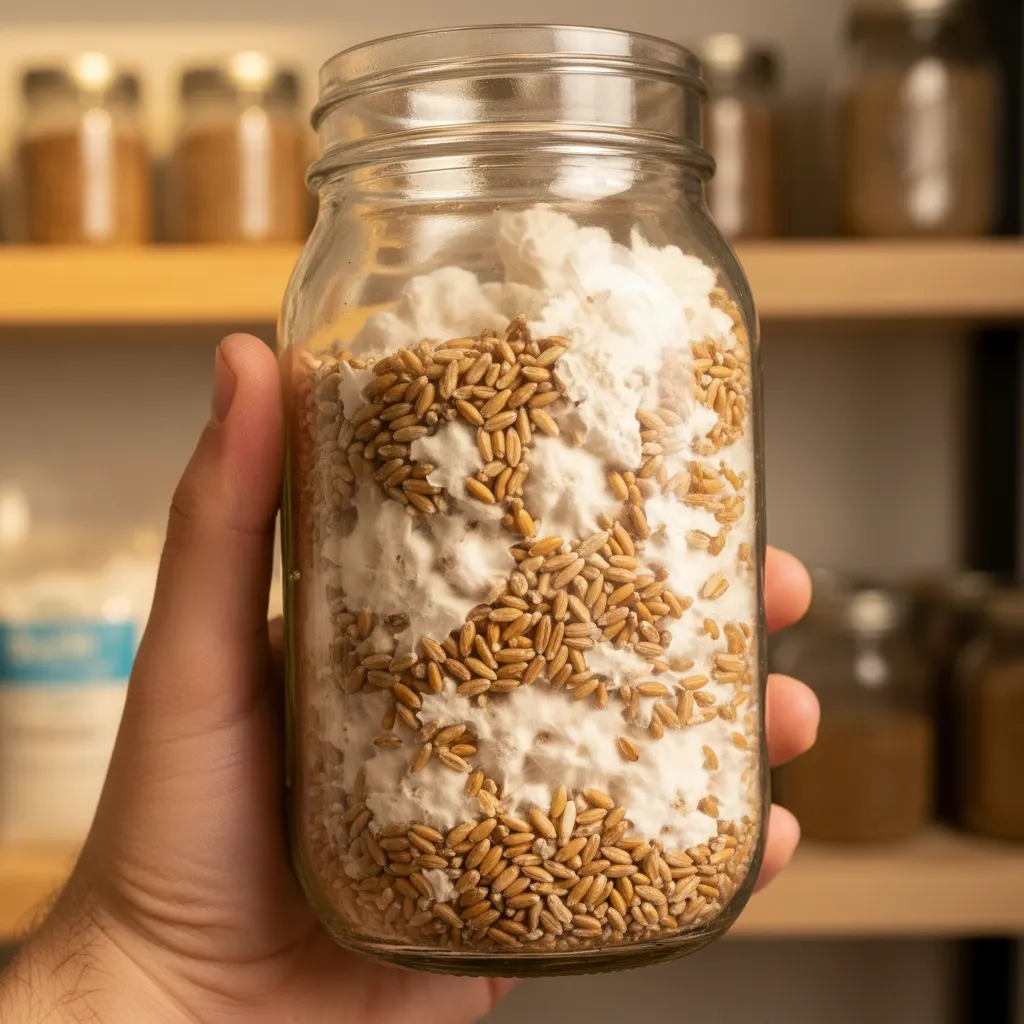
If the grain is stuck in a solid mass that won't break, roll the jar firmly between your palms or tap the bottom against a padded surface. Fully colonized grain should break apart with moderate effort. If it absolutely won't break, you can use a clean, flame-sterilized fork or skewer to break it up after opening — but this adds contamination risk.
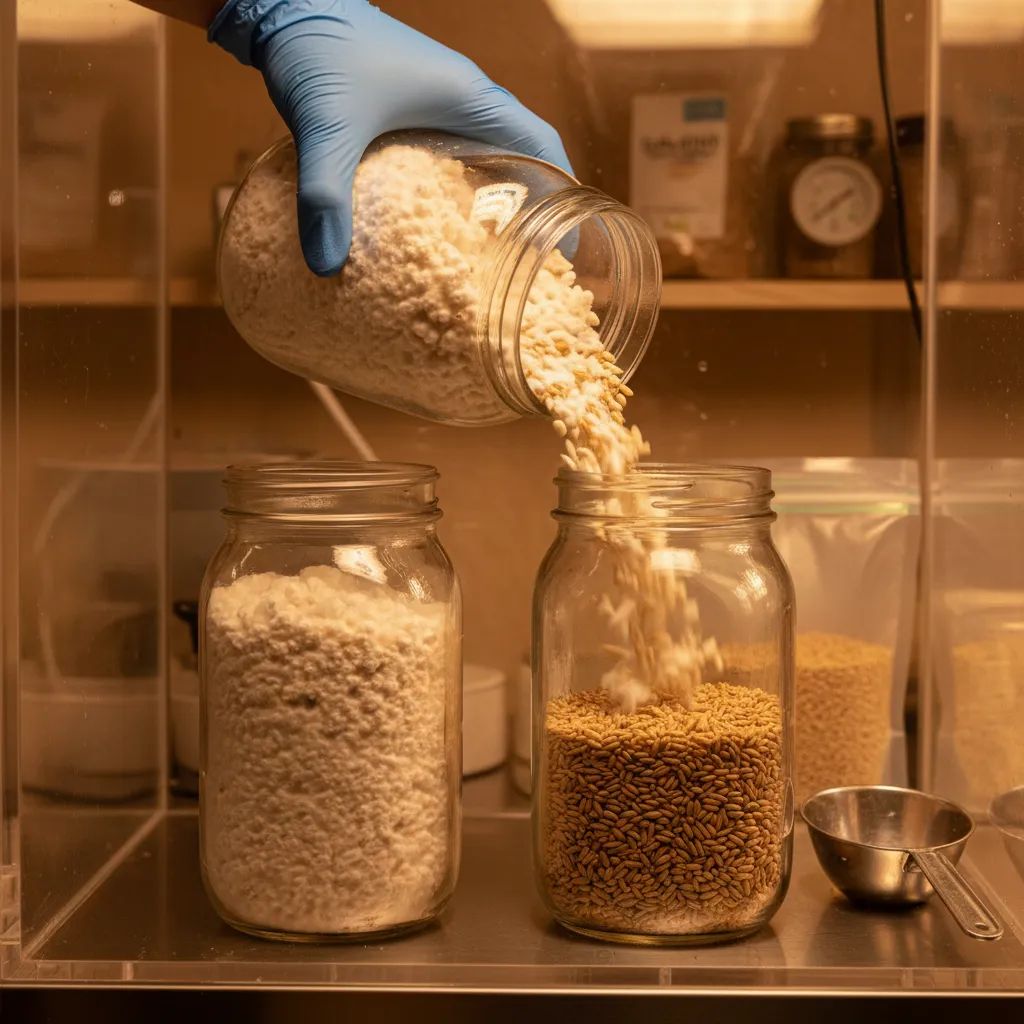
Step 3: Open and Transfer
This is the moment that matters. Move deliberately and calmly.
- Remove the lid from the donor jar. Set it aside, open side up.
- Remove the lid from the first recipient jar. Hold it close to the donor jar.
- Pour colonized grain from the donor into the recipient. You want to add roughly 10-25% colonized grain by volume. For a quart jar of fresh grain, that means adding roughly 60-120 mL (1/4 to 1/2 cup) of colonized grain.
- Close the recipient jar immediately. Snap the lid back on.
- Repeat for each recipient jar.
- Close the donor jar when you're done.
The entire transfer for each jar should take 5-10 seconds of open air exposure. Open, pour, close. Don't linger.
Step 4: Shake the Recipient Jars
Once all transfers are done and all lids are closed, shake each recipient jar to distribute the colonized grain throughout the fresh grain. You want the colonized kernels scattered evenly, not sitting in a clump at the top.
Step 5: Label and Incubate
Label each jar with:
- Species and strain
- Date of transfer
- Generation (G1, G2, G3, etc.)
Place them in your incubation area at 21-27°C (70-80°F). G2G jars colonize fast — check them daily.
Bernardin Wide-Mouth Mason Jars — 12 Pack
You'll burn through jars fast once you start doing G2G transfers. A 12-pack of Bernardin wide-mouth jars keeps you stocked for multiple rounds of spawn expansion.
View on Amazon.ca →When you buy through our links, it supports our mycology research at no extra cost to you.
Ratios: How Far Can You Stretch One Jar?
The ratio of colonized grain to fresh grain determines how many jars you can make from one donor and how fast they'll colonize.
| Ratio (colonized:fresh) | Jars from 1 quart donor | Colonization speed | Contamination risk |
|---|---|---|---|
| 1:2 | 2 jars | Very fast (5-10 days) | Low |
| 1:4 | 4 jars | Fast (7-14 days) | Low-moderate |
| 1:6 | 6 jars | Moderate (10-18 days) | Moderate |
| 1:10 | 10 jars | Slower (14-21 days) | Higher |
Our recommendation: 1:4 is the sweet spot. It gives you a 4x multiplication with reliable colonization speed and manageable contamination risk. More aggressive ratios (1:6, 1:10) work with vigorous species like oyster mushrooms but are riskier with slower colonizers.
For beginners, start with 1:2 or 1:3 until you're confident in your technique. The faster colonization reduces the window for contamination, giving you more margin for error.
Generations: How Many Times Can You G2G?
Each G2G transfer is a "generation." Your original culture (from agar or liquid culture) is Generation 0. The first spawn jar is G1. G2G from that jar produces G2, and so on.
How many generations is safe?
Most growers recommend staying within 3-5 generations of your original culture. Beyond that, you may see:
- Reduced vigor — slower colonization, smaller fruits
- Sector loss — the culture may drift genetically, losing desirable traits
- Increased contamination risk — weaker mycelium is less competitive
To reset, go back to your original agar culture or liquid culture stock and start a fresh G1. This is why maintaining clean agar cultures or LC stocks is so valuable — they're your genetic library.
Exception: If you're regularly cloning your best fruits back to agar, you're resetting genetics with each clone. Clone your biggest cluster, grow it out on agar, transfer to grain, and start your G2G chain fresh.
When to G2G
Timing on the donor jar matters. The ideal time to use a jar as a G2G donor is when it's fully colonized — every grain covered in white mycelium with no bare spots.
Don't G2G from a jar that's only partially colonized. The uncolonized grain may contain dormant contaminants that survived sterilization. Those contaminants were being held in check by the spreading mycelium — if you transfer uncolonized grain along with colonized grain, you're potentially transferring contaminants too.
Use fresh donor jars. Spawn that's been sitting fully colonized for weeks starts to decline. The mycelium consumes the grain's nutrients and can begin to stall. For best results, G2G within 1-2 weeks of full colonization. For longer-term storage, see our spawn storage guide.
Contamination Risks and Prevention
G2G involves opening multiple jars in sequence, which creates more exposure than a simple syringe inoculation. Here's how to keep it clean:
Work fast but deliberately. Speed reduces exposure time. But rushing leads to fumbling, dropping lids, and creating air currents. Find the balance.
Don't pour over open jars. When transferring from the donor, hold the recipient jar close to the donor and pour directly. Don't hold the donor high in the air and let grain fall through a long column of air.
Flame the rim (optional). Some growers quickly pass the jar rim through a flame before and after opening. This kills any contaminants on the rim edge that might fall into the jar. It's not strictly necessary in a well-managed SAB, but it adds a margin of safety.
One donor jar per session. If you suspect any contamination in a donor jar (off smell, discolored spots, soft/wet grain), don't use it for G2G. You'll contaminate every recipient jar in the batch.
Inspect carefully. Before using any jar as a donor, examine it thoroughly through the glass. Rotate it, look at every angle. Any green, pink, orange, or black spots mean contamination. Any sour or sweet smell when you crack the lid means bacterial contamination. When in doubt, don't use it.
Troubleshooting G2G Transfers
"All my G2G jars are contaminating"
Check your donor jar — it may have been contaminated without obvious signs. Bacterial contamination in particular can be invisible through the glass. If your donor jar smells sour or sweet when you open it (rather than clean and mushroomy), it's contaminated and every transfer from it will be too.
Also evaluate your SAB technique. Are you moving too fast? Is there a draft in the room? Are you flame sterilizing between jars?
"The colonized grain won't break apart"
This sometimes happens with overly moist grain. The mycelium and excess moisture create a solid mass. Try rolling the jar vigorously between your palms or smacking the bottom against a padded surface. If it still won't break, you can open the jar in your SAB and use a sterilized fork — but this is slower and riskier.
Prevention: proper grain prep with adequate drying before loading jars. See the grain preparation section in our spawn making guide.
"G2G jars are colonizing unevenly"
You probably didn't distribute the colonized grain evenly when you shook the jar after transfer. One section has lots of colonized kernels and the rest has none. Solution: shake more vigorously after transfer to distribute evenly.
"Colonization stalled at 80%"
This can happen if temperatures drop or if there are pockets of overly dry or overly wet grain. Try gently shaking the jar again to redistribute colonized grain into the uncolonized areas. If the stalled area looks discolored or smells off, it may be contamination holding the mycelium back.
G2G in Practice: A Typical Workflow
Here's how G2G fits into a practical spawn production cycle:
- Start with a clean culture. Isolate a strain on agar or obtain a liquid culture.
- Make your G1 spawn. Inoculate 2-4 quart jars from your agar or LC. Wait for full colonization.
- G2G to G2. Take each G1 jar and transfer to 4 fresh jars. That's 8-16 jars of G2 spawn.
- Optionally G2G to G3. If you need more, take some G2 jars and transfer again. You now have enough spawn for a serious operation.
- Use spawn. Mix with bulk substrate for monotubs, stuff into bags, or use however you grow.
- Reset when needed. After G3-G5, go back to your original culture and start a fresh G1.
With one agar plate and two rounds of G2G, you can produce 16+ quart jars of spawn — enough to inoculate 80+ litres of substrate. That's the math that makes home spawn production practical.
Pick up a liquid culture or agar plates, make your first spawn jar, and then multiply from there. Once you've done your first G2G, you'll realize how simple it is — and you'll never want to buy spawn again.
Need help with your grow? Dr. MycoThumb is our free AI growing assistant — ask about substrates, contamination, fruiting conditions, or any cultivation question. Available 24/7 in the chat bubble at the bottom-right of every page.