You just harvested the biggest, most beautiful cluster of oyster mushrooms you've ever grown. Dense caps, thick stems, perfect form. Wouldn't it be great if every flush looked exactly like that?
That's what cloning is for. When you clone a mushroom, you're capturing the exact genetics of that specific fruit and preserving them so you can grow identical mushrooms again and again. It's the same principle behind plant cloning — you're skipping the genetic lottery of spores and going straight to a proven winner.
Cloning is one of the most valuable skills in mushroom cultivation, and it's simpler than most new growers expect. All you need is a still air box, some agar plates, a scalpel, and a lighter. Let's walk through it.
Why Clone?
Genetic Selection
When you grow mushrooms from a multi-spore syringe or a spore print, you're working with a random mix of genetics. Each spore carries different traits — growth speed, fruit size, cluster density, temperature preference, substrate affinity. The mushrooms you get are a genetic grab bag.
Cloning lets you select. You see a fruit that exhibits the exact traits you want — large size, dense cluster, fast colonization — and you capture those genetics directly. Every subsequent grow from that clone will carry those same traits (barring mutation, which is rare in the short term).
Consistency
For anyone selling at farmers' markets or supplying restaurants, consistency matters. Customers want the same mushroom every week — same size, same appearance, same quality. Cloning a high-performing strain and running it repeatedly gives you that consistency.
Preserving Wild Finds
If you forage a spectacular wild oyster mushroom cluster or find a particularly vigorous lion's mane in the forest, cloning lets you bring it into cultivation. You take a tissue sample, grow it out on agar, and now you have a domesticated version of that wild strain.
Rescuing Declining Cultures
Liquid cultures and grain spawn degrade over time and through repeated grain-to-grain transfers. Cloning from a fresh fruit resets your genetics to a strong, vigorous starting point. Many experienced growers clone their best fruit from every batch, creating a continuous cycle of genetic improvement.
Equipment
| Item | Notes |
|---|---|
| Still air box | Essential. Cloning in open air is almost guaranteed to fail. |
| Agar plates | Pre-poured plates with malt extract agar (MEA) or potato dextrose agar (PDA). You can also pour your own. |
| Scalpel with #10 blades — 100 pack | #10 or #11 blade is ideal. Must be flame-sterilizable. The 100-pack gives you a fresh blade whenever you need one. |
| Lighter or alcohol lamp | For flame sterilizing the scalpel. An alcohol lamp provides a continuous flame. |
| 70% isopropyl alcohol | For sanitizing hands, surfaces, and the mushroom exterior. |
| Nitrile gloves | Keep your skin bacteria off the work. |
| Parafilm or micropore tape | For sealing plates after inoculation. A single roll lasts hundreds of plates. |
Total additional cost if you already have a SAB: Under $20 for plates and a scalpel.
Parafilm M Laboratory Sealing Film — 2" x 250'
The industry standard for sealing agar plates. Stretches to form a tight seal while still allowing gas exchange. One roll lasts most growers well over a year.
View on Amazon.ca →When you buy through our links, it supports our mycology research at no extra cost to you.
Selecting Your Clone Source
Not every mushroom is worth cloning. You want to select fruits that exhibit the traits you want to reproduce:
Size: The largest individual fruit or cluster from a flush is a good candidate — it likely carries genetics for vigorous growth and high yield.
Cluster density: If you're growing oyster mushrooms and one cluster has 15 tightly packed caps while the rest have 5-8, that dense cluster has desirable genetics.
Speed: If one block fruits significantly earlier than others from the same batch, those genetics are faster colonizers. Worth capturing.
Form: Clean, well-shaped caps with thick stems indicate healthy genetics. Avoid cloning fruits that are deformed, discolored, or stunted.
Contamination resistance: If one block in a batch stayed clean while others caught contamination, the clean block may carry genetics with stronger competitive ability.
When to Harvest for Cloning
Harvest the fruit slightly before peak maturity. For oyster mushrooms, when the cap edges are still slightly curled. For lion's mane, when the spines are well-formed but not yet dropping. For shiitake, when the cap is about 70-80% open.
Work with the freshest possible fruit. Clone within hours of harvest, not days. The sooner you take the tissue sample, the less time surface contaminants have to work their way inward.
The Cloning Process: Step by Step
Step 1: Set Up Your SAB
Wipe down your still air box with 70% iso. Place inside: agar plates, scalpel, lighter, iso spray bottle, paper towels. Wipe down each item.
Insert your arms and let the air settle for 30-60 seconds.
Step 2: Prepare the Mushroom
The outside of any mushroom — even one grown in a controlled environment — is covered in contaminants. Bacteria, wild mold spores, dust, all of it. You cannot use tissue from the outer surface.
Inside the SAB:
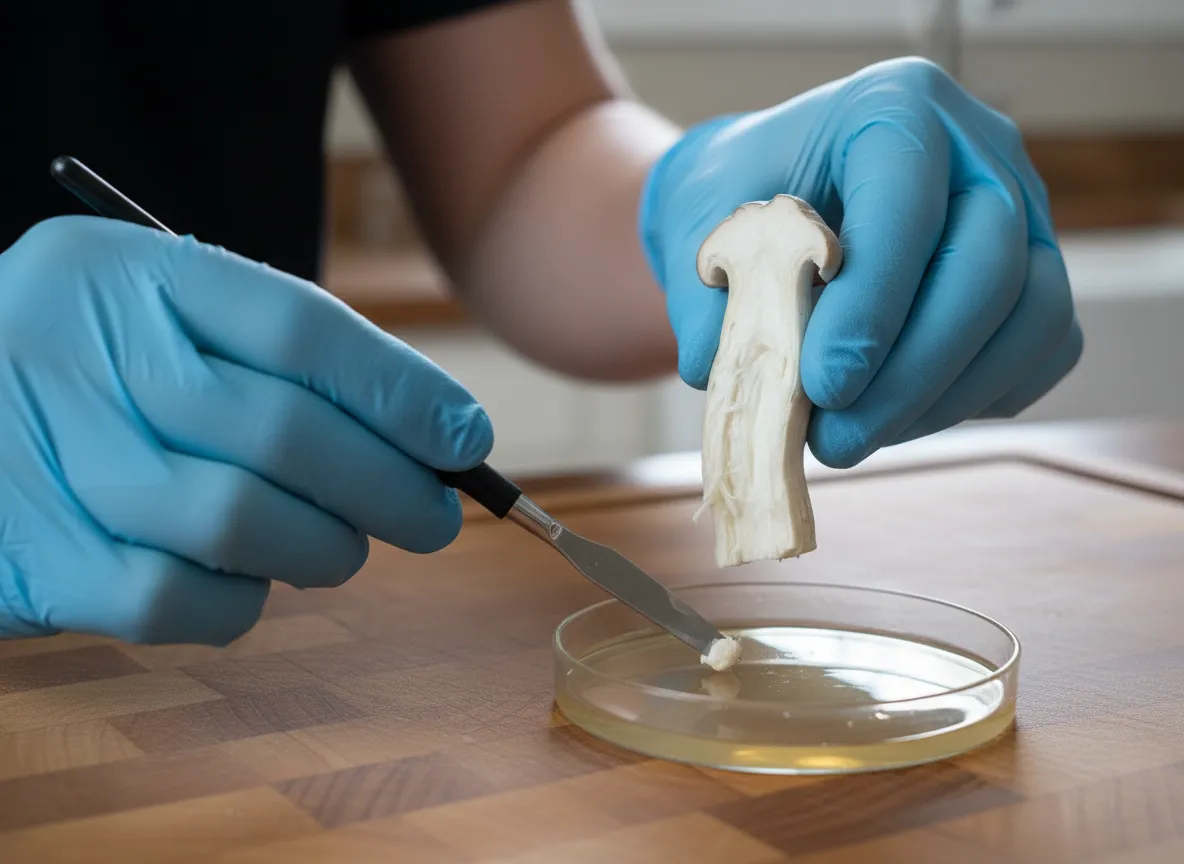
Clean the exterior. Wipe the mushroom down with a paper towel dampened with 70% iso. This reduces surface contaminants but doesn't eliminate them — that's not the goal. The goal is to minimize what might fall onto the agar when you open things up.
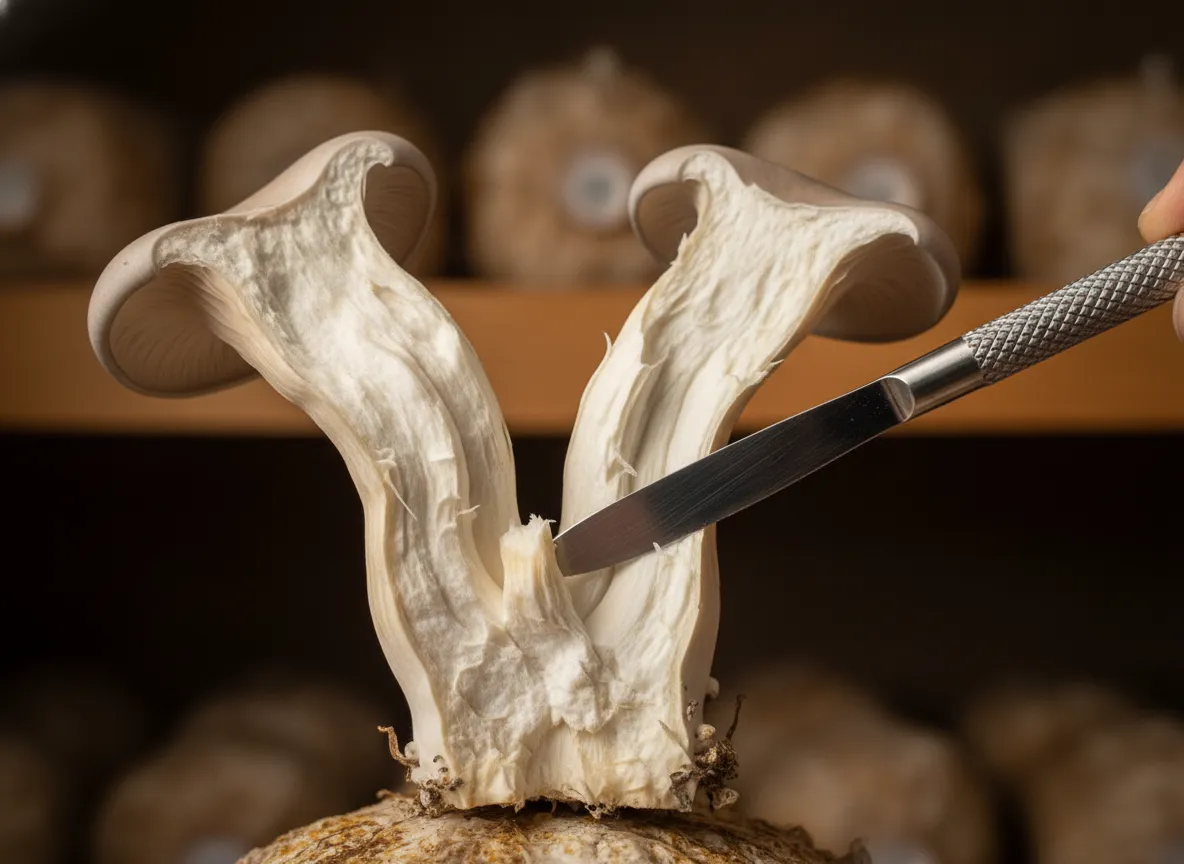
Split the mushroom in half. Using your hands (gloved) or a clean knife, tear or cut the mushroom stem lengthwise down the middle. You want a clean rip that exposes the inner tissue.
Step 3: Take the Tissue Sample
This is the critical step. You're taking tissue from the interior of the stem — tissue that has never been exposed to open air and is therefore sterile (or as close to sterile as biological tissue gets).
Flame your scalpel until the blade glows red. Let it cool for 5-10 seconds. Do not blow on it.
Cut a small piece from the inner stem. Aim for the junction where the stem meets the cap — this is the area of most active growth and tends to have the most vigorous tissue. The piece should be roughly 3-5 mm in size — about the size of a grain of rice.
Do not touch the outer surface. Your cut should come from deep inside the exposed interior, not from anywhere near the outer skin. This is the single most important detail in cloning.
Step 4: Transfer to Agar
Open one agar plate by lifting the lid just enough to insert the scalpel with the tissue sample.
Place the tissue piece in the centre of the agar. Touch the scalpel tip to the agar surface and let the tissue fall off. Don't drag the scalpel across the agar — just deposit the tissue.
Close the plate immediately.
Seal with parafilm by wrapping a strip around the edge of the plate where the lid meets the base. This prevents contamination from entering through the gap while still allowing minimal gas exchange.
Label the plate. Species, date, source description (e.g., "Blue Oyster — largest cluster, Block 3").
Step 5: Repeat
Take 3-5 tissue samples from the same mushroom, each on a separate plate. This redundancy is important — not every plate will be clean. Having multiple samples increases your chances of getting at least one clean culture.
You can also take samples from different mushrooms if you want to compare genetics later.
Incubation
Store your plates upside down (agar side up, lid side down) at 21-25°C (70-77°F) in a clean, dark location. The upside-down orientation prevents condensation from dripping onto the growing mycelium.
What to Watch For
Days 1-3: No visible growth. The tissue is establishing.
Days 3-5: White, wispy mycelium begins to grow outward from the tissue sample. This is exactly what you want to see — healthy mycelial growth radiating from the tissue.
Days 5-10: Mycelium continues to expand across the plate. It should look clean, white, and consistent in texture — ropey or cottony depending on species.
Identifying Contamination
Not every plate will be clean. Here's what to watch for:
- Bacterial contamination: Slimy, wet-looking patches near the tissue, often with an off smell. Bacteria grows faster than mycelium and often appears within 24-48 hours.
- Mold contamination: Green, blue-green, black, or pink fuzzy patches appearing anywhere on the plate. Common molds include Trichoderma (green) and Penicillium (blue-green).
- Mixed growth: Mycelium growing in one direction while contamination grows in another. This plate isn't clean and shouldn't be used as-is.
If contamination appears on some plates but not others, your clean plates are good to proceed with. If all plates contaminate, the issue was likely:
- Tissue was taken too close to the outer surface
- The mushroom was too old or damaged
- SAB technique needs improvement
Cleaning Up Your Clone: Transfer to Fresh Agar
Even "clean-looking" plates often have low levels of contamination that aren't visible yet. The standard practice is to do 1-2 transfers to fresh agar before using your clone.
Transfer Process
- Inside your SAB, open the colonized plate and a fresh agar plate side by side.
- Flame your scalpel.
- Cut a small wedge from the leading edge of the mycelium — the outer frontier where it's growing fastest, as far as possible from the original tissue sample and any potential contamination.
- Place the wedge on the fresh plate, near the centre.
- Close and seal both plates.
After the transfer, the mycelium on the new plate should grow out clean. If contamination reappears, do another transfer from the leading edge. Two transfers are usually enough to get a fully clean culture.
Why Transfers Work
Mushroom mycelium and contaminants grow at different speeds in different directions. By cutting from the leading edge of the mycelium — the fastest-growing frontier — you're selecting tissue that has outrun any trailing contamination. Each transfer leaves more contamination behind.
Using Your Clone
Once you have a clean plate (no contamination after 7-10 days on the second transfer), your clone is ready to use. You can:
- Inoculate liquid culture: Drop a small wedge of colonized agar into a sterilized LC jar. The mycelium will colonize the liquid within 1-2 weeks.
- Inoculate grain: Drop a wedge directly onto sterilized grain spawn. Colonization from an agar wedge is fast and reliable.
- Store the plate: Seal the plate well with parafilm and store in the refrigerator at 2-4°C (35-39°F). A properly stored agar plate can remain viable for months, giving you a long-term genetic library.
Tips for Higher Success Rates
Use the freshest possible mushroom. Clone within hours of harvest. Every hour the mushroom sits post-harvest, surface contaminants migrate deeper into the tissue.
Take bigger tissue from deeper inside. The deeper into the interior of the stem you go, the cleaner the tissue. Surface-adjacent tissue is always riskier.
Don't clone from store-bought mushrooms (usually). Grocery store mushrooms have been handled, transported, and stored for days. Surface contamination has often penetrated deep into the tissue. It's possible but success rates are much lower. Your own freshly harvested mushrooms are far better candidates.
Use nutritious agar. Malt extract agar (MEA) or potato dextrose agar (PDA) both work well. Nutritious agar supports faster mycelial growth, which helps the mycelium outrun any contamination that hitched a ride.
Temperature matters. Warmer incubation temperatures (24-27°C / 75-80°F) speed up mycelial growth but also speed up contamination. A moderate 21-24°C (70-75°F) is a good compromise.
Document everything. Label your plates with the source, date, and any notable traits of the parent fruit. In six months, you won't remember which plate came from which mushroom. Good records let you trace genetics back to specific fruits.
Cloning as a Continuous Practice
The best growers don't clone once — they clone continuously. Every batch, they identify the best-performing fruit, clone it back to agar, and use that clone for the next batch. Over time, this selective pressure naturally pushes their cultures toward better and better performance.
It's the same principle behind selective breeding in agriculture, compressed into a much shorter timeline because mushrooms reproduce so quickly.
Start simple: grow a batch from spawn, identify your best fruit, clone it onto agar, and use that clone for your next batch. You'll see the difference within a few cycles — bigger clusters, faster colonization, more consistent results. That's the power of working with your own genetics instead of rolling the dice every time.
Need help with your grow? Dr. MycoThumb is our free AI growing assistant — ask about substrates, contamination, fruiting conditions, or any cultivation question. Available 24/7 in the chat bubble at the bottom-right of every page.