If you want to grow mushrooms outdoors with almost zero effort, wine caps are your species. Stropharia rugosoannulata — also called Garden Giant or King Stropharia — is the most forgiving outdoor mushroom you can cultivate in a Canadian garden. No sterile technique. No pressure cooker. No grow room. Just wood chips, spawn, and patience.
They fruit in the same bed for years, improve your soil as they decompose organic matter, and produce caps the size of dinner plates. If you have a shady corner of your yard and access to wood chips, you can grow wine caps.
Species Profile
- Scientific name: Stropharia rugosoannulata
- Common names: Wine Cap, Garden Giant, King Stropharia, Burgundy Mushroom
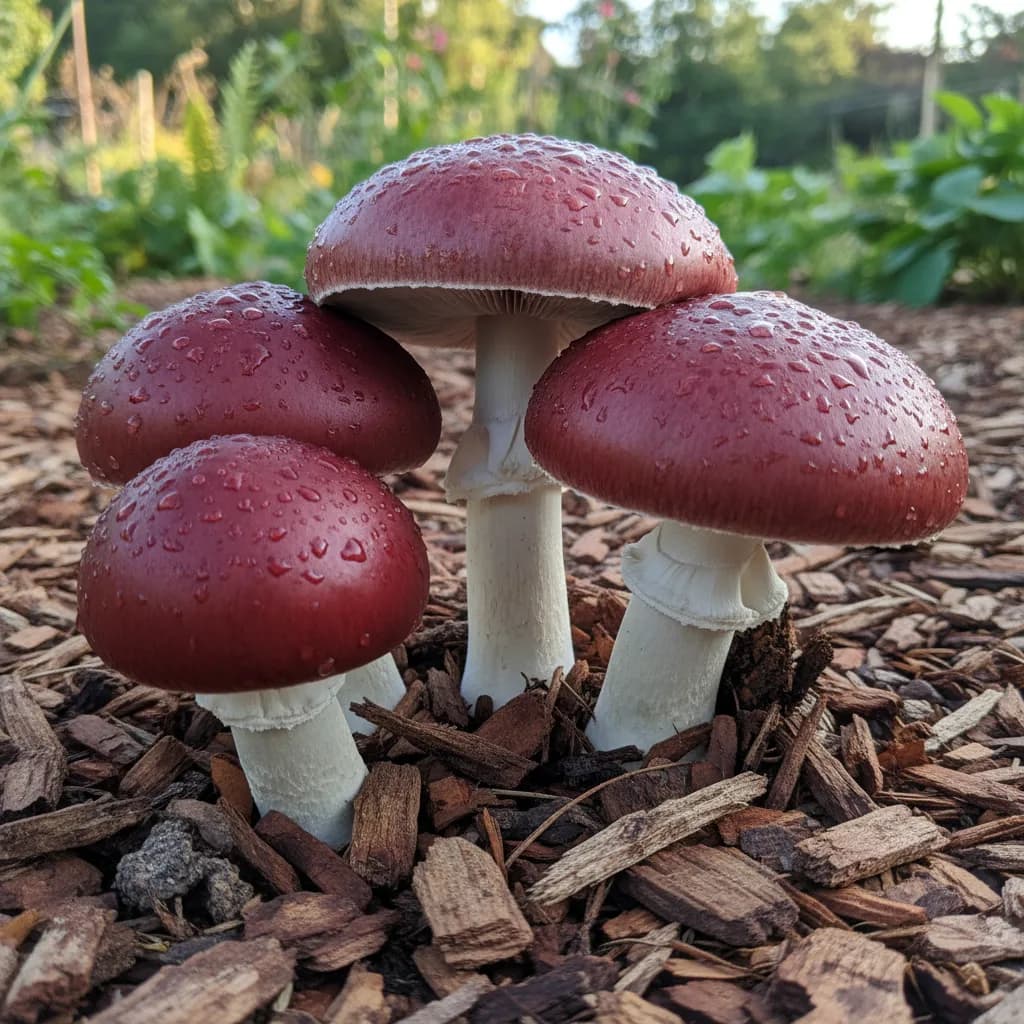
- Cap colour: Rich burgundy to wine-red when young, fading to tan-brown as they mature
- Cap size: 5 to 30 cm across — some of the largest cultivated mushroom caps you will ever see
- Gills: Grey to purple-grey, darkening with age
- Stem: Thick, white, with a prominent ring (annulus)
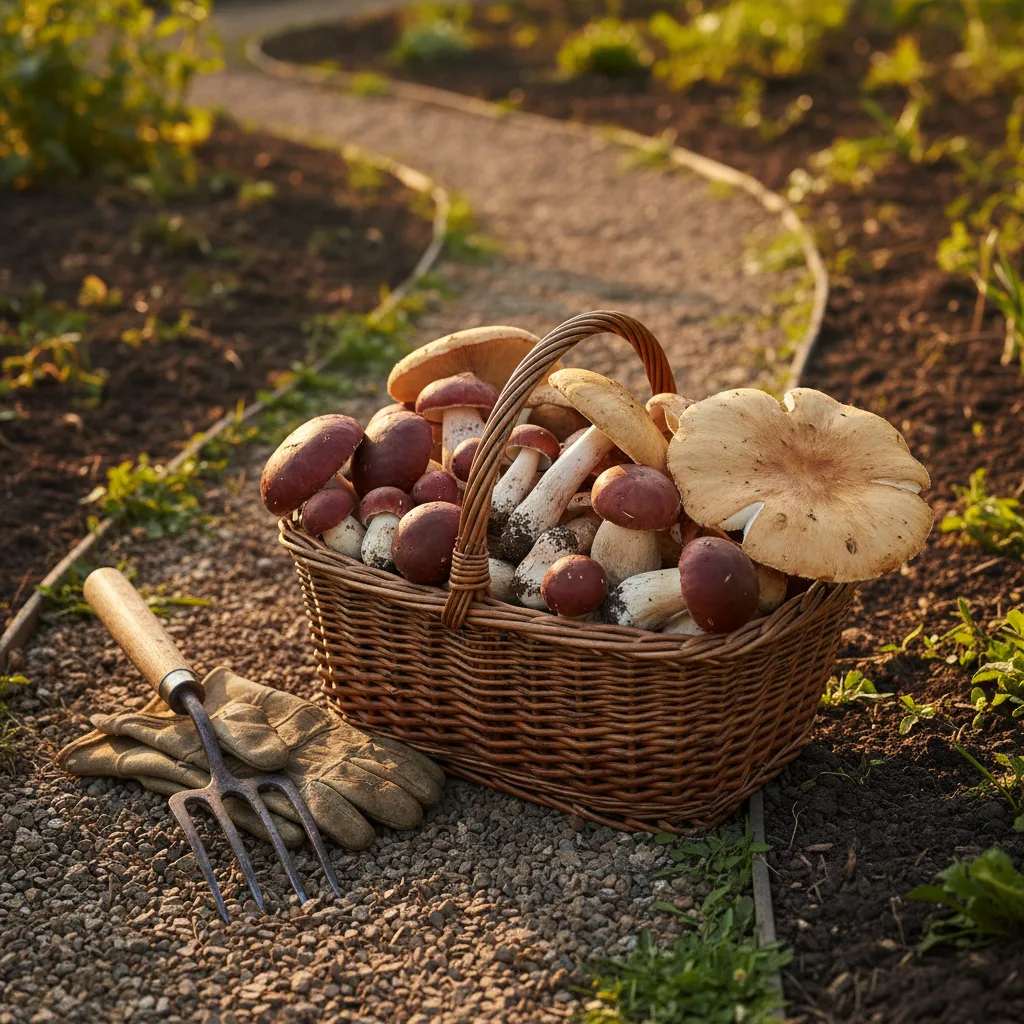
- Flavour: Mild, nutty, slightly potato-like. Meaty texture when cooked.
- Difficulty: Beginner — the easiest outdoor mushroom to grow in Canada
Why Wine Caps Are Perfect for Canadian Gardens
Wine caps thrive in exactly the conditions that most Canadian backyards already provide:
Cold-hardy. Wine caps fruit between 10 and 21°C (50 to 70°F) — the same temperature range as a Canadian spring and fall. They handle frost better than any oyster mushroom and overwinter in the ground as mycelium, coming back year after year.
No special equipment. No laminar flow hood, no pressure cooker, no humidity tent. You build a bed, add spawn, water it, and wait. This is gardening, not lab work.
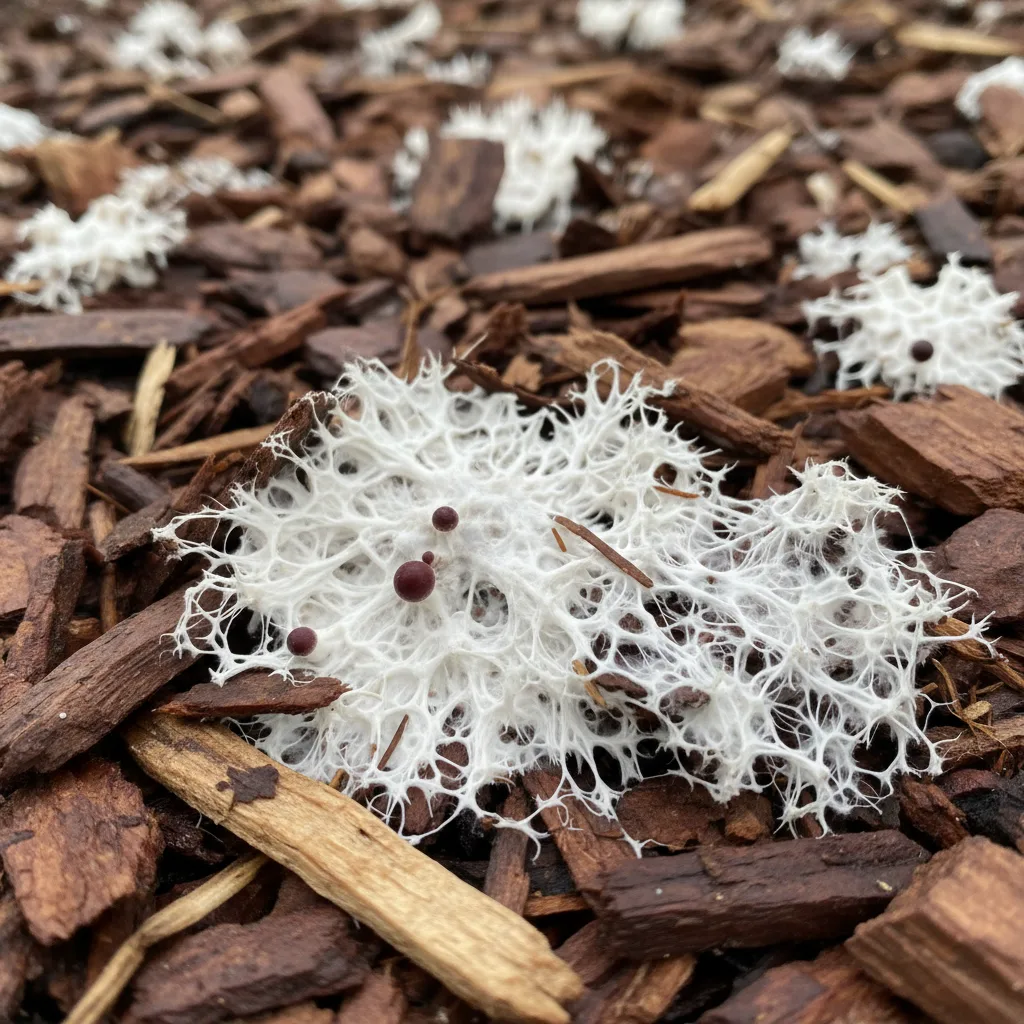
Improves your soil. Wine cap mycelium breaks down wood chips and straw into rich humus. After a year or two of fruiting, the bed becomes some of the best garden soil you have ever seen. Many permaculture growers use wine caps specifically for soil building.
Produces for years. A single inoculated bed can fruit for 3 to 5 years if you keep feeding it fresh wood chips or straw each season. The mycelium spreads naturally and can even colonize nearby mulched pathways.
Massive yields. A well-established 4x8 foot bed can produce 5 to 15 kg of mushrooms over a season. At farmers market prices of $15 to $20/lb, that is serious value from a pile of wood chips.
When to Plant in Canada
Timing depends on your region, but the rule is simple: plant after your last frost date, when soil temperatures are consistently above 10°C (50°F).
| Region | Best Planting Window | First Expected Harvest |
|---|---|---|
| Southern Ontario, BC Lower Mainland | Late April to June | July to October |
| Prairies (AB, SK, MB) | Mid-May to June | August to October |
| Quebec, Maritimes | May to June | August to October |
| Northern Ontario, Northern BC | June to early July | August to September |
You can also plant in early fall (September) to let the mycelium establish before winter. It will overwinter and fruit the following spring — this actually produces the strongest flushes because the mycelium has months to colonize before fruiting.
Substrate Options
Wine caps are not picky. They will colonize almost any carbon-rich organic material:
Hardwood chips (preferred). Fresh or aged hardwood chips from maple, oak, birch, or beech are ideal. Many municipalities offer free wood chips from tree trimming operations — call your local public works department. Arborist chip (mixed species with leaves) works well too.
Straw. Wheat or barley straw works excellent. Chop or break it up to increase surface area. Straw beds colonize faster than wood chips but break down quicker — expect 1 to 2 years of production vs 3 to 5 years with wood chips.
Cardboard. Corrugated cardboard, soaked and layered, makes a surprisingly good substrate layer. Wine caps love the cellulose. Use it as a base layer under wood chips for excellent results.
Mixed substrates. The best beds combine materials — a cardboard base, wood chips as the main body, and a straw top layer. This gives the mycelium multiple food sources and textures to colonize.
What to avoid: Softwood chips (cedar, pine) contain natural fungicides that slow colonization. Dyed mulch, pressure-treated wood, and anything with chemical treatment will kill the mycelium.
Step-by-Step: Building a Wine Cap Bed
What You Need
- 1 bag of wine cap spawn or wine cap liquid culture expanded on grain
- 2 to 4 wheelbarrows of fresh hardwood wood chips (enough for a 4x8 foot bed, 15 to 20 cm deep)
- A shady or partially shaded garden area
- A garden hose or watering can
- Optional: cardboard for the base layer, straw for the top layer
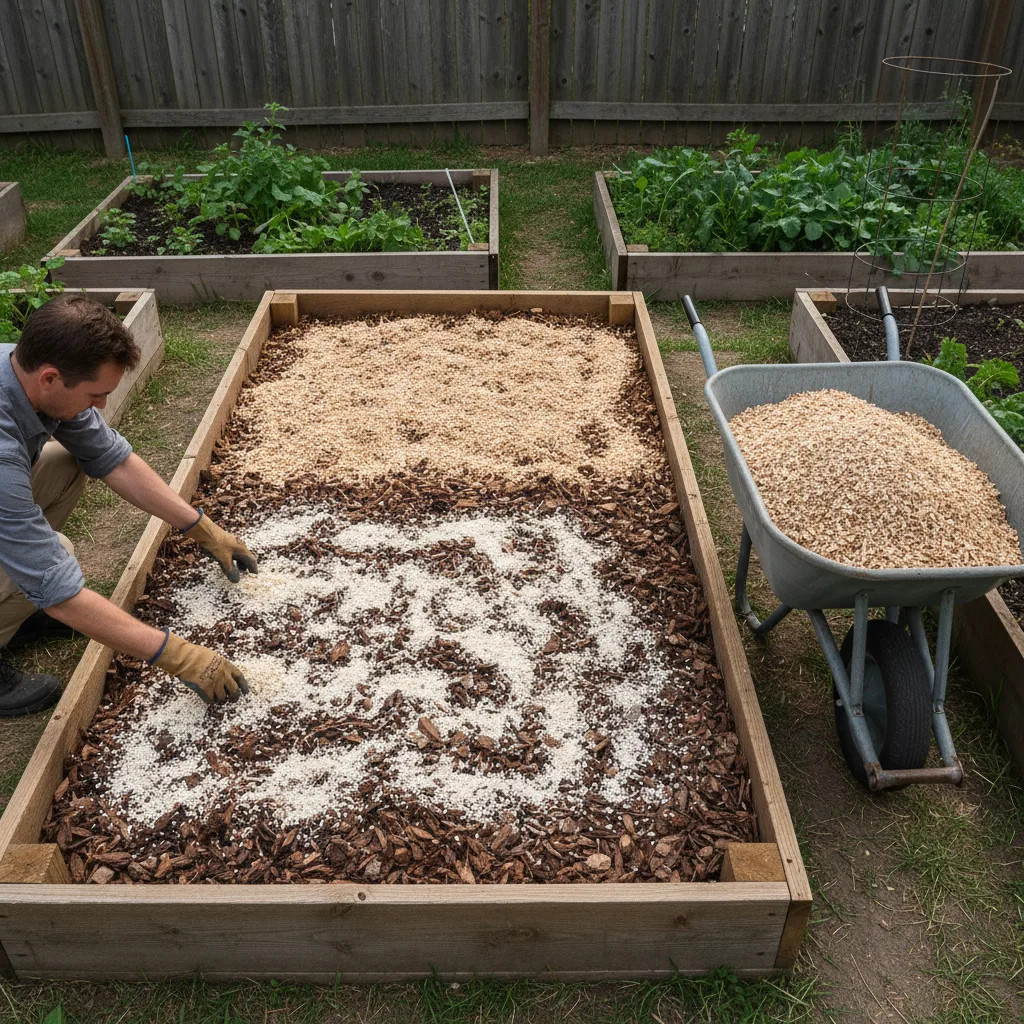
Build the Bed
Choose your location. Part shade is ideal — under deciduous trees, along a fence, or on the north side of a building. Wine caps can handle more sun than most mushrooms, but full blazing sun will dry the bed out too fast. Near a hose for easy watering is a bonus.
Prepare the ground. Clear grass or weeds from a 4x8 foot area (or any size you want — bigger is better). Lay down a layer of soaked corrugated cardboard if you have it. This suppresses weeds and gives the mycelium a head start.
Add the first substrate layer. Spread 5 to 8 cm (2 to 3 inches) of wood chips evenly across the bed. If the chips are dry, soak them with a hose until thoroughly moist.
Add spawn. Crumble or break your spawn into walnut-sized pieces and scatter evenly across the wood chip layer. Space pieces about 15 to 20 cm (6 to 8 inches) apart. You want good coverage but it does not need to be perfect — mycelium will grow to fill gaps.
Add the second substrate layer. Cover the spawn with another 5 to 8 cm of wood chips. This protects the spawn from drying out and gives it more food.
Optional: Add a third layer. For the best results, repeat the spawn and chip layers one more time. A deeper bed (15 to 20 cm total) holds moisture better and produces larger harvests.
Water thoroughly. Soak the entire bed until water runs out the bottom. The substrate should be consistently moist — like a wrung-out sponge.
Mulch the top. Cover with a thin layer of straw or leaf litter. This insulates the bed and helps retain moisture during hot spells.
Fiskars Steel D-handle Square Garden Spade
Essential for building mushroom beds and turning wood chips. The flat blade makes it easy to spread substrate in even layers.
View on Amazon.ca →When you buy through our links, it supports our mycology research at no extra cost to you.
Maintenance
Wine cap beds are low-maintenance, but a little attention goes a long way:
Watering. This is the most important factor. The bed should never dry out completely. Water deeply every 2 to 3 days during dry spells, more often during heat waves. A soaker hose laid across the bed on a timer is ideal. Consistent moisture is the single biggest factor in getting good harvests.
Feeding. Add 5 to 10 cm of fresh wood chips or straw to the top of the bed each spring. This gives the mycelium fresh food and keeps the bed producing. Think of it like mulching your garden — you are just feeding mushrooms at the same time.
Weeding. Minimal. The mycelium mat suppresses most weeds naturally. Pull anything that pushes through in the first few weeks before the bed is fully colonized.
Winter preparation. In most of Canada, the bed will freeze solid in winter. This is fine — wine cap mycelium survives Canadian winters. Cover with a thick layer of leaves or straw in late fall for insulation. Remove in spring when temperatures rise above 10°C.
Harvesting
Wine caps are ready to harvest when the caps are still convex (rounded) and the veil underneath is just starting to separate from the stem. At this stage, the cap colour is its deepest burgundy and the texture is firmest.
When to pick:
- Button stage (best eating quality): Caps still closed or just opening. Deep wine-red colour. Firm, dense flesh. This is when flavour and texture are at their peak.
- Mature (still good): Caps fully open, flattening out. Colour fading to tan-brown. Gills turning dark purple-grey. Still edible but softer texture.
- Past prime (skip these): Caps curling upward, edges ragged, dark spore deposit visible. Leave these to drop spores and seed the bed for future flushes.
How to harvest: Grip the stem near the base and twist gently while pulling. The mushroom should pop out cleanly. Or use a sharp knife to cut at the base. Do not pull hard — you want to disturb the mycelium network as little as possible.
Expected timeline: First flush typically appears 6 to 12 weeks after planting in spring, or the following spring for fall plantings. Subsequent flushes appear every 2 to 4 weeks through the fruiting season, especially after rain.
How to Cook Wine Cap Mushrooms
Wine caps have a mild, nutty flavour with a dense, meaty texture — often compared to potatoes or mild porcini. They hold up well to any cooking method.
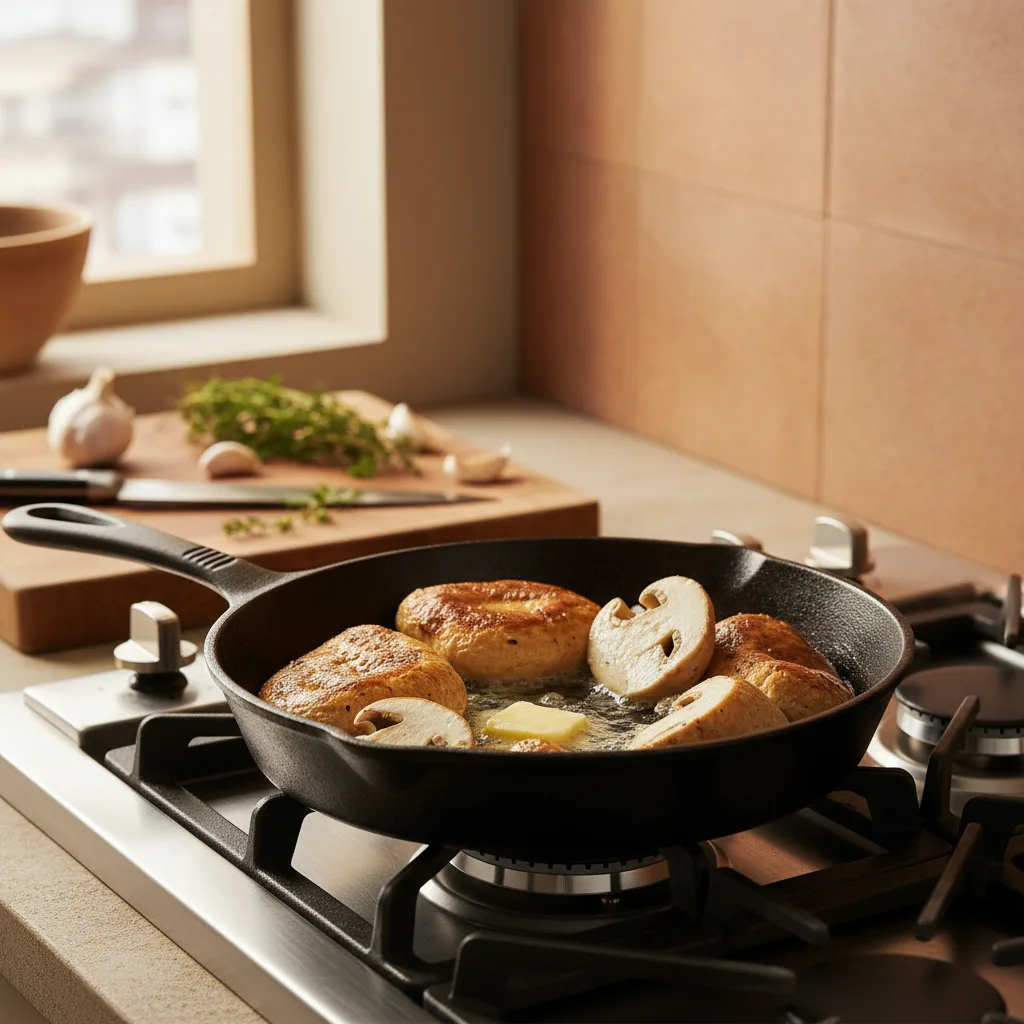
The sear method (recommended):
- Slice caps into 1 cm thick pieces. Large caps can be quartered.
- Heat a cast iron skillet over medium-high with butter or oil.
- Lay slices in a single layer — do not crowd the pan.
- Cook 3 to 4 minutes per side until golden brown and slightly crispy.
- Season with salt, pepper, and a squeeze of lemon.
Other ways to use them:
- Grilled. Large caps grill beautifully — brush with olive oil, grill cap-side down for 4 minutes, flip, cook 3 more minutes. Serve like a portobello burger.
- Soups and stews. Dice and add to any recipe calling for button mushrooms. They hold their texture better than most species.
- Dehydrated. Wine caps dehydrate well for long-term storage. Use a food dehydrator at 50°C (125°F) for 6 to 8 hours.
- Pickled. Small button-stage wine caps pickle excellently in vinegar brine with garlic and dill.
For more mushroom cooking ideas, check out our oyster mushroom recipes.
Troubleshooting
No fruiting after 3 months
Usually a moisture problem. Check the bed — if the wood chips are dry more than 2 cm below the surface, you are not watering enough. Soak deeply and consistently. Wine caps also need cool temperatures to trigger fruiting — they often stall during hot summers and flush heavily once temperatures drop in September.
Slugs eating the mushrooms
Slugs love wine caps. Set beer traps around the bed perimeter, or harvest at the button stage before slugs find them. Early morning harvest (when slugs are still hiding) helps too.
Bed colonizing slowly
Fresh spawn colonizes faster than old spawn. If you are using liquid culture, expand it on grain first before adding to the bed — direct liquid culture on wood chips is slow. Also check that you are not using softwood chips, which contain natural antifungal compounds.
Green mold on the bed surface
Small patches of green mold (Trichoderma) on the surface are common in the first few weeks and usually harmless. The wine cap mycelium is aggressive and will outcompete it once established. If green mold is widespread, the bed may be too wet with poor air circulation — reduce watering slightly and remove any covering that traps moisture. See our contamination guide for identification help.
Mushrooms are small and thin
The bed needs more food. Add a fresh layer of wood chips or straw. Also check moisture — inconsistent watering produces small, stunted mushrooms. A well-fed, well-watered bed produces massive caps.
Wine Cap vs Other Outdoor Mushrooms
| Factor | Wine Cap | Shiitake (logs) | Oyster (straw) |
|---|---|---|---|
| Setup difficulty | Very easy | Moderate (drilling, plugging) | Easy |
| Equipment needed | None | Drill, plug spawn, wax | Grow bags or buckets |
| Time to first harvest | 6 to 12 weeks | 6 to 18 months | 2 to 4 weeks |
| Production lifespan | 3 to 5 years | 3 to 6 years | Single flush per bag |
| Temperature range | 10 to 21°C | 10 to 20°C | 10 to 30°C (species dependent) |
| Canadian winter survival | Yes | Yes (on logs) | No (tropical species die) |
| Maintenance | Water only | Soak logs seasonally | Indoor management |
For log growing methods, see our guide to growing mushrooms on logs.
Frequently Asked Questions
Can I grow wine caps in a raised bed with vegetables?
Yes, and this is one of the best applications. Plant wine cap spawn in the wood chip mulch between your vegetable rows. The mycelium decomposes the mulch, feeds your soil, and produces mushrooms as a bonus crop. Tomatoes, squash, and corn all grow well alongside wine cap beds.
How much spawn do I need?
For a 4x8 foot bed (3.7 square metres), 2 to 3 kg of grain spawn is ideal. More spawn means faster colonization and earlier fruiting. If you are starting from liquid culture or agar, expand to grain spawn first before building your bed.
Do wine caps spread on their own?
Yes. Once established, the mycelium will spread into any adjacent wood chip mulch, pathways, or garden beds. Many growers start with one bed and find wine caps popping up in their mulched flower beds and walkways the following year. This is a feature, not a problem.
Are wine caps safe to eat? Can I confuse them with anything dangerous?
Wine caps are distinctive and easy to identify: large burgundy cap, grey-violet gills, thick white stem with a prominent ring, and growth on wood chips or mulch. There are no dangerous lookalikes in this habitat in Canada. However, always confirm your identification with a local mycology group or field guide before eating any mushroom for the first time. Check out our foraging guide for identification resources.
Can I grow wine caps in containers or indoors?
Not recommended. Wine caps need soil contact and natural rainfall/temperature cycling to fruit well. They are specifically an outdoor species. For indoor growing, try oyster mushroom grow kits or lion's mane instead.
When is the best time to start a wine cap bed in Canada?
Spring (May to June) is ideal for most of Canada. The mycelium colonizes through summer and produces the first flush in late summer or fall. Fall planting (September) also works — the mycelium establishes before winter and produces heavy spring flushes the following year.
Get Started
Wine cap is the perfect gateway to outdoor mushroom cultivation. No equipment, no sterile technique, no experience needed — just wood chips and spawn.
Start with our Wine Cap Liquid Culture for production-scale inoculation, or a Wine Cap Agar Culture if you want to expand your own spawn. Both are produced in our CFIA-licensed cleanroom in Brantford, Ontario with lab-isolated genetics.
For more species guides, read our complete guide to growing mushrooms in Canada, our guide to growing mushrooms on logs, or browse our full substrate guide for other outdoor methods. If you are brand new to mushroom growing, start with our beginner's guide.
Want to grow this species? Dr. MycoThumb is our free AI growing assistant — ask about growing conditions, substrate recipes, troubleshooting, and more. Available 24/7 in the chat bubble at the bottom-right of every page.