PF Tek is the method that introduced countless growers to mushroom cultivation. Developed in the early 1990s, it uses a simple mixture of brown rice flour (BRF) and vermiculite in jars to create small cakes that colonize and fruit without the complexity of grain spawn or bulk substrate. It's a self-contained system — everything from inoculation to harvest happens in and around those jars.
While more advanced methods like monotubs and grain-to-grain transfers produce larger yields, PF Tek remains a fantastic starting point. It teaches you the fundamentals of sterile technique, colonization monitoring, and fruiting management with a minimal investment. And for gourmet species like lion's mane and oyster mushrooms, it produces perfectly good results for home consumption.
What Is PF Tek?
PF Tek (named after its creator, who went by "Psilocybe Fanaticus" online) is a cultivation method that uses half-pint or pint mason jars filled with a mixture of brown rice flour, vermiculite, and water. The mixture is sterilized in the jars, inoculated with a culture syringe, colonized, and then "birthed" (removed from the jars) for fruiting in a separate humidity chamber.
The beauty of PF Tek is its simplicity:
- No pressure cooker required (steam sterilization works, though a pressure cooker is better)
- No grain prep — brown rice flour is a grocery store item
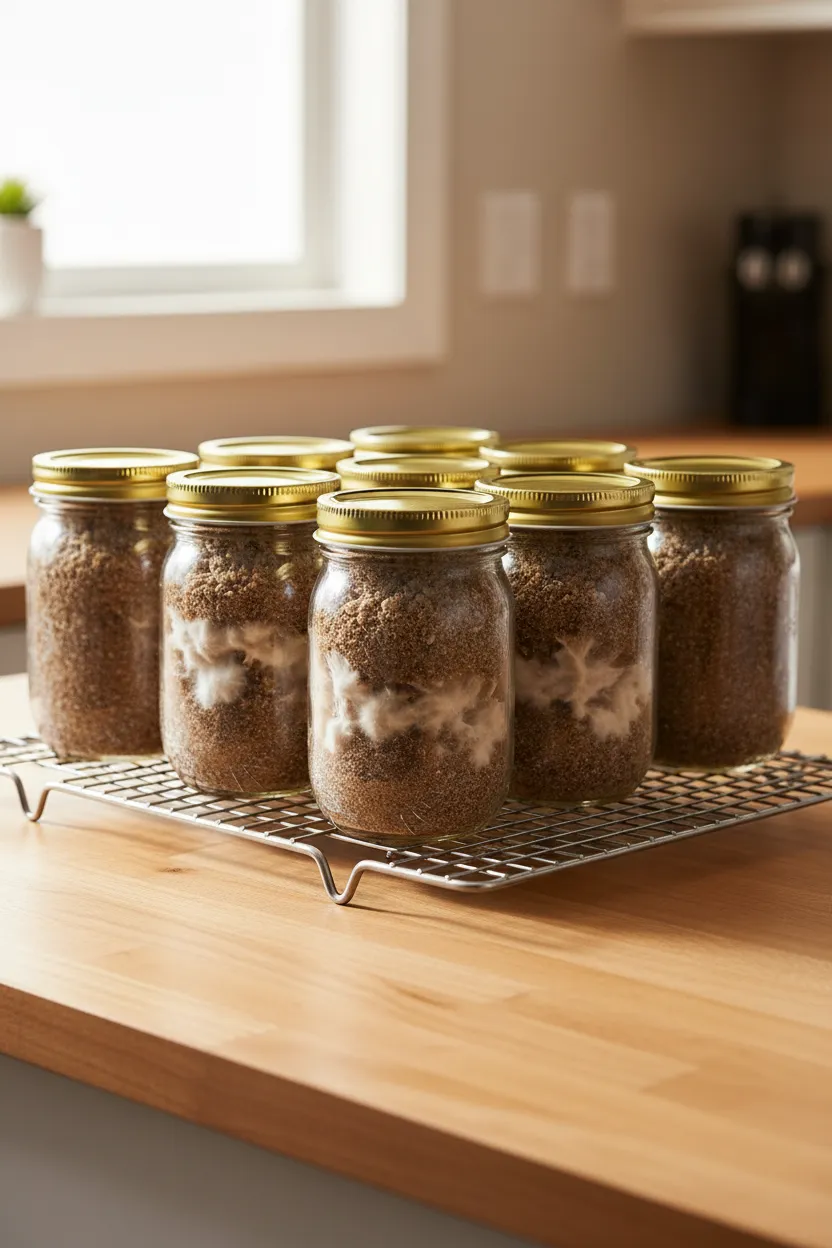
- Small scale — a batch of 6-12 jars fits in any kitchen
- Visual feedback — you can monitor colonization through the glass
- Forgiving — the high vermiculite content creates natural air space and contamination resistance
Adapting PF Tek for Gourmet Species
PF Tek works beautifully with gourmet species. Here's how different species perform:
Oyster mushrooms: Aggressive colonizers that take to BRF cakes readily. Expect fast colonization (2-3 weeks) and prolific fruiting. Blue and Pink Oyster are both excellent candidates.
Lion's Mane: Works well on BRF cakes, though it prefers supplemented sawdust for maximum yield. On BRF, expect smaller but perfectly edible clusters. A good way to learn the species before investing in more complex substrate preparation.
Shiitake: Colonizes BRF slowly (4-6 weeks) but produces small, dense fruits. Not the most efficient method for shiitake, but it works for learning.
Reishi and Turkey Tail: Both colonize BRF well and produce interesting formations on cakes. Reishi in particular creates beautiful shelf-like growths.
Materials List
Jar Ingredients (per jar)
| Item | Amount per half-pint jar | Notes |
|---|---|---|
| Brown rice flour (BRF) | 80 mL (1/3 cup) | Grind your own from brown rice in a blender, or buy pre-ground |
| Vermiculite (fine or medium) | 160 mL (2/3 cup) | Provides structure and air pockets |
| Water | ~60 mL (1/4 cup) | Enough to hydrate the verm |
Equipment
| Item | Estimated Cost | Notes |
|---|---|---|
| Half-pint or pint wide-mouth mason jars, 12 pack | $12-18 | Wide-mouth makes birthing easier. Bernardin is the Canadian standard. |
| Aluminum foil | $3 | For covering jars during sterilization |
| Large pot with lid (or pressure cooker) | $0-80 | A large stock pot works for steam sterilization |
| Liquid culture syringe or spore syringe | $12-20 | Your inoculant |
| Still air box | $10-15 | For clean inoculation |
| Lighter or alcohol lamp | $2 | For flame sterilizing the needle |
| Isopropyl alcohol (70%) | $3-5 | For sanitizing |
| Micropore tape | $5 | For covering injection holes |
| Spray bottle | $3 | For misting during fruiting |
| Perlite (coarse) | $8-12 | For the fruiting chamber |
| Large clear tub (for SGFC) | $8-12 | 50-60 quart size |
Total estimated cost (first batch): $65-170 CAD depending on whether you already have a pot and need a pressure cooker.
Bernardin Wide-Mouth Mason Jars — 12 Pack
Bernardin is Canada's go-to mason jar brand. The wide mouth makes filling, birthing cakes, and cleaning much easier than regular-mouth jars.
View on Amazon.ca →When you buy through our links, it supports our mycology research at no extra cost to you.
Step 1: Prepare the Jars
Mixing the Substrate
For a batch of 12 half-pint jars:
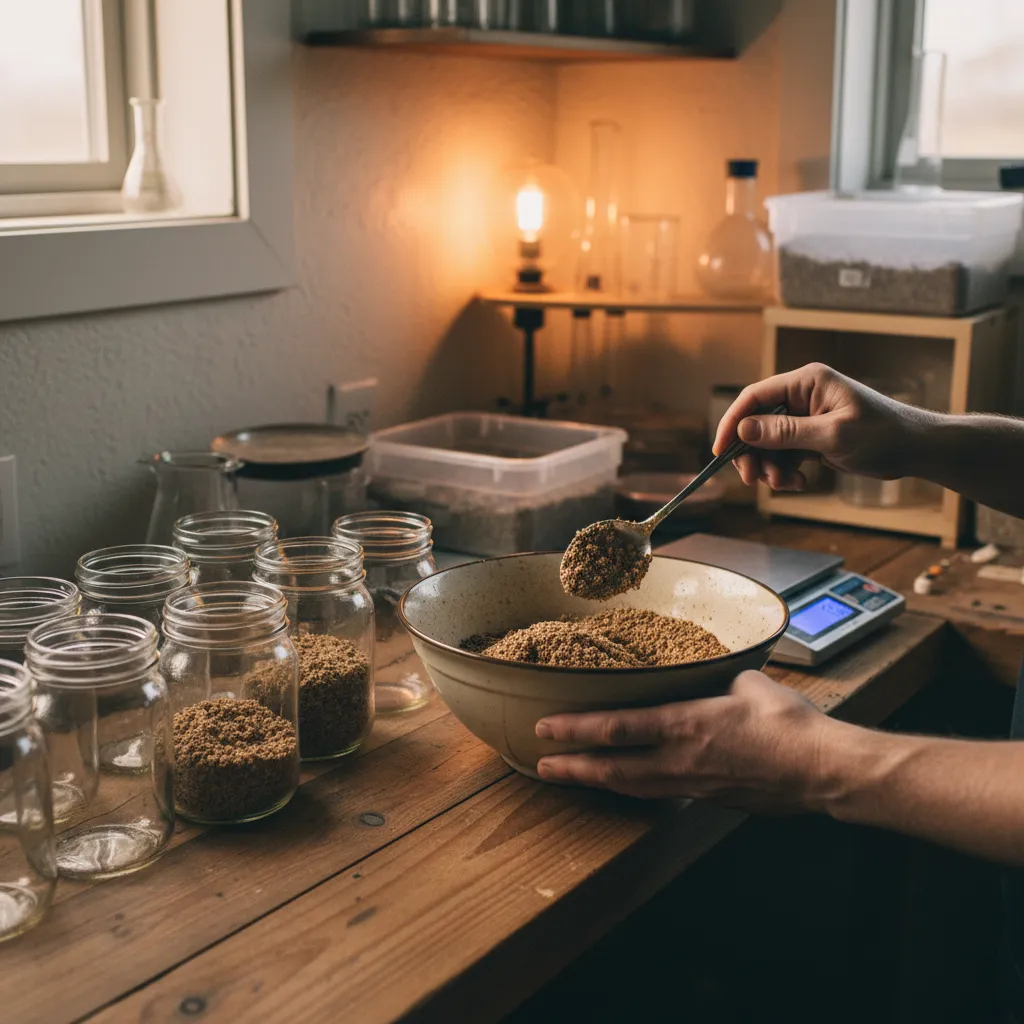
Hydrate the vermiculite. In a large bowl, combine vermiculite with water. For 12 jars, that's roughly 8 cups of vermiculite and 3 cups of water. Mix until the vermiculite is uniformly damp. It should glisten but not drip when squeezed.
Add the brown rice flour. Sprinkle the BRF over the wet vermiculite (4 cups for 12 jars) and mix gently. You want every piece of vermiculite coated with BRF, not clumps of flour sitting in dry vermiculite. The BRF sticks to the wet vermiculite — that's exactly what you want.
Fill the jars. Loosely fill each jar to about 1 cm below the rim. Do not pack it down — the loose fill creates air pockets that the mycelium needs.
Add a dry vermiculite barrier. Top off the last centimetre with dry vermiculite. This dry layer acts as a contamination barrier between the substrate and the outside world.
Cover with foil. Place a square of aluminum foil over the top of each jar, crimping it around the edges. This keeps water out during sterilization.
Making Injection Holes
Before filling, use a nail or small drill bit to make 4 holes in each jar lid, evenly spaced around the edge. These are your inoculation ports. After sterilization, you'll push the syringe needle through these holes.
Some growers skip the lids entirely and just use the foil cover. Both work. Using lids with holes gives you a more secure seal during colonization.
Step 2: Sterilize
Pressure Cooker Method (Recommended)
Load your jars into the pressure cooker on a rack (jars should not sit directly on the bottom — a canning rack or a folded towel works). Add water to the level specified by your pressure cooker's manual.
Process at 15 PSI for 60 minutes. Let the pressure drop naturally — do not quick-release, as the rapid pressure change can crack jars or cause the substrate to erupt.
After the pressure drops to zero, leave the jars inside with the lid cracked until they cool to room temperature. This can take several hours. Don't rush it.
Steam Sterilization (No Pressure Cooker)
If you don't have a pressure cooker, steam sterilization works for PF Tek because the BRF/vermiculite substrate is not as nutrient-dense as grain — it's more resistant to contamination.
- Place a rack, folded towel, or a few jar lid rings in the bottom of a large pot.
- Set your jars on the rack.
- Add water to about 5 cm (2 inches) up the sides of the jars.
- Put the pot lid on.
- Bring to a boil, then reduce to a simmer.
- Steam for 90 minutes.
- Turn off the heat and let cool completely without opening the lid. This can take 8-12 hours — overnight is ideal.
The key is keeping steam circulating around the jars for the full 90 minutes. Check periodically that the pot hasn't boiled dry.
Step 3: Inoculate
This is where your still air box earns its keep.
Set up your SAB. Wipe it down with 70% iso. Place your cooled jars, syringe, lighter, and iso inside.
Let the air settle. Insert your arms and wait 30 seconds before starting.
Shake the syringe. If using a liquid culture syringe, shake it well to distribute the mycelium evenly.
Flame the needle. Heat it until it glows red. Let it cool for 5-10 seconds.
Inject. Push the needle through one of the lid holes until it touches the glass on the inside of the jar. Inject about 0.5-1 cc of liquid culture. Repeat at each hole, depositing a small amount at each point. Total injection per jar: 1-2 cc.
Cover the holes. Place a small piece of micropore tape over each injection hole. This allows gas exchange while keeping contaminants out.
Repeat for all jars. Flame the needle between every 2-3 jars.
A standard 10 cc syringe will inoculate 6-10 jars, depending on how much you inject per jar.
Step 4: Colonization
Place your inoculated jars in a clean, warm location. The ideal temperature is 21-27°C (70-80°F). A shelf in a closet, a cupboard, or a warm room works well. Avoid direct sunlight and drafty areas.
What to Watch For
- Days 3-7: Small white dots appear at the injection points. This is healthy mycelium starting to grow.
- Week 1-2: The white patches expand outward from each inoculation point. You'll see white tendrils radiating through the vermiculite.
- Week 2-4: Patches merge and cover more of the jar. Healthy mycelium is bright white, wispy or ropey in texture, and smells clean — like fresh mushrooms.
- Week 3-5: Full colonization. The entire jar should be covered in white mycelium, visible from all sides.
Red Flags
- Green, blue-green, or black patches: Contamination. Remove the jar immediately — don't open it. The most common cause is insufficient sterilization or a break in sterile technique during inoculation.
- Sour or sweet smell: Bacterial contamination. The jar should smell like mushrooms, not like fermentation.
- No growth after 2 weeks: The syringe may have been inactive, or temperatures are too low. Give it another week before writing it off.
- Wet, slimy spots: Bacterial wet spot. Often caused by injecting too much liquid culture or from a contaminated syringe.
Consolidation
After the jar appears fully colonized, wait an additional 5-7 days. This "consolidation" period allows the mycelium to fully establish itself throughout the cake, including any small uncolonized pockets you might not be able to see. A well-consolidated cake is much more resistant to contamination during fruiting.
Step 5: Build Your SGFC (Shotgun Fruiting Chamber)
While your jars colonize, build your fruiting chamber. An SGFC is a large clear tub with holes drilled on all six sides, filled with damp perlite. It's the standard fruiting chamber for PF Tek.
Build Instructions
Get a large clear tub. 50-66 quart (47-62 litre) works well.
Drill holes. Using a 6 mm (1/4 inch) drill bit, drill holes in a grid pattern spaced roughly 5 cm (2 inches) apart on all six sides — top, bottom, and all four walls. Yes, including the bottom. The bottom holes are essential for airflow.
Add perlite. Fill the bottom of the tub with 10-13 cm (4-5 inches) of coarse perlite. Soak the perlite in water first, then drain off the excess. It should be damp but not sitting in standing water.
Elevate the tub. Set the tub on four small objects (jar lids, bottle caps, pieces of wood) so air can flow through the bottom holes. This is critical — the SGFC works by ambient air currents rising through the damp perlite and out the top, creating a gentle humidity cycle.
The SGFC creates a high-humidity environment (85-95% RH) with passive air exchange. No fans, no humidifier, no automation. Just physics.
Step 6: Birthing the Cakes
"Birthing" means removing the colonized cake from the jar. Once your jars are fully colonized and consolidated, it's time.
Remove the foil and lid. Turn the jar upside down and tap the bottom firmly. The cake should slide out. If it's stuck, use a clean butter knife around the edges to loosen it.
Rinse gently. Hold the cake under cool running water for a few seconds to wash off any loose vermiculite and contamination from the outer surface. Handle gently — the cakes are fragile.
Dunk. Submerge the cakes in clean, cold water for 12-24 hours. This rehydrates them after months in the jar and gives the mycelium a water boost before fruiting. Use a clean container and weigh the cakes down with a clean plate or lid so they stay submerged.
Roll (optional). After dunking, some growers roll the cakes in dry vermiculite. This creates a moisture-retaining layer on the outside of the cake. It helps in dry environments but isn't strictly necessary in the humidity of an SGFC.
Step 7: Fruiting
Place cakes in the SGFC. Set each cake on a small square of aluminum foil (to prevent direct contact with the perlite) on top of the perlite layer. Space them evenly so air flows around each cake.
Mist and fan. Mist the inside of the chamber (the walls, the perlite, the air above the cakes) 2-4 times per day with a spray bottle. Avoid spraying directly on the cakes — let the mist settle. After misting, fan the chamber with the lid for 30-60 seconds to exchange air.
Provide light. Indirect natural light or a small lamp on a 12/12 cycle. The cakes need light to orient their growth.
Watch for pins. Within 7-14 days of birthing, you should see tiny mushroom pins forming on the surface of the cakes. These develop rapidly into full-sized mushrooms over the next 5-10 days.
Harvest. Pick mushrooms when the cap edges are still slightly curled (for oyster mushrooms) or when the spines are well-formed but before browning (for lion's mane). Twist gently at the base.
Step 8: Subsequent Flushes
PF Tek cakes can produce multiple flushes — typically 2-4 from a healthy cake.
After each flush:
- Remove remaining stumps and any tissue that didn't develop.
- Dunk again for 12-24 hours to rehydrate.
- Return to the SGFC and resume misting and fanning.
- Wait 7-14 days for the next flush.
Each flush generally produces less than the previous one. When the cakes stop producing, they'll often start to develop blue bruising (a stress response) or show signs of contamination. At that point, compost them and start a new batch.
PF Tek vs Bulk Growing
PF Tek is an excellent educational method, but it has limitations compared to bulk substrate methods:
| Feature | PF Tek | Monotub/Bulk |
|---|---|---|
| Yield per batch | 50-150 g (from 12 jars) | 500-2000 g |
| Complexity | Low | Moderate |
| Cost per gram | Higher | Lower |
| Sterile technique needed | Moderate | Higher for grain prep |
| Time to first harvest | 5-8 weeks | 4-7 weeks |
| Best for | Learning, small batches | Serious yields |
Many growers start with PF Tek, learn the fundamentals, and then "graduate" to grain spawn and monotubs. The skills transfer directly — sterile inoculation, colonization monitoring, fruiting conditions, and harvest timing are the same regardless of method.
Quick Tips for PF Tek Success
- Don't skip the dry vermiculite layer. It's your primary contamination barrier during colonization.
- Less liquid is better. Injecting too much liquid culture creates wet spots where bacteria thrive. Stick to 1-2 cc per jar.
- Be patient during consolidation. Birthing too early leads to soft, crumbly cakes that contaminate easily.
- Keep your SGFC elevated. The bottom holes are not optional — they're what drives the passive airflow.
- Dunk between every flush. Rehydration is what fuels subsequent flushes. Skip the dunk and your second flush will be weak.
PF Tek is how most of us got started. It's simple, it works, and it teaches you the fundamentals that every other growing method builds on. Grab a liquid culture syringe or a grow kit if you want to start even simpler, and work your way up from there.
Need help with your grow? Dr. MycoThumb is our free AI growing assistant — ask about substrates, contamination, fruiting conditions, or any cultivation question. Available 24/7 in the chat bubble at the bottom-right of every page.