
If you've outgrown your first mushroom grow kit and you're ready to produce serious quantities of fresh mushrooms at home, a Martha tent is the next step. Named after the Martha Stewart-style mini greenhouse it's based on, a Martha tent is a controlled fruiting chamber that lets you manage humidity and fresh air directly. Temperature still depends on the room or on separate heating and cooling. Those three factors together decide whether your mushrooms thrive or struggle.
A tent can hold several blocks at once, depending on their size and the space needed around each cluster. Weekly output depends on species, block supply, losses and harvest timing. It's the setup that bridges the gap between casual hobbyist and dedicated home grower, and it's also the starting point for many small commercial farms.
This guide walks you through the complete build, from parts list to first harvest.
What Is a Martha Tent?
A Martha tent is a zip-up shelving greenhouse converted into a mushroom fruiting chamber. You add a humidifier, a small fan for fresh air, and a controller to keep both in range. That is the whole idea.
The name comes from the Martha Stewart branded portable greenhouses that early growers repurposed, and it stuck to the method rather than the brand. Nobody sells a tent called a Martha. You are looking for a four or five shelf mini greenhouse, roughly 60 cm wide by 45 cm deep by 130-160 cm tall, with a clear zip cover and wire shelves. You will also see the approach called Martha tek, which means the same thing.
A typical tent holds 4-12 fruiting blocks depending on their size and how much space each cluster needs to open properly. That puts it between a monotub and a proper grow room.
What it costs. A working build runs roughly $150-250 CAD. The tent itself is the cheap part at $40-80; the humidity controller is usually the single largest line at $40-60, and it is the component that turns a plastic greenhouse into something you do not have to babysit. Every part is itemised in the parts list below.
Martha Tent vs Monotub
They solve different problems, and most growers end up running both.
A monotub is a sealed tub that holds its own humidity passively. It costs very little, needs no power, and is the right answer for one or two bulk grows at a time. The limit is that each tub is its own climate, so ten tubs means ten separate things to check.
A Martha tent is active. It costs more up front and needs electricity, but it fruits many blocks under one set of conditions you control from a single dial. That is the real trade: you are buying centralised control, not just capacity.
The usual progression is monotubs first, then a tent once you are running more blocks than you want to manage individually, or once you are fruiting bagged blocks rather than bulk tubs. If you are still deciding, the monotub guide covers the cheaper path first.
Buy a Kit or Build Your Own?
Purpose-made mushroom tents now exist with the shelving, ports and covers already sized for this job. They cost more than a hardware-store greenhouse and save you the fiddly parts, mainly cutting and sealing ports for the humidifier hose.
Building your own from a generic greenhouse is still the cheaper route and it is what most of this guide describes. The parts are not hard to source and nothing about the build is precise work. The one thing worth knowing before you choose: on cheap greenhouses the clear cover is the component that fails, usually inside 6-12 months of constant humidity, and replacing it costs $15-25. The frame and shelves outlast several covers.
If you would rather skip the build entirely, the grow tent roundup compares purpose-made tents against horticultural ones across the full size range.
Why a Martha Tent?
You might be wondering why you need a dedicated fruiting chamber at all. Can't you just cut your bags open and mist them on the kitchen counter?
You can, and for a single grow kit, that works fine. But as soon as you're running multiple blocks, the limitations of open-air fruiting become apparent:
Humidity consistency. Mushrooms need 80-95% relative humidity during fruiting. Your kitchen is probably sitting at 30-40%. Misting helps, but it creates spikes and valleys rather than the consistent environment mushrooms prefer. A Martha tent maintains high humidity continuously.
Contamination control. An enclosed space limits exposure to airborne contaminants. This matters less during fruiting (the mycelium is already established) than during colonization, but it still helps.
Space efficiency. A Martha tent uses vertical space with shelves, allowing you to fruit many more blocks in the same floor footprint. A single tent in a corner of your basement can produce more mushrooms than most families can eat.
Scalability. Everything you learn running a Martha tent translates directly to a larger grow room. The principles are identical. You're just controlling them in a smaller space.
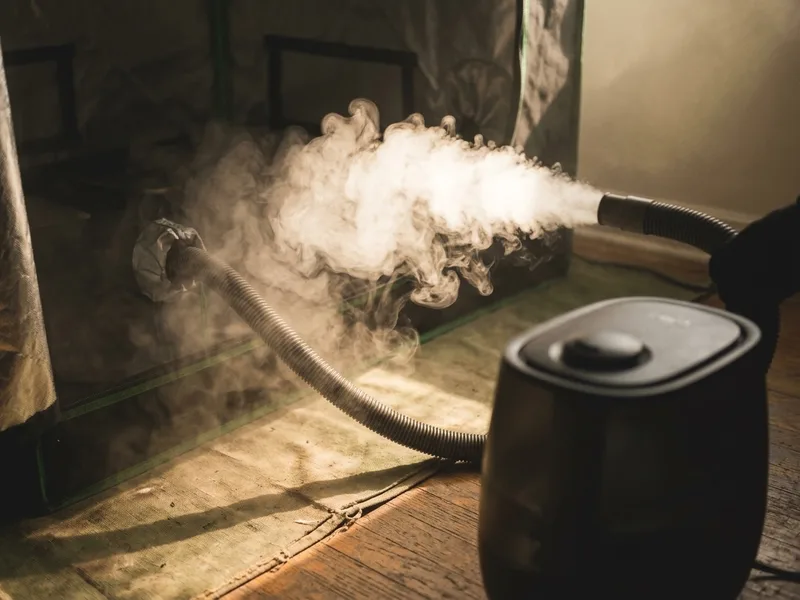
Ultrasonic Grow Tent Humidifier, 3L
Ultrasonic fogging with a hose you can run into a tent or chamber, which is what makes it useful here rather than a room humidifier. Pair it with a controller: on a timer alone it will swing well past what a fruiting surface wants.
When you buy through our links, it supports our mycology research at no extra cost to you.
Parts List
Here's everything you need, with estimated costs in Canadian dollars.
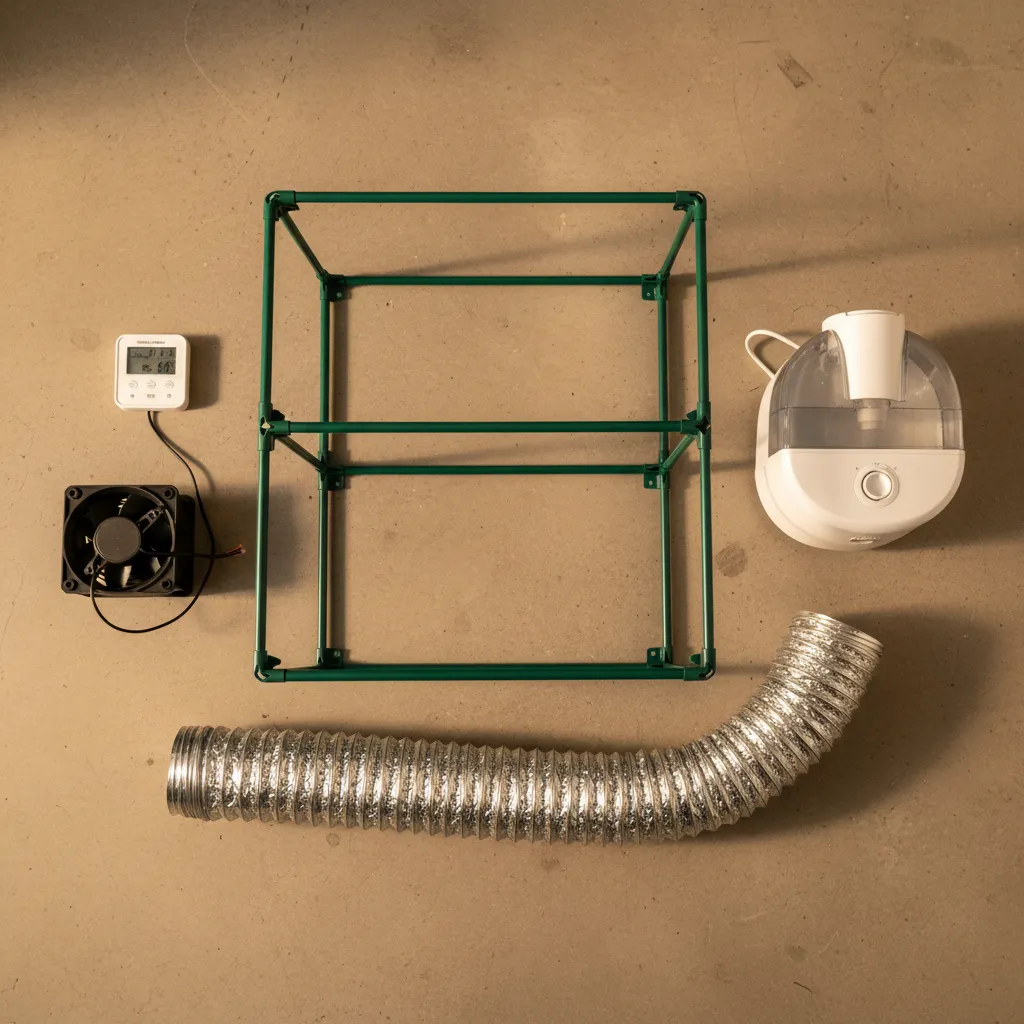
The Tent
| Item | Estimated Cost | Notes |
|---|---|---|
| 4-shelf mini greenhouse / grow tent | $40-80 | The "Martha" itself. Available at Canadian Tire, Home Depot, or online. Look for one with a clear PVC or plastic zip-up cover and wire shelving. Dimensions around 60 cm wide x 45 cm deep x 130-160 cm tall. |
| Replacement clear PVC cover (optional) | $15-25 | Some cheap greenhouses come with flimsy covers. A thicker replacement improves humidity retention. |
Humidity System
| Item | Estimated Cost | Notes |
|---|---|---|
| Ultrasonic disc humidifier | $15-30 | A single-disc or dual-disc ultrasonic mist maker that sits in a reservoir of water. Available on Amazon. A cool-mist ultrasonic unit is a common choice; match its output and control compatibility to your tent. |
| Plastic tub or bucket (reservoir) | $5-10 | The humidifier disc sits in water inside this container. A 10-20 litre plastic tub works well. |
| Flexible ducting (7.5-10 cm / 3-4 inch) | $10-20 | Runs from the reservoir to the tent, carrying mist inside. |
| PVC or duct tape | $5-10 | For sealing connections. |
Automation
| Item | Estimated Cost | Notes |
|---|---|---|
| Humidity controller (Inkbird IHC-200 or similar) | $40-60 | Plugs your humidifier into a controller that turns it on and off based on a set humidity level. This is what makes the system hands-off. |
| Humidity/temperature sensor | Included | Most controllers come with a sensor probe. |
| Timer (optional) | $10-15 | For cycling the humidifier if you don't have a humidity controller. A simple 15-minute interval timer works. |
Air Exchange
| Item | Estimated Cost | Notes |
|---|---|---|
| Small fan (computer fan or USB fan) | $10-20 | Provides gentle air circulation. A 12V computer fan is ideal: quiet and low-power. |
| Timer or fan speed controller | $10-15 | To cycle the fan on and off (you don't want constant airflow, just periodic exchange). |
Optional but Helpful
| Item | Estimated Cost | Notes |
|---|---|---|
| Thermometer/hygrometer | $10-20 | A secondary readout so you can monitor conditions at a glance without relying solely on the controller. |
| LED strip light | $10-15 | Mushrooms need a small amount of light to orient their growth. A basic LED strip on a timer (12 hours on / 12 hours off) is sufficient. Natural indirect light also works if the tent is near a window. |
| Drip tray | $5-10 | Goes on the bottom shelf to catch excess moisture. |
Total estimated cost: $170-330 CAD
That's less than the cost of buying fresh gourmet mushrooms for a few months, and this setup will produce mushrooms continuously for years.
Humidifying the tent
Lighting the shelves
Step-by-Step Assembly
Step 1: Assemble the Greenhouse Frame
Follow the manufacturer's instructions to assemble the wire shelving unit. Most mini greenhouses click together without tools. Position the shelves with enough vertical space between them for your mushroom blocks to fruit. 25-35 cm between shelves is usually right. Remove shelves you don't need to create the spacing that works for your blocks. Use mature, ready-to-fruit blocks in the tent. Pre-sterilized hardwood substrate still needs spawn added and time for the mushroom to grow through it before fruiting. Check block dimensions and leave space for mushrooms to grow.
Place the frame in its permanent location before adding the humidity system. A basement, spare room, or garage works well. Avoid direct sunlight, which heats the tent and promotes algae growth. You want indirect light or artificial light only.
Step 2: Set Up the Humidity Reservoir
Place your plastic tub next to (or behind) the tent. Fill it with clean water and place the ultrasonic disc humidifier in the water according to its instructions. The disc should be submerged at the depth recommended by the manufacturer, usually 3-5 cm of water over the disc.
Important: Use clean, cold water. Hot water damages ultrasonic discs. Some growers use distilled water to prevent mineral buildup (the white dust that ultrasonic humidifiers produce from mineral-rich tap water). If your tap water is very hard, distilled or reverse-osmosis water is worth the extra cost.
Step 3: Run the Ducting
Connect flexible ducting from the top of the reservoir tub to an opening in the tent. You can cut a small hole in the PVC cover of the tent, or route the ducting through the zipper opening. Seal the connection with duct tape to prevent mist from escaping.
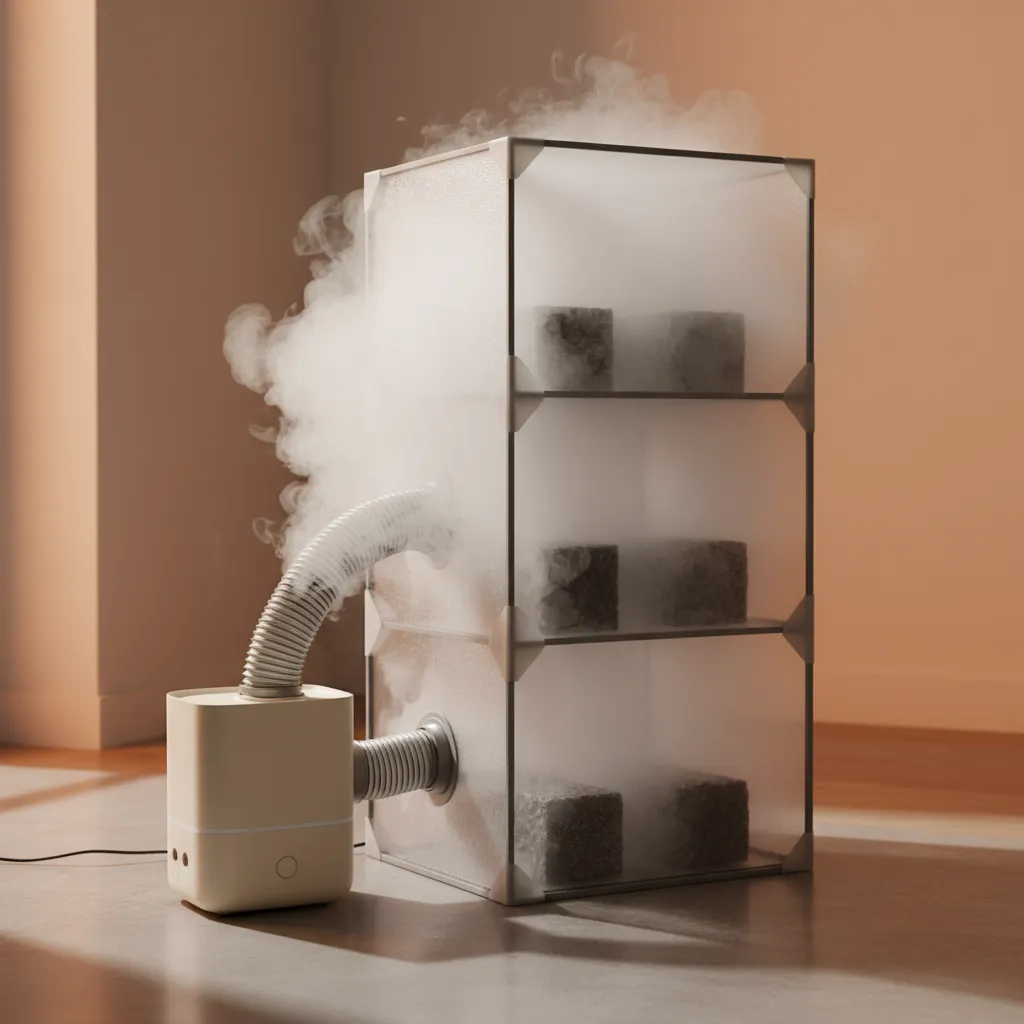
An ultrasonic disc makes mist but does not push it through a duct by itself. Use a reservoir air inlet and an appropriately rated fan or a humidifier with a built-in air mover, following the equipment instructions. Direct the outlet away from mushrooms and sensors so they are not continuously wet. Keep electrical connections outside the wet area and use equipment suitable for its location.
Step 4: Connect the Humidity Controller
Plug the ultrasonic humidifier into the humidity controller's outlet. Place the controller's sensor probe inside the tent, at shelf level (not at the very top or bottom, because you want a reading that represents conditions where your blocks are).
Set the controller to:
- Target humidity: 90%
- Differential: 3-5% (the humidifier turns on when humidity drops to 85-87% and off when it reaches 90%)
The controller will now automatically maintain your target humidity by cycling the humidifier on and off. This is the single most important piece of the setup. It reduces manual switching, but you still need daily checks of water, sensors, airflow and the mushrooms.
Step 5: Set Up Air Exchange
Fresh air exchange (FAE) is essential. Mushrooms respire: they consume oxygen and produce CO2, just like we do. Without FAE, CO2 builds up inside the tent, which causes long, leggy stems and small caps. But too much FAE drops humidity rapidly. The balance is the art of running a Martha tent.
Method 1: Passive FAE. Leave the bottom of the tent cover slightly open (unzipped 5-10 cm). Warm, humid air rises and exits through gaps at the top; fresh air enters from the bottom. This works well in moderate climates but may not provide enough exchange for a fully loaded tent.
Method 2: Active FAE. Mount a small fan on a timer. Run it for 5-10 minutes every 1-2 hours to exchange air in the tent. The fan can blow air into the tent (pushing out stale air through gaps) or exhaust air out of the tent (pulling fresh air in through gaps). Either works.
Method 3: Humidity-driven FAE. When the humidifier runs, the mist flowing through the ducting pushes fresh air into the tent. If your humidifier cycles frequently enough, this alone can provide adequate FAE. Monitor CO2 levels or mushroom morphology (see Troubleshooting) to determine if additional FAE is needed.
Step 6: Add Lighting
Mount an LED strip light inside the tent or position the tent where it receives indirect natural light. Mushrooms don't photosynthesize, but they do use light as a directional signal, and they grow toward light sources. Without any light, mushrooms grow in random directions and may develop abnormal shapes.
A simple timer running the light for 12 hours on / 12 hours off mimics a natural day/night cycle and is more than sufficient.
Step 7: Test the System
Before loading your blocks, run the tent empty for 24 hours. Monitor:
- Humidity (should hold steady at your target, 85-95%)
- Temperature (should stay in range for your species)
- Condensation (some is normal, but heavy dripping means humidity is too high or FAE is too low)
- Noise (ultrasonic humidifiers are quiet, but check that the fan isn't rattling)
Adjust your controller settings, FAE timing, and ducting position based on what you observe.
Once the empty tent holds its numbers for a full day, it's ready to load. If you're running your own substrate in filter-patch grow bags inoculated with grain spawn, make sure every bag is fully colonized, solid white with no bare patches, before it goes onto a shelf.
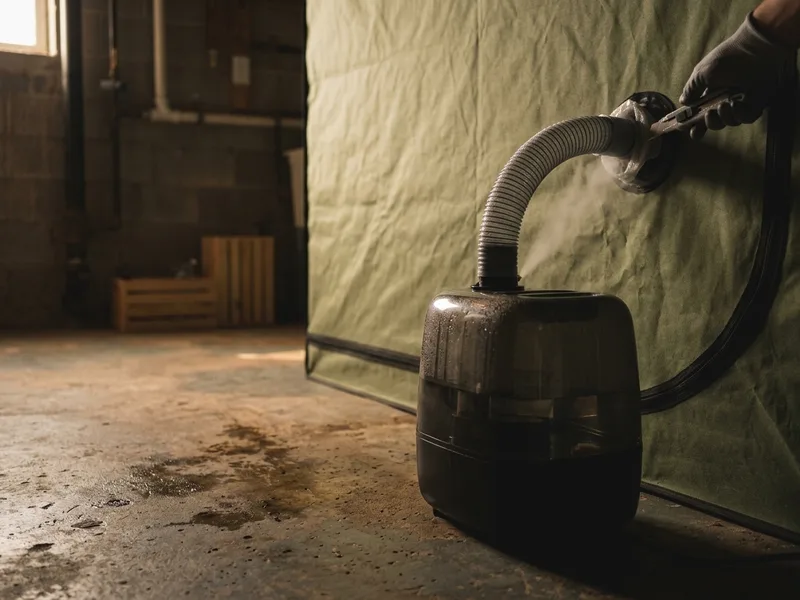
Spider Farmer 16L Humidifier
Sixteen litres and multiple hose outlets, sized for a fruiting room rather than a single tent. Overkill for one martha and the right answer once you are running several shelves.
When you buy through our links, it supports our mycology research at no extra cost to you.
Species Recommendations
Different mushroom species have different environmental preferences. Here's how common species perform in a Martha tent, with temperature guidance.
Best for Martha Tents
Blue Oyster. The easiest species to fruit in a Martha tent. Tolerates a range of conditions, fruits at 10-21°C (50-70°F), and produces fast, heavy flushes. If this is your first Martha tent grow, start here. Blue Oyster spawn | Blue Oyster grow kit
Lion's Mane. Thrives in high humidity, which makes the Martha tent an ideal environment for this species. Fruits at 15-20°C (59-68°F). Slightly more particular than oysters about humidity consistency, and the Martha tent's automated humidity solves this perfectly. Lion's Mane grow kit
Pink Oyster. A great summer species for the Martha tent if your growing space is warm. Needs 18-30°C (64-86°F). Grows explosively fast in humid conditions, so expect pins within days.
Shiitake. Fruits well in a Martha tent at 10-21°C (50-70°F). Benefits from the consistent humidity that's hard to maintain with open-air fruiting. For more on shiitake cultivation, see how to grow shiitake mushrooms.
More Challenging
King Oyster. Needs lower humidity (75-85%) and cooler temperatures (12-18°C / 54-64°F) than most species. Can work in a Martha tent with adjusted controller settings, but requires more attention.
Reishi. Grows well but produces heavy spore loads that coat everything in brown powder. Some growers dedicate a separate tent to reishi for this reason.
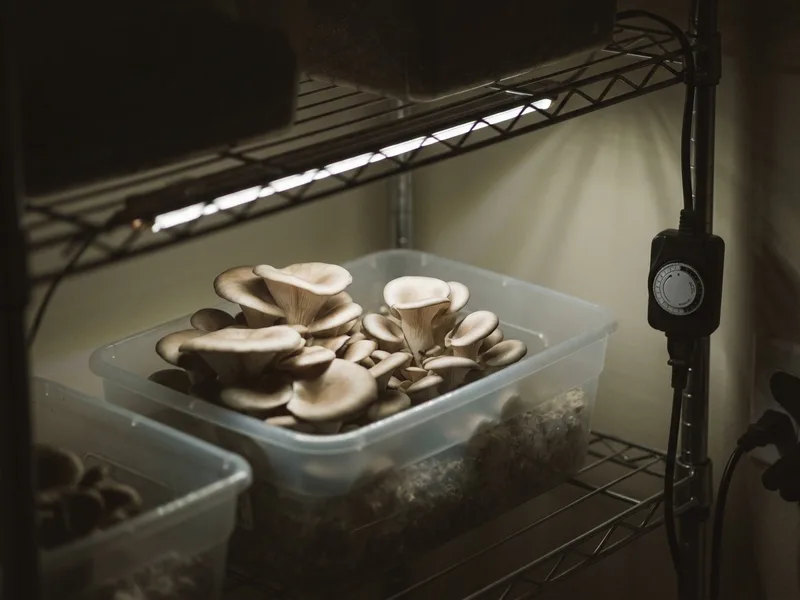
6500K LED Strip Light on a Timer
Mushrooms do not photosynthesise. Light is only a directional cue telling the stem which way is out, so a plain 6500K daylight strip on a 12-hour timer is all a chamber needs, and a room with a window often needs nothing at all. Avoid horticultural bloom lights: red spectrum is tuned for flowering plants and is the wrong cue entirely. Spend the money on fresh air exchange instead, which actually changes the shape of your mushrooms.
When you buy through our links, it supports our mycology research at no extra cost to you.
Troubleshooting
Problem: Long, Leggy Stems with Tiny Caps
Cause: Not enough fresh air exchange. High CO2 levels cause mushrooms to stretch toward oxygen sources, producing elongated stems and undersized caps.
Fix: Increase FAE. Open the bottom of the tent cover wider, increase fan runtime, or add a second air exchange cycle. This is the single most common Martha tent issue, and it's always the same fix: more fresh air. For more on temperature and environmental management, see our guide on what temperature do mushrooms need.
Problem: Humidity Won't Stay Above 80%
Cause: Too much air exchange, tent cover has gaps or tears, or the humidifier isn't producing enough mist.
Fix: Check the tent cover for holes or unsealed zippers. Reduce FAE slightly, because there's always a balance between humidity and fresh air. If the humidifier is the bottleneck, consider upgrading to a dual-disc unit or adding a second humidifier. Also check the water level in the reservoir, since the disc must be submerged to function.
Problem: Puddles of Water on Shelves or Floor
Cause: Humidity is too high (above 95%) or there's not enough airflow to distribute moisture evenly. Condensation forms on surfaces and pools.
Fix: Lower your humidity target to 85-90%. Add a small circulating fan inside the tent (not blowing directly on blocks, just moving air gently). Add a drip tray on the bottom shelf. Some condensation is normal and unavoidable. Puddles are excessive.
Problem: Condensation Dripping Onto Blocks
Cause: The mist enters the tent directly above the shelves, or humidity is running at the very top of the range (95%+). Water beads on the tent ceiling and the underside of shelves, then drips straight onto your blocks, and standing water on a block is an open invitation for bacterial blotch and mould.
Fix: Reroute the ducting so mist enters at the side of the tent rather than directly over the shelves, and angle the outlet so the fog drifts rather than rains. Drop your humidity target a few points. 85-90% fruits mushrooms just as well as 95% without the ceiling turning into a rain cloud. Wipe down the inside of the cover during your daily check, and if one shelf sits directly under the mist inlet, leave it empty or use it for your drip tray.
Problem: Humidity Overshooting the Target
Cause: Ultrasonic humidifiers don't stop humidifying the instant the controller cuts power. The fog already hanging in the ducting and tent keeps pushing the reading up for several minutes. With a tight differential, the tent sawtooths: overshooting to 97-98%, drifting down, then overshooting again. Sensor placement makes it worse if the probe sits right in the mist path.
Fix: Widen the controller differential to 5% and set the target so the overshoot peaks below 95%. In practice, a target of 87-88% often lands you right where you want to be. Move the sensor probe to mid-shelf level, away from the mist inlet, so it reads the air your blocks actually sit in. If the swings are still wide, shorten the ducting run, since less fog in the pipe means less momentum after shutoff.
Problem: Green Mold on Blocks or Shelves
Cause: Trichoderma contamination, the most common mold in mushroom growing. It thrives in warm, humid environments, exactly the conditions you're creating in a Martha tent.
Fix: Remove contaminated blocks immediately, because Trichoderma spreads fast. Clean the tent and shelves with a 10% bleach solution or isopropyl alcohol (we keep a 4L jug on hand at all times). Check that your blocks were properly colonized before entering the tent (fully white, no bare spots). Green mold on blocks that aren't fully colonized means the colonization step failed, not the Martha tent. For a deep dive into contamination, read green mold and mushroom contamination.
Problem: Mushrooms Growing Towards One Side
Cause: Uneven light distribution. Mushrooms orient their growth toward light, so if light enters from one side, they'll all lean that way.
Fix: Add an LED strip inside the tent for even illumination, or rotate blocks periodically.
Problem: No Pins After a Week
Cause: Any of several things. The blocks aren't fully colonized, humidity is too low, temperature is out of range for the species, or there's no light trigger.
Fix: Verify full colonization (the block should be completely white with no visible uncolonized substrate). Check humidity is above 80%. Verify temperature is in range for your species. Ensure there's at least some indirect light reaching the blocks. If growing oyster mushrooms from bags, make sure you've cut the bags open, since they need an opening to fruit from. Read how to grow oyster mushrooms for species-specific fruiting guidance.
Maintenance
A Martha tent requires light but consistent maintenance to keep it running well.
Daily:
- Check humidity and temperature readings
- Refill the humidifier reservoir as needed (daily in dry conditions)
- Quick visual check of blocks for signs of contamination
Weekly:
- Wipe down shelves and interior surfaces to prevent algae and mold buildup
- Clean the ultrasonic disc (mineral deposits reduce mist output over time)
- Check ducting connections for looseness
Between Grows:
- Remove all spent blocks
- Clean the entire tent, shelves, and cover with a diluted bleach or hydrogen peroxide solution
- Clean the humidifier reservoir and disc thoroughly
- Inspect the tent cover for tears or worn spots
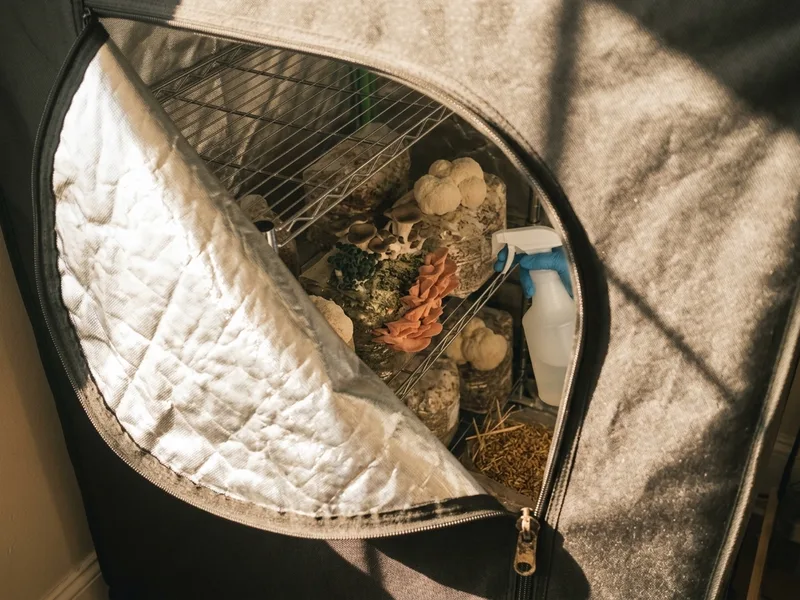
Mushroom Growing Tent (Martha Tent)
Purpose-built Martha tent for mushroom fruiting. Comes with a clear PVC cover, 4-tier shelving, and zipper access. Fits monotubs inside and has ports for ducting. Much sturdier than a basic greenhouse frame.
When you buy through our links, it supports our mycology research at no extra cost to you.
Frequently Asked Questions
What size grow tent do I need for a Martha setup?
The classic Martha is built on a 4-tier mini greenhouse, roughly 60-70 cm wide and 150-160 cm tall, small enough for a basement corner, big enough to fruit 6-12 blocks at once. That's the size to start with. If you've got the floor space and want more capacity, a 2-door walk-in greenhouse (about 140 cm wide) doubles your shelf area and runs on the same humidifier-and-controller setup, just with a bit more FAE.
What size humidifier does a Martha tent need?
Smaller than most people buy. A single or dual-disc ultrasonic mist maker sitting in a 10-20 litre reservoir is enough for a tent this size, and that is a $15-30 part rather than a room humidifier. Output matters less than control: a unit running flat out will soak your blocks, so the humidity controller is what actually keeps the tent in range. Size the reservoir for how often you want to refill it, not for how much mist the disc can make.
Should I use an ultrasonic or evaporative humidifier?
A cool-mist ultrasonic humidifier is a common compact option. Choose enough output for the tent and check that it can restart correctly under the controller. Performance depends on the room, tent size and ventilation; do not assume every evaporative unit has the same limit. Follow the maker’s water and cleaning instructions, particularly where mineral buildup is a problem.
How often should I run fresh air exchange?
A fan on a timer running 5-10 minutes every 1-2 hours is the baseline for a loaded tent. But the mushrooms will tell you if it's enough: long stems and small caps mean CO2 is building up and you need more exchange; humidity that crashes after every fan cycle means you're exchanging too aggressively. Adjust one variable at a time and give it a day between changes.
Can I fruit multiple species in the same tent at once?
Yes, as long as their temperature ranges overlap. The tent runs at one setpoint, so every species in it lives under the same conditions. Blue oyster and lion's mane are a natural pairing since both fruit happily at 15-20°C. What to avoid is mixing a cold-weather species with a warm-weather one and hoping both cope. Run species with matching needs together, and rotate the odd one out into its own grow.
Can I run a Martha tent through a Canadian winter?
In a basement, absolutely. Most Canadian basements hold 15-18°C year-round, which is ideal fruiting temperature for oysters and lion's mane, and winter is honestly our favourite season to run tents. An unheated garage is a different story: once the space drops near freezing, fruiting stalls and your humidifier reservoir can ice up. If the garage is your only option, you'll need a thermostat-controlled space heater in the room (never inside the tent) and you should expect higher humidity demand from the dry winter air.
A tent holds far more substrate than a tub, which is the point at which carbon dioxide outpaces passive diffusion. See fresh air exchange for fan sizing and why most inline fans are wildly oversized for a single tent.
Scaling Beyond the Martha Tent
Many growers start with a Martha tent and eventually outgrow it. The natural next step is a dedicated fruiting room: a small, enclosed room (a closet, spare bathroom, or purpose-built space) with a humidifier, exhaust fan, and fresh air intake. The principles are identical to a Martha tent, just on a larger scale.
If you're considering turning your hobby into a business, our guide on how to start a mushroom farm in Canada covers the full journey from first tent to first farmers' market.
Use the home-growing guide when the tent supports personal or experimental blocks. When it becomes a repeated production room with batches, harvest records, and sales, move into the commercial mushroom-growing guide.
A Martha tent is one of those projects where the setup effort pays off immediately and continuously. Once it's built and dialled in, you've got a miniature mushroom farm running in a corner of your basement, giving you a dedicated space to grow mushrooms, with daily checks and regular cleaning.
Start with a grow kit or grain spawn and a bag of substrate, load up your tent, and watch the magic happen. Browse our growing supplies for everything you need to get your Martha tent producing.
Need help with a Nature Lion kit? Start with the kit care guide, or email info@naturelion.ca with a photo and your start date. Dr. MycoTek is another option for growing questions and notes.