Used coffee grounds are one of the best free substrates for growing mushrooms at home. Your morning coffee habit generates a steady supply of pre-pasteurized, nitrogen-rich growing material that oyster mushrooms absolutely love. No pressure cooker, no special equipment, no cost — just coffee grounds, some spawn, and a container.
This guide walks you through the complete process from collecting grounds to harvesting your first flush, including the mistakes that trip up most beginners.
Why Coffee Grounds Work as Mushroom Substrate
Coffee grounds have three properties that make them excellent for mushroom cultivation:
They're already pasteurized. The brewing process pushes near-boiling water through the grounds, killing most competing organisms. This means you can skip the sterilization step that makes other substrates more complex. Fresh grounds straight from the coffee maker are ready to use.
They're high in nitrogen. Coffee grounds contain approximately 2% nitrogen by weight — significantly higher than straw or sawdust. Mushroom mycelium needs nitrogen to grow, and the elevated levels in coffee grounds support fast colonization. This is the same reason coffee grounds make excellent garden compost.
They have good structure. The particle size of coffee grounds provides adequate air space for mycelium to breathe while retaining enough moisture to stay hydrated. They don't compact into an airless mass like some fine substrates can.
The catch? Coffee grounds are too nutritious. The same nitrogen content that feeds mushroom mycelium also feeds contamination. This is why technique matters more with coffee grounds than with something like pasteurized straw. Get the details right and you'll be rewarded with fast, productive grows. Get them wrong and you'll grow a spectacular display of green mould instead.
Which Mushrooms Grow Best on Coffee Grounds
Not all species perform equally on coffee. Here's what works and what doesn't:
Oyster Mushrooms — The Best Choice
Oyster mushrooms (Pleurotus ostreatus and related species) are the undisputed champion of coffee ground cultivation. They colonize aggressively, tolerate imperfect conditions, and produce generous yields on this substrate. If this is your first time growing mushrooms, start with oyster.
Among oyster varieties:
- Blue oyster — the most reliable performer, handles cooler Canadian temperatures well. Our Blue Oyster Grain Spawn is a great match.
- Pink oyster — extremely fast colonizer, but needs warmer temps (21-27°C / 70-80°F). See our pink oyster guide for specifics.
- Pearl/grey oyster — the classic variety, dependable and forgiving.
Other Species That Work
- King oyster — grows on coffee grounds but prefers supplemented hardwood. Results are inconsistent compared to regular oyster species.
- Wine cap (Stropharia rugosoannulata) — grows well on coffee grounds mixed with straw or wood chips in outdoor beds.
Species to Avoid on Coffee
- Shiitake — needs hardwood. Coffee grounds don't provide the right lignin structure.
- Lion's mane — too slow to colonize, contamination will beat it every time on this substrate.
- Reishi — requires supplemented hardwood blocks and sterile technique.
Stick with oyster mushrooms for coffee grounds. Once you've had success, you can experiment with other species on more appropriate substrates.
What You Need
The beauty of coffee ground cultivation is the minimal equipment list:
- Used coffee grounds — 500g to 2 kg (1-4 lb), collected over 1-2 days maximum
- Mushroom grain spawn — 10-20% of the weight of your grounds. For 1 kg of grounds, use 100-200g of grain spawn. Check our spawn ratio guide for exact calculations.
- A container — a clean 4-litre plastic bucket with lid, a grow bag, or even a large freezer bag
- A spray bottle — for misting during fruiting
- Isopropyl alcohol 70% — for surface sanitizing
- Nitrile gloves — reduces contamination from your hands
That's it. No pressure cooker, no flow hood, no special bags. Total cost beyond the spawn is essentially zero.
Step-by-Step: Growing Oyster Mushrooms on Coffee Grounds
Step 1: Collect Your Coffee Grounds
Freshness is critical. Use grounds within 24 hours of brewing — ideally the same day. Coffee grounds start growing mould within 2-3 days of sitting at room temperature, even in a sealed container. The "already pasteurized" advantage disappears quickly.
How much do you need? A single coffee maker produces roughly 30-50g of grounds per brew. To fill a 4-litre bucket, you need about 1-1.5 kg of grounds — roughly a week's worth of coffee for a household. Here's how to handle the timing:
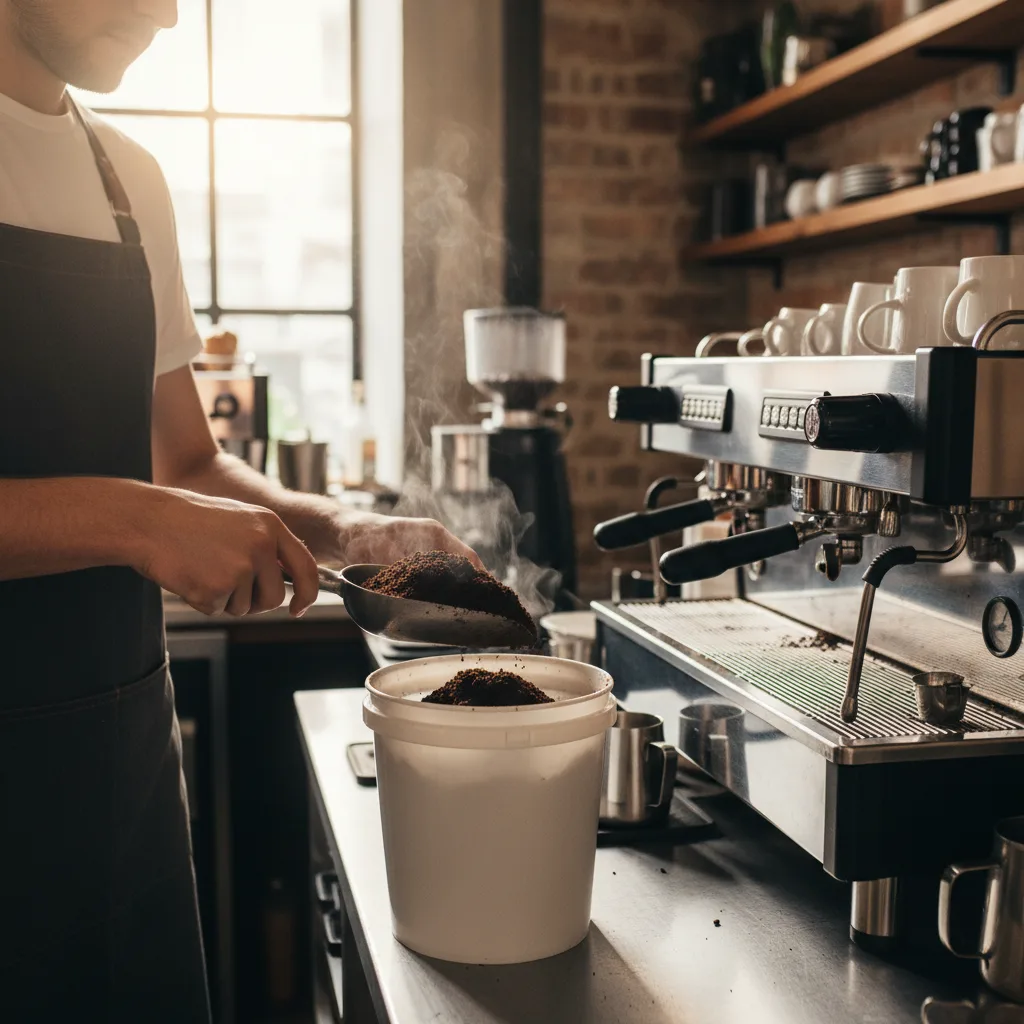
- Option A (best): Collect from a local café. Most coffee shops throw away kilograms of grounds daily and will happily give them to you. Ask for grounds that were brewed that morning. One café trip can give you enough for several grows.
- Option B: Collect your own grounds over 2-3 days, storing them in the fridge between collections. The fridge slows contamination enough to buy you time.
- Option C: Freeze grounds daily, then thaw the entire batch when you have enough. Freezing works, but the thaw introduces extra moisture — squeeze out excess water before using.
Step 2: Prepare Your Container
Bucket method (recommended):
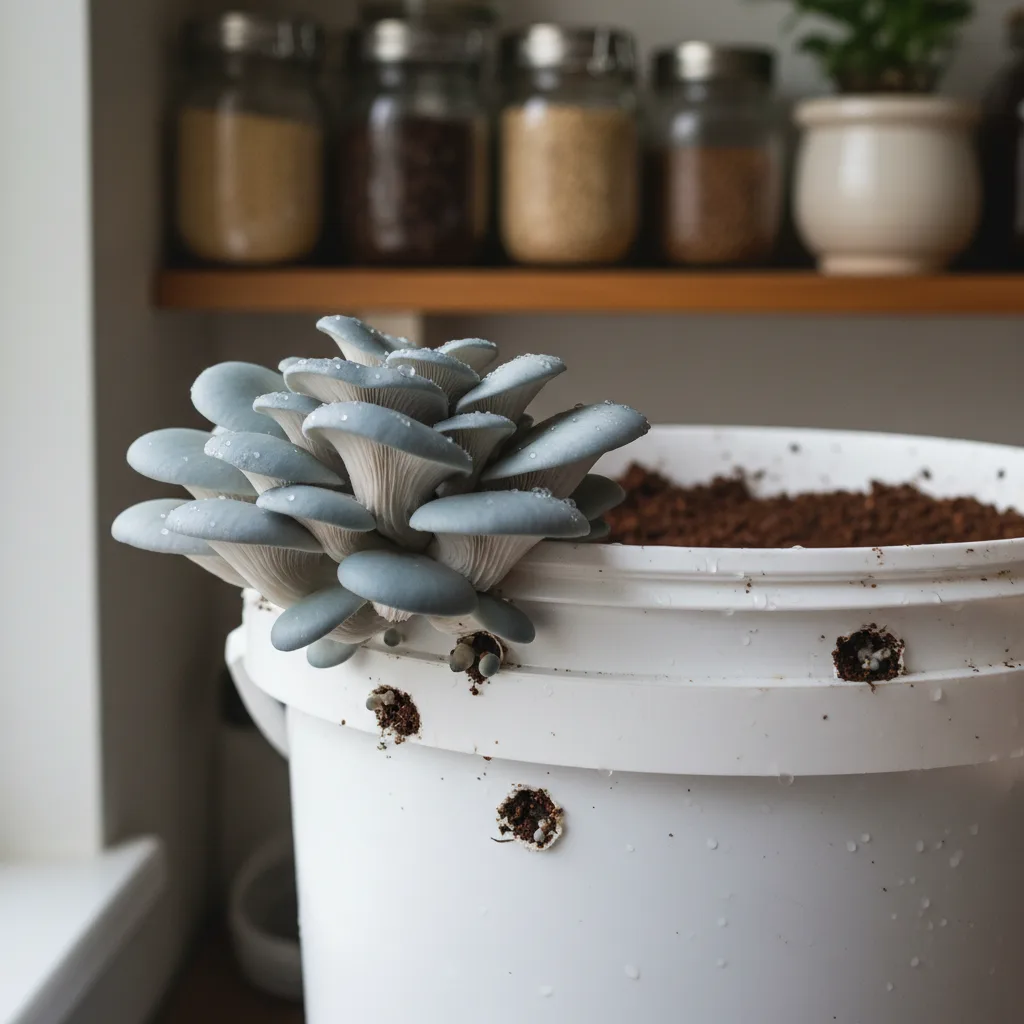
Drill 4-6 holes (about 10mm / 3/8 inch diameter) around the sides of a clean 4-litre plastic bucket, spaced evenly and positioned in the upper two-thirds of the bucket. These are your fruiting holes — where the mushrooms will grow out of.
Wipe the inside of the bucket with 70% isopropyl alcohol and let it air dry. Clean your hands or put on nitrile gloves.
Grow bag method:
If you have filter-patch grow bags, you can use those instead. Fill, seal, and cut X-shaped slits for fruiting once colonization is complete.
Freezer bag method (simplest):
A large ziplock freezer bag works in a pinch. Poke 6-8 small holes with a clean nail for air exchange. This isn't ideal — there's no filter, so contamination risk is higher — but it works for a first experiment.
Step 3: Mix Spawn and Grounds
This is the most important step. Do it quickly and cleanly.
- Break up your grain spawn so individual grains are separated (not in clumps).
- Add a layer of coffee grounds to the bottom of your bucket (2-3 cm deep).
- Sprinkle a thin layer of spawn over the grounds.
- Repeat — alternating layers of grounds and spawn until the bucket is full.
- The final layer should be spawn.
The ratio matters. Use 15-20% spawn by weight. More spawn means faster colonization and less chance of contamination. For coffee grounds, err toward 20% — the high nitrogen content attracts contaminants, so you want mycelium to colonize fast. See our spawn ratio guide for the math.
Mix everything together gently after layering. You want the spawn distributed evenly throughout the grounds, not concentrated in bands.
Step 4: Incubate (Colonization Phase)
Put the lid on the bucket (loosely — don't seal it airtight; the mycelium needs air exchange). Store it in a dark, warm spot at 20-24°C (68-75°F). A closet, cupboard, or shelf in a heated room works well.
Within 3-5 days, you should see white mycelium spreading from the spawn grains into the coffee grounds. This is exactly what you want.
Don't open the bucket to check. Look through the sides (if using a translucent container) or through the holes. Every time you open it, you introduce contaminants.
Full colonization takes 14-21 days depending on temperature, spawn rate, and species. The grounds should be almost entirely white with mycelium. Some areas of brown (uncolonized coffee) are normal, but the majority should be colonized before you move to fruiting.
Step 5: Initiate Fruiting
Once the substrate is well colonized:
- Move the bucket to a spot with indirect light — not direct sunlight, but not total darkness. A north-facing window, a shelf near a window, or under a grow light all work.
- The temperature should ideally drop slightly from the colonization phase — 15-20°C (59-68°F) is ideal for blue oyster. Pink oyster prefers it warmer at 21-27°C (70-80°F).
- Mist the holes 2-3 times daily with your spray bottle. You want the area around the holes to stay moist but not waterlogged.
- Ensure fresh air exchange. Mushrooms need oxygen and produce CO2. If your bucket is in a closed closet, move it somewhere with air circulation. A monotub or Martha tent setup works perfectly if you want to automate humidity.
Pins (tiny mushroom buds) should appear at the holes within 5-10 days of initiating fruiting conditions.

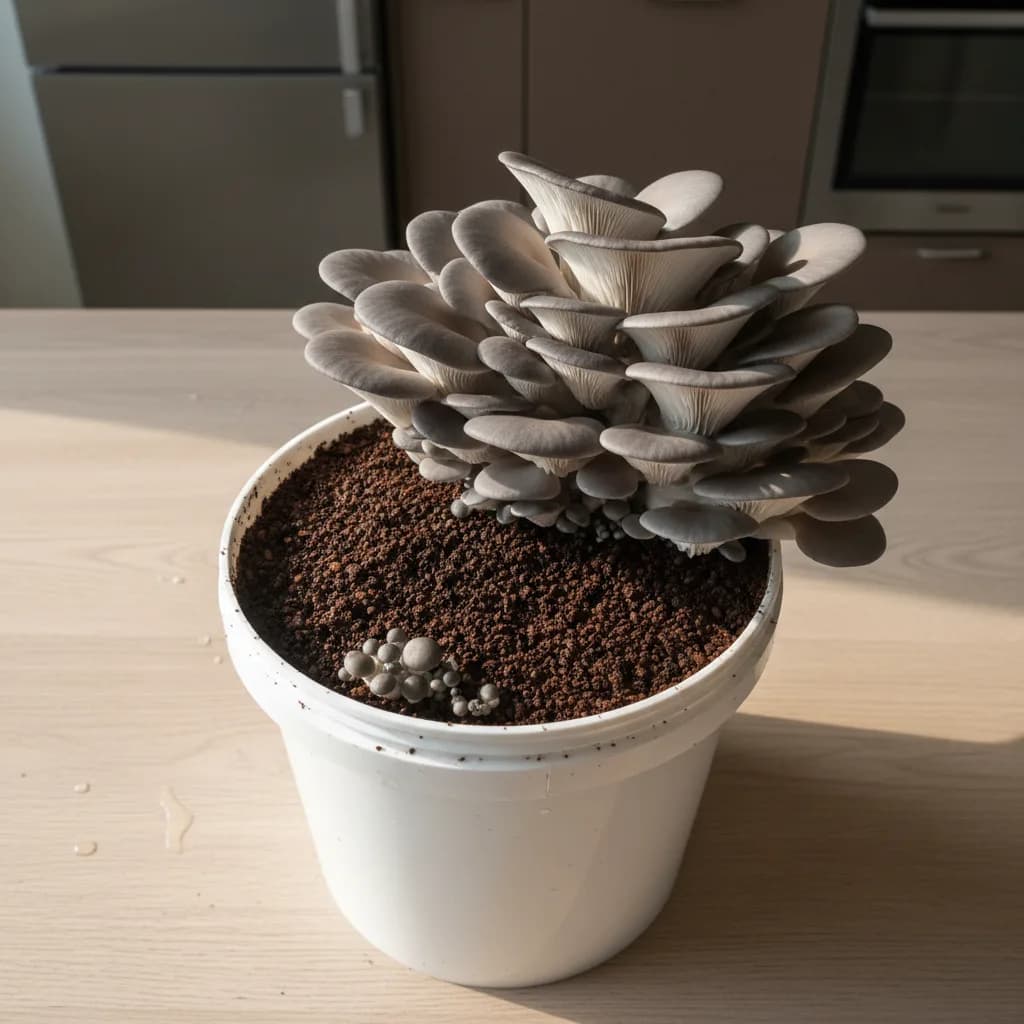
Step 6: Harvest
Oyster mushrooms are ready to harvest when the caps begin to flatten out and the edges start to curl slightly upward. Don't wait until the edges are fully wavy — harvest just before that point for the best texture and shelf life.
Grab the entire cluster at the base and twist gently to remove it from the substrate. A clean twist is better than cutting — it leaves less stump material that could rot.
Expected yield: 200-500g of fresh mushrooms per kilogram of coffee grounds over 1-2 flushes. That's roughly $5-15 worth of gourmet mushrooms from free substrate.
After the first flush, soak the bucket in water for 12 hours, drain, and return to fruiting conditions. A second flush is common. A third is possible but less productive.
Common Mistakes (And How to Avoid Them)
Using Old Grounds
This is the number one reason coffee ground grows fail. Grounds that sat on the counter for 3+ days are already colonized by bacteria and mould — even if you can't see it yet. By the time you add spawn, the competition has a head start.
Fix: Only use grounds brewed within the last 24 hours. If collecting over multiple days, store in the fridge or freezer.
Too Wet
Coffee grounds hold a lot of water. If your grounds are dripping wet straight from the coffee maker, the substrate will be too moist, creating anaerobic conditions that favour bacteria over mushroom mycelium.
Fix: Let grounds cool and drain for an hour after brewing. They should feel damp but not dripping. If you squeeze a handful, you should get a few drops of water at most — the same field capacity test used for other substrates.
Not Enough Spawn
With lower-nutrition substrates like straw, you can get away with 10% spawn ratios. Coffee grounds are different — the high nutrient content means more competition, so you need more inoculation points.
Fix: Use 15-20% spawn by weight. It feels like a lot of spawn relative to the grounds, and that's the point.
No Air Exchange
Sealing the bucket airtight during colonization or keeping it in a dead-air space during fruiting starves the mycelium of oxygen. You'll get thin, leggy mushrooms with long stems and tiny caps — or no mushrooms at all.
Fix: Keep the lid loose during colonization. During fruiting, ensure the bucket is in a space with air movement. Fan the holes once or twice daily if natural airflow is limited.
Mixing Coffee Grounds with Other Substrates
Some guides recommend mixing coffee grounds with straw or sawdust. This can work, but it introduces complexity — straw needs pasteurization, sawdust needs sterilization, and mixing substrate types changes the moisture balance.
Fix: For your first grow, use 100% coffee grounds. Once you've had a successful harvest, experiment with 50/50 coffee-straw mixes for larger yields.
Scaling Up: Beyond the Kitchen Bucket
If your first bucket grow goes well and you want to produce more, there are a few paths forward:
Multiple buckets. The simplest scaling method. Run 3-5 buckets at staggered intervals so you have a continuous harvest cycle. Each bucket costs nothing but spawn.
Partner with a café. A single busy café produces 5-10 kg of grounds daily. That's enough substrate for serious hobby-scale production. Some growers trade fresh mushrooms for free grounds — a mutually beneficial arrangement.
Graduate to proper substrates. Coffee grounds are a fantastic starting point, but they have a yield ceiling. When you're ready to scale further, supplemented hardwood substrates with proper sterilization produce significantly higher yields per kilogram. Our mushroom substrate guide covers all the options.
Try a grow kit. If you want guaranteed results without any substrate preparation, our mushroom grow kits come ready to fruit — just open, mist, and harvest in 7-14 days.
Frequently Asked Questions
Can I use coffee grounds from a pod/capsule machine?
Yes, but you'll need a lot of pods. Each pod contains only 5-7g of grounds. You'd need 150-200 pods to fill a single bucket. Traditional drip or French press coffee produces much more grounds per brew.
Do I need to add anything to the coffee grounds?
No. Pure coffee grounds provide everything oyster mushrooms need. Some growers add a small amount of gypsum (1-2% by weight) to improve structure and pH, but it's not necessary for a successful grow.
Can I reuse the spent substrate after fruiting?
Yes — it makes excellent garden compost. The mycelium has broken down the grounds into nutrient-rich material that plants love. Mix it into garden soil, add it to your compost bin, or use it as mulch.
How many times can I harvest from one bucket?
Typically 1-2 full flushes, occasionally 3. Each flush produces less than the previous one as the substrate's nutrients are consumed. Total production across all flushes is usually 200-500g per kilogram of starting grounds.
Why are my mushrooms growing long stems with tiny caps?
This is a CO2 problem. The mushrooms are stretching toward fresh air. Increase air exchange by fanning the fruiting holes more frequently, moving the bucket to a better-ventilated spot, or using a humidity controller with a fan setup.
Growing mushrooms on coffee grounds is one of the most satisfying ways to start in mushroom cultivation. It costs almost nothing, uses a waste product you're already generating, and produces genuinely delicious gourmet mushrooms in under a month. Start with a single bucket and a bag of oyster mushroom spawn, and see what your morning coffee can become.
Need help with your grow? Dr. MycoThumb is our free AI growing assistant — ask about substrates, contamination, fruiting conditions, or any cultivation question. Available 24/7 in the chat bubble at the bottom-right of every page.